Gumdrop Wreath
This post may contain affiliate links. Read our disclosure policy.
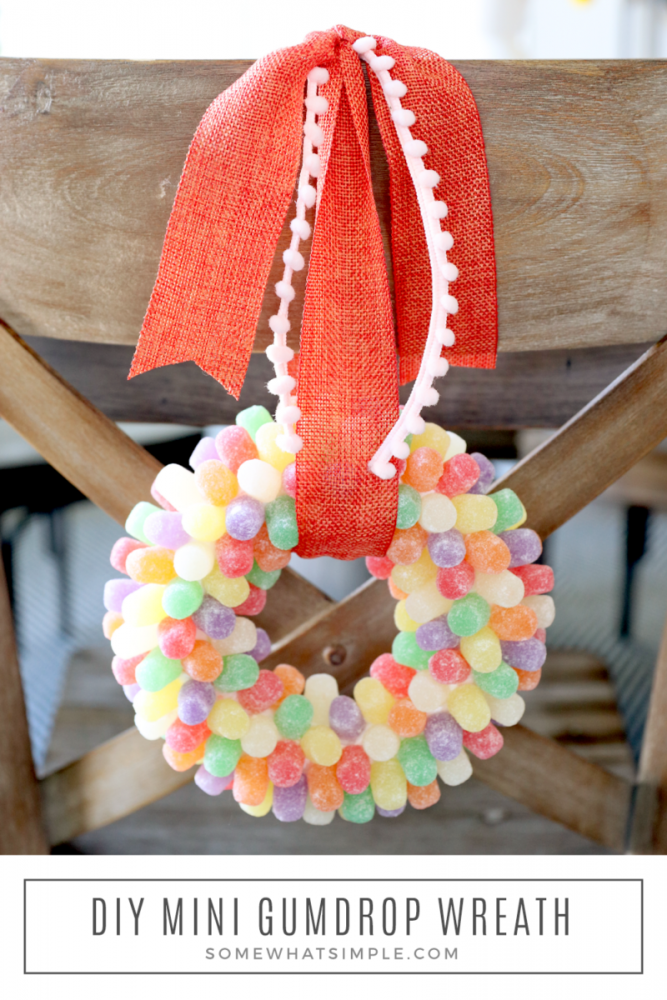
How to make a gumdrop wreath in 60 minutes or less! This simple little wreath looks darling and is absolutely perfect for every season and celebration!
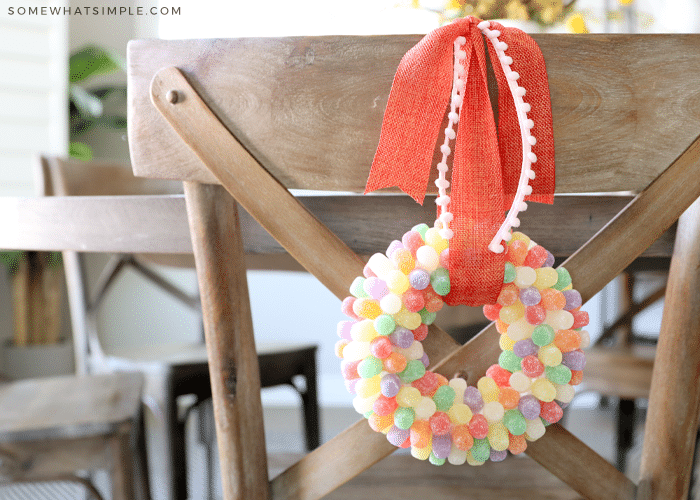
The first gumdrop wreath I made was for a birthday party nearly 10 years ago. It was shortly after that party that I realized how versatile these darling wreaths are! They look colorful and fun in the spring, they look bright and fresh in the summer, they look cozy and inviting in the fall, and they look sweet and nostalgic in the winter. Whether you’re decorating for a special birthday, for Easter, or for Christmas, this wreath is absolutely perfect!
How to Make A Gumdrop Wreath
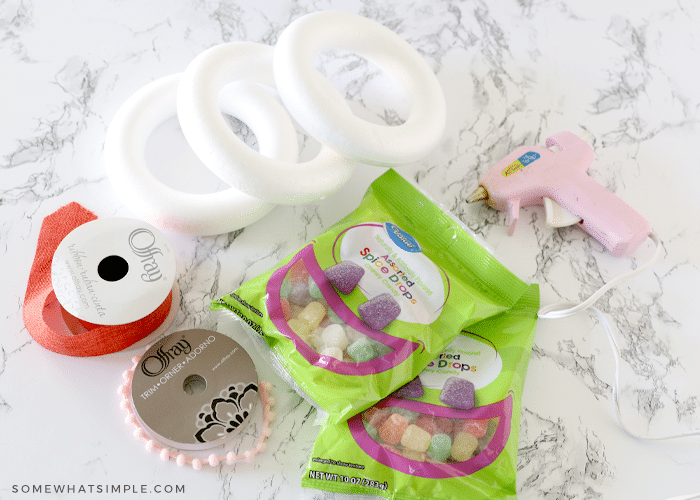
MATERIALS –
- wreath form – for my mini wreaths, I used these 5-inch styrofoam wreath forms, and they looked so cute!
- gumdrop candies – I used 2 bags per mini wreath
- hot glue gun & glue sticks
- ribbon
DIRECTIONS –
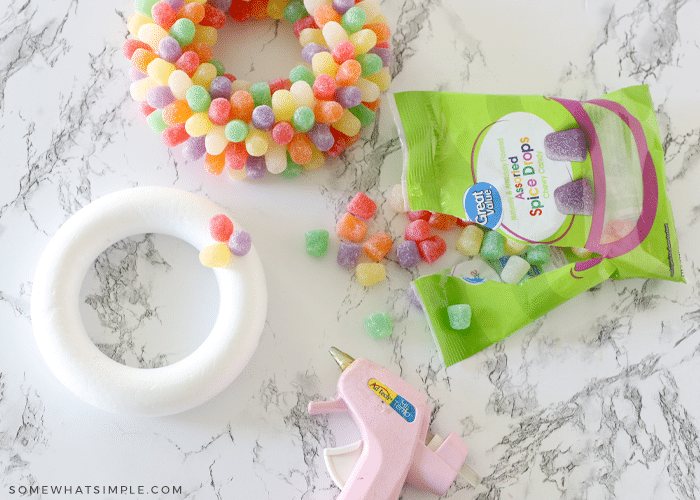
Place a small amount of glue on the bottom of the gumdrop and then stick it to the wreath, pressing firmly to secure.
You can place the candies in whatever color pattern and placement you’d like. When I first started gluing mine down, I was placing them in rows, but I didn’t love the big gaps between the rows. I ended up starting over and glued them in clusters of three (as pictured above). The clusters seemed to make the wreath look nice and full.
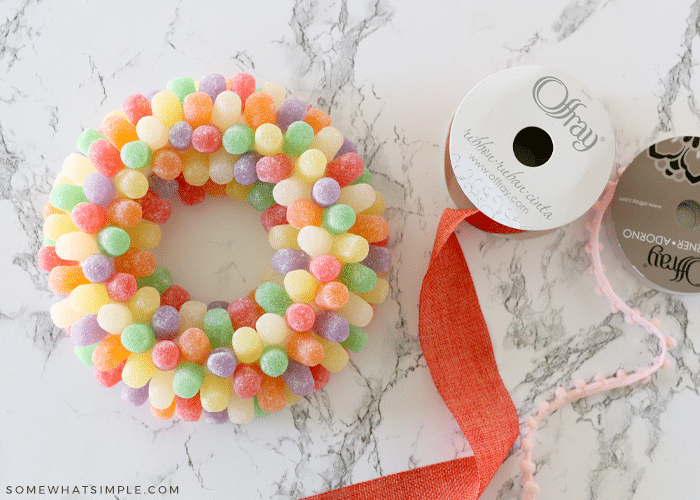
Loop a long ribbon around the top of the wreath and hang it on your door, your windows, or on the back of a chair!
So festive! Nice share. Have a good weekend!
I love a gum drop wreath. It so reminds me of when I was little!
That is super fun!
This is so super cute! I am going to share a link to your post over at Dixie Pieces!
Makes me want to go out and buy a bag of gum drops…to eat! So cute!
How cute is that!!! And thank you for showing me the 'not' way to do it also!! I always wonder if I am the ONLY one that makes mistakes!!!!
Great idea!!
I love it! So smart and cheap! Thanks so much for sharing.
Never in a million years would I have thought of this.. Love it!
That is stinkin' cute! Now I need a sugar fix.
so cute! thank you for sharing =)
Too cute! I love love love this idea!
I love it! Just wondering though- how long does it keep? If I store it away for the season will it last until next year? It just seems like a lot of work to only have it one season 😉
I am so glad you figured it out using glue. It turned out lovely. Thanks for sharing this project.
Love that wreath…I am sure my family would eat all the candy before I got it glued on. It is so fun and festive!
When I was young, we made gumdrop Christmas trees and I loved them. This wreath is gorgeous and the gumdrops bring back good memories.
Umm… this may be a dumb question, but what about ants and other bugs? I like this idea, but we live in FL & I’m afraid I’ll come home to a trail of ants on my door. 🙂
I can’t handle how ADORABLE this is!!!! Such a cute idea…and love your blog! I just found it and cant stop looking around.
xo