DIY Picture Frame + Free Printables
This post may contain affiliate links. Read our disclosure policy.
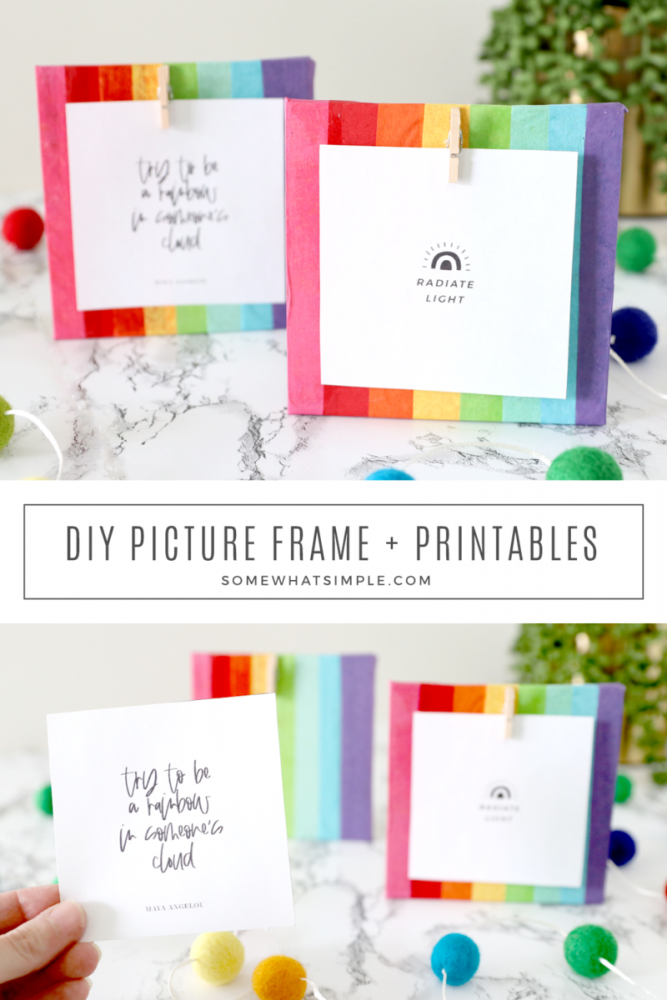
This DIY Picture Frame can be made in just a few minutes for $5 or less! It’s a thoughtful gift for someone you love that couldn’t be easier to create!
Here are a few more Mod Podge ideas we think you’ll love – Wooden Photo Blocks, Sweet Bud Vase, and Cereal Box Totes.
I have made several Mod Podge frames over the years to give as gifts to friends and family – they are thoughtful, personal, and can totally make you look all crafty and talented! They only take about 15 minutes to complete + drying time, so if you find yourself in a time crunch, this idea is perfect!
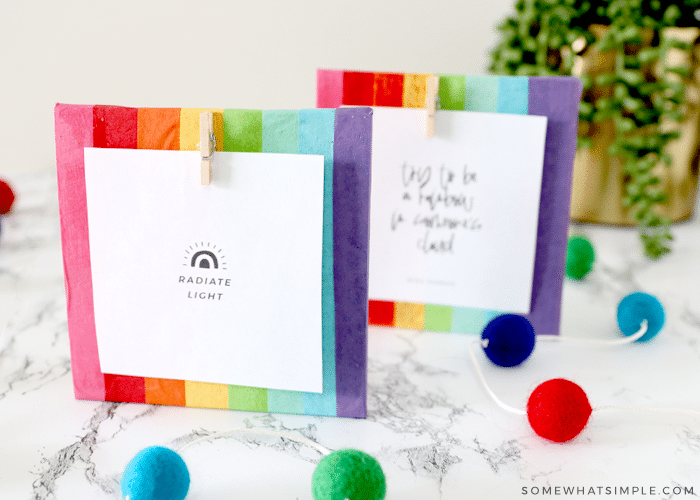
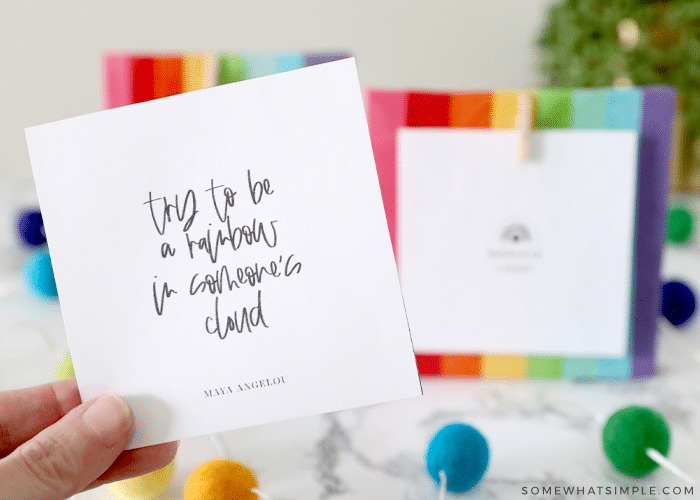
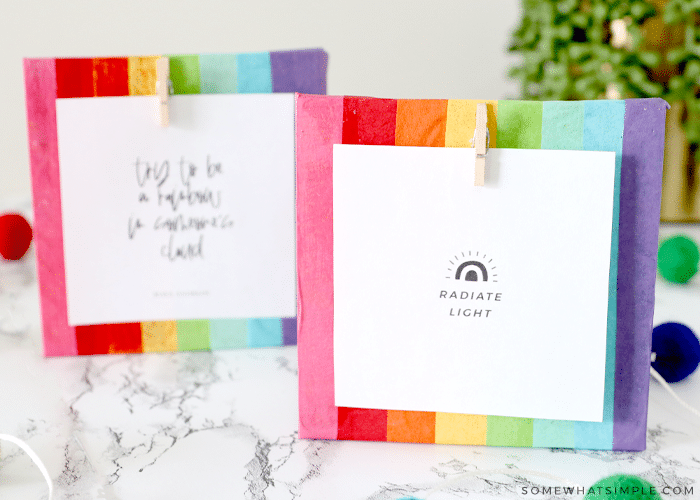
These colorful rainbow frames were made one afternoon for my daughter and her friends. I thought it would be cute for them to clip black and white pictures on these, but I included some cute positive quotes for them to use until they can print their pictures out. (I’ll include the printables at the end of this post if you’d like to use them!)
Here is how to make your own wood picture frames –
DIY Picture Frame
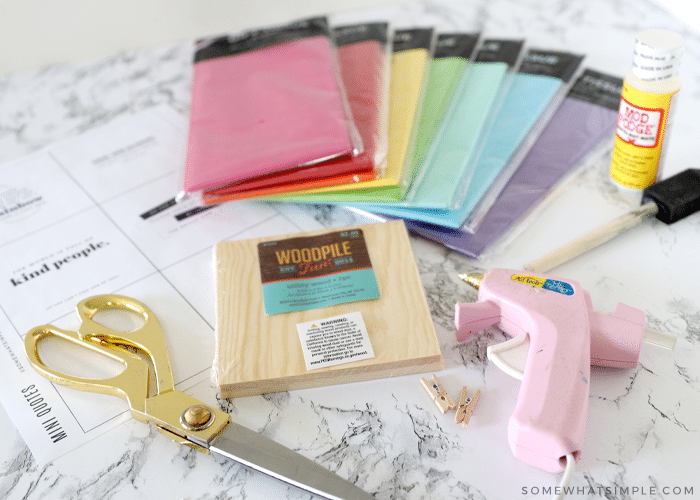
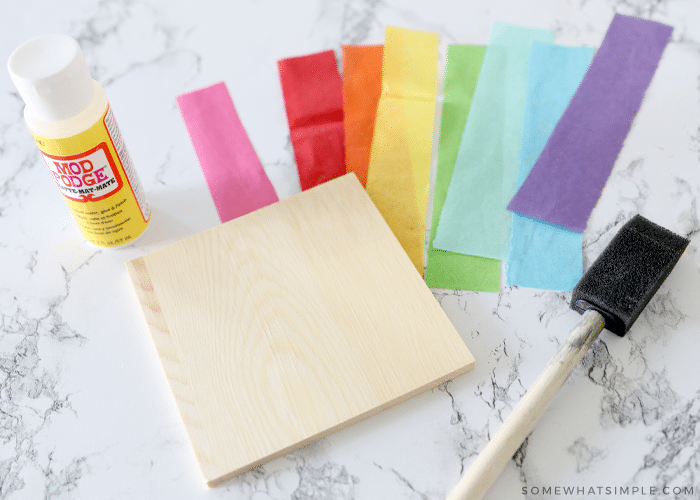
MATERIALS NEEDED:
- craft wood square – my squares were 4.5 x 4.5″ from Hobby Lobby.
- Mod Podge
- sponge brush
- tissue paper in a variety of colors
- scissors
- clothespins – 1 small and 1 regular size
- hot glue gun
- printable quotes (download below) or 3.5 squared images
DIRECTIONS:
Cut your tissue paper into 1″ strips.
Brush a thin layer of Mod Podge on the front of the frame, then place your strips of tissue paper on top, smoothing out as you go to make sure there aren’t any bubbles. I just eyeballed it when it came to overlapping my strips evenly, but if you want to get all math-y and have exact measurements, then that’s on you. 😉
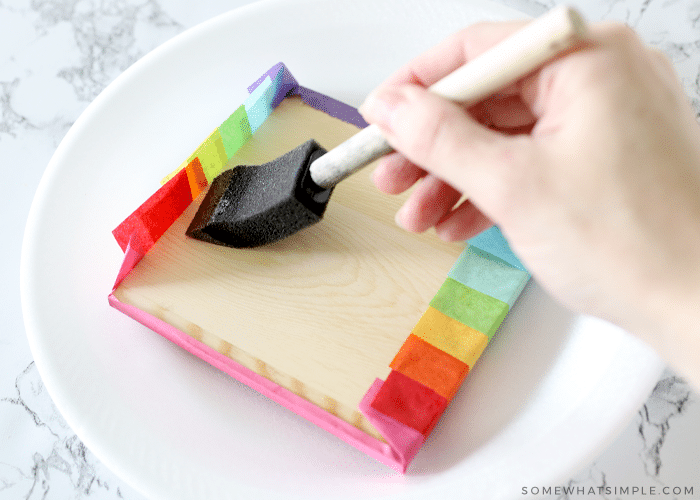
Wrap your strips of tissue paper around to the backside, securing with Mod Podge.
Most Mod Podge projects tell you to do a thin layer on top of the paper to seal it, but since the tissue paper is so thin, the color of the tissue paper underneath will show through, so I didn’t seal these. If you want to seal yours, use regular paper or multiple layers of tissue paper.
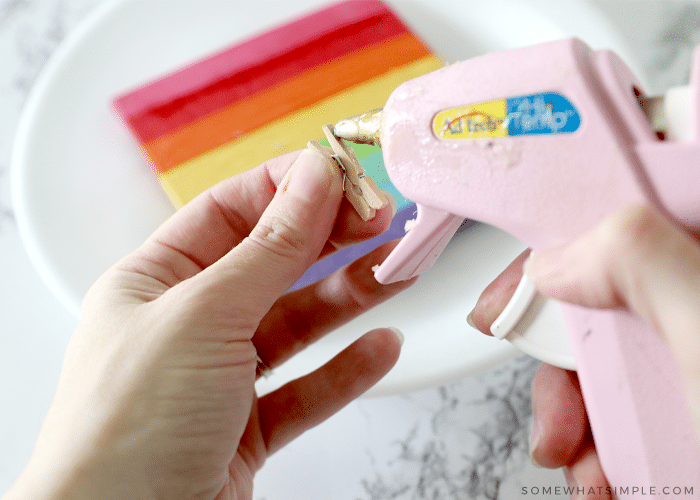
Add a small dab of hot glue to your small clothes pin, then stick it facing down to the front top center of your frame.
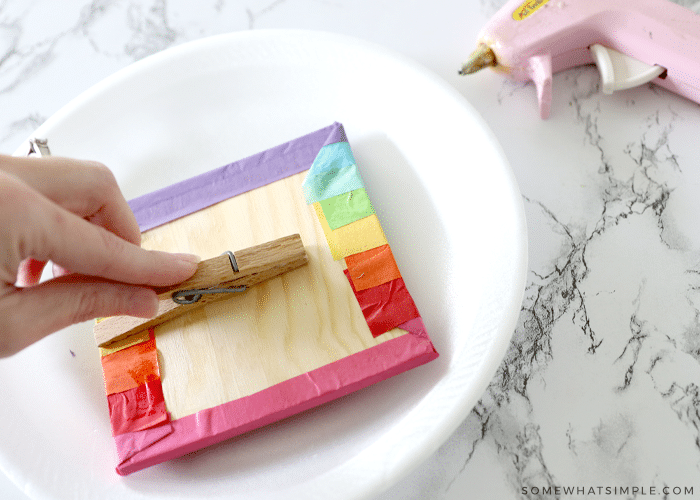
Glue your big clothes pin to the bottom center of the backside of your frame with the closed part of the pin facing up. This will serve as the easel part of the frame and allow it to stand upright.
Cut out a printable quote or a picture, then clip it to the frame.
And you’re done! Simple, thoughtful, and cute!
Printable Quotes