Simple Mini Notebook Project
Guys. I can’t get over how darling these mini notebooks are. They are so stinkin’ cute! And functionable – how many times do you need to write something important down, and you can’t find any paper in your purse or bag?! And how often are office supplies an accessory?!
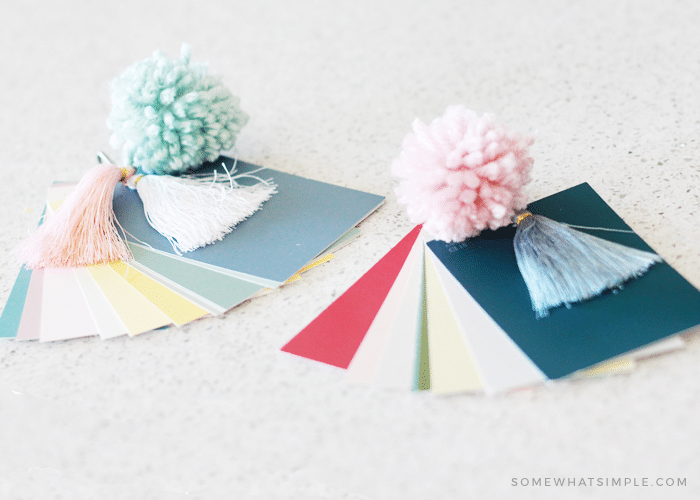
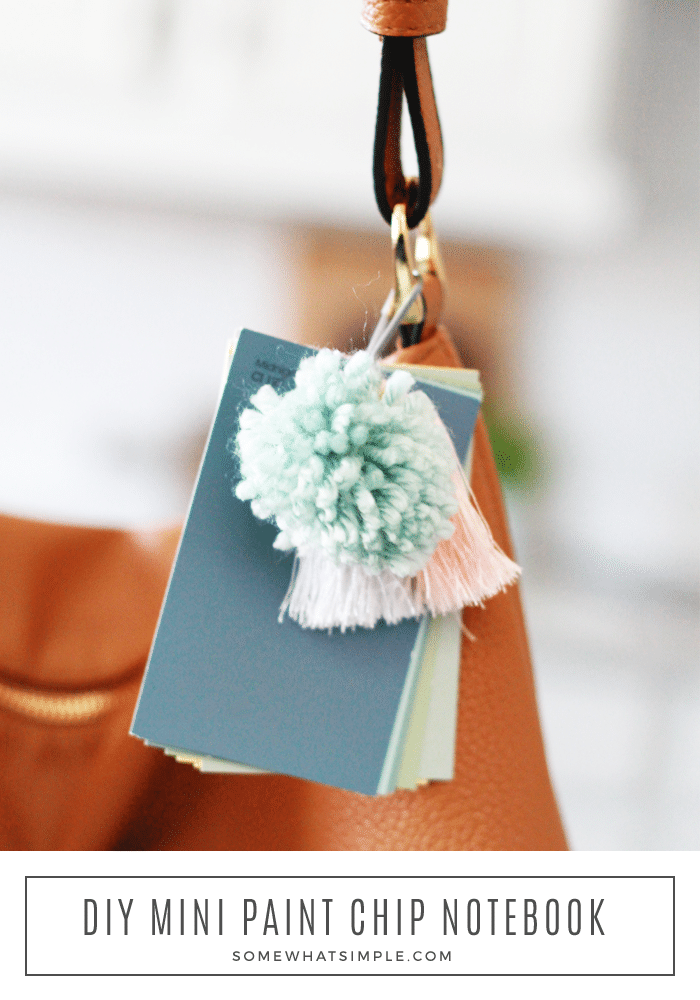
I just love how these paint chip pendant notebooks turned out! And they were one of the quickest, easiest, and most satisfying projects I’ve done in a long time. I think the hardest part was coming up with the color scheme I wanted. (But keep reading for a tip that helped me!)
Here are a few more creative notebook posts that are so quick and easy:
diy mini notebook pendant
supplies:
- paint chip swatches
- small paper hole punch
- lanyard snap hooks/clips
- mini tassles, pom poms, and/or charms
directions:
- First, grab some paint ship samples from any big box store. (See our tip for picking colors, below)
- Punch a hole fairly close to the top of your paint chips.
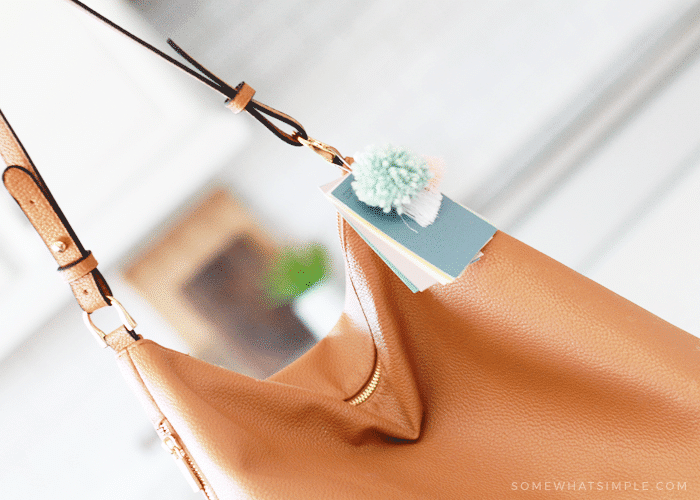
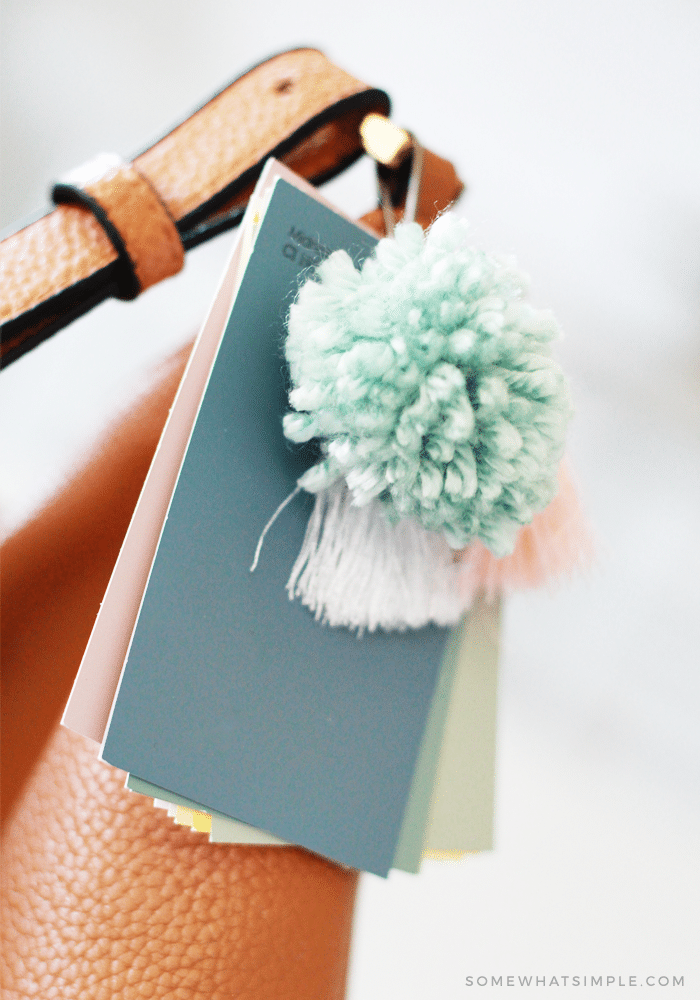
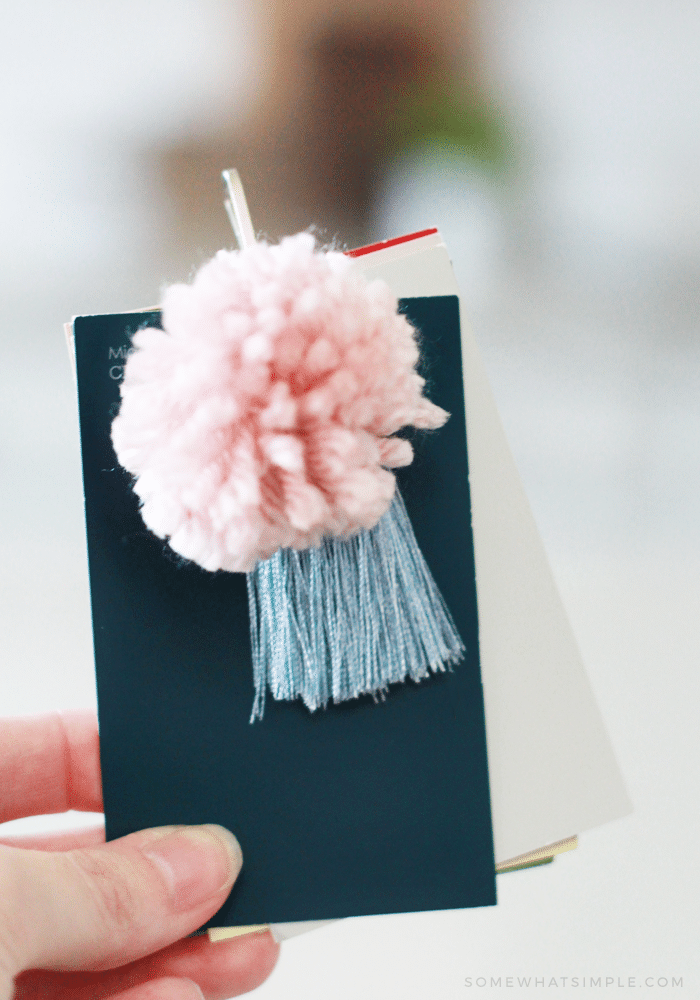
- Add them to your clip.
- Add your embellishments to the clip, and voila!

TIP: Can’t decide on a color scheme? Grab one of the pamphlets that paint companies provide and grab each color off the list of colors that work well together. Or find a picture you love, spot the main colors of it, and match those with the samples! It takes the guess work out, freeing up time for you to get on with your project! (You could even go monochromatic – just grab different shades of the same color: blue, pink, green, etc.)
These would also make great party favors or gifts – so inexpensive, they take minutes to make, and everyone is going to love them!
Clip these to your purse or backpack, hang them from your calendar, attach them to your keys… whatever you want! Have fun!


I own a painting company and I think this is so cute and functional for me. love this
Thanks Marie, you’re too kind!