
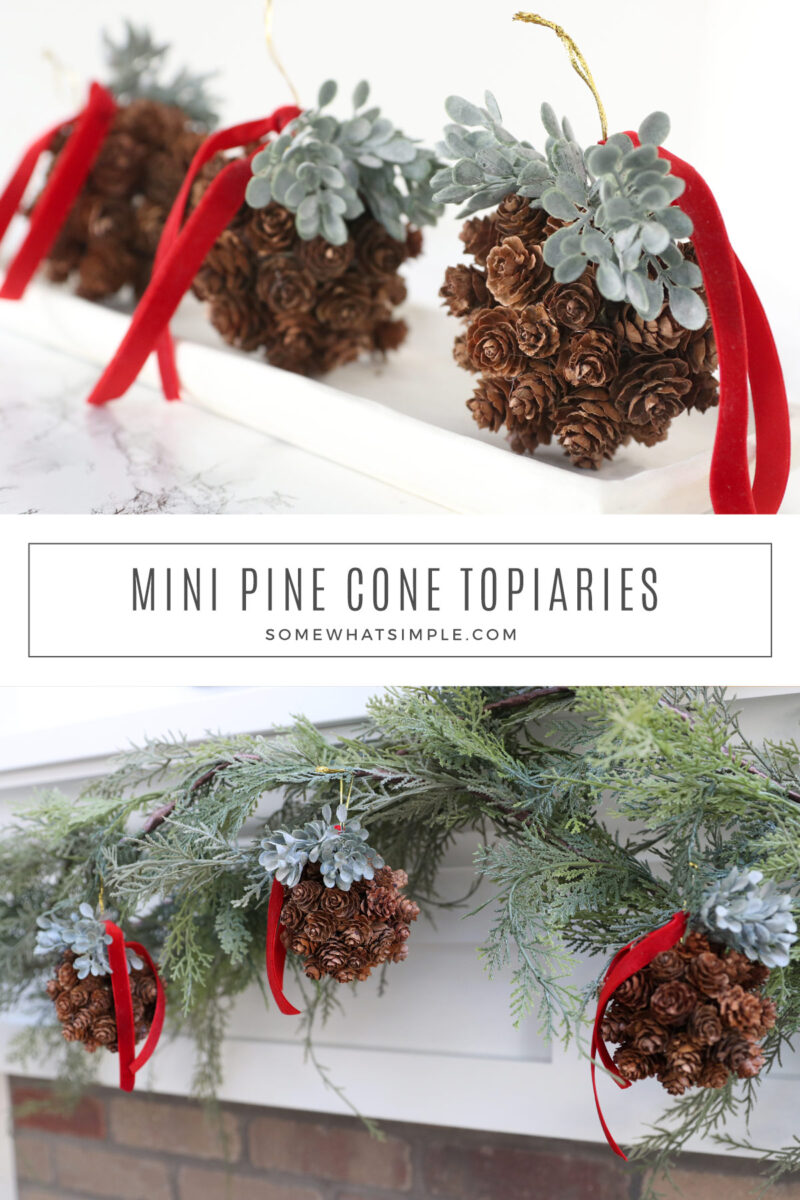
A pinecone topiary is a beautiful, simple craft that requires little artistic talent or expensive supplies. Learn how to make your own pinecone topiary here.
If you’re looking for more winter projects this holiday season, try making Ice Candles or a fun Christmas Sweater Craft.

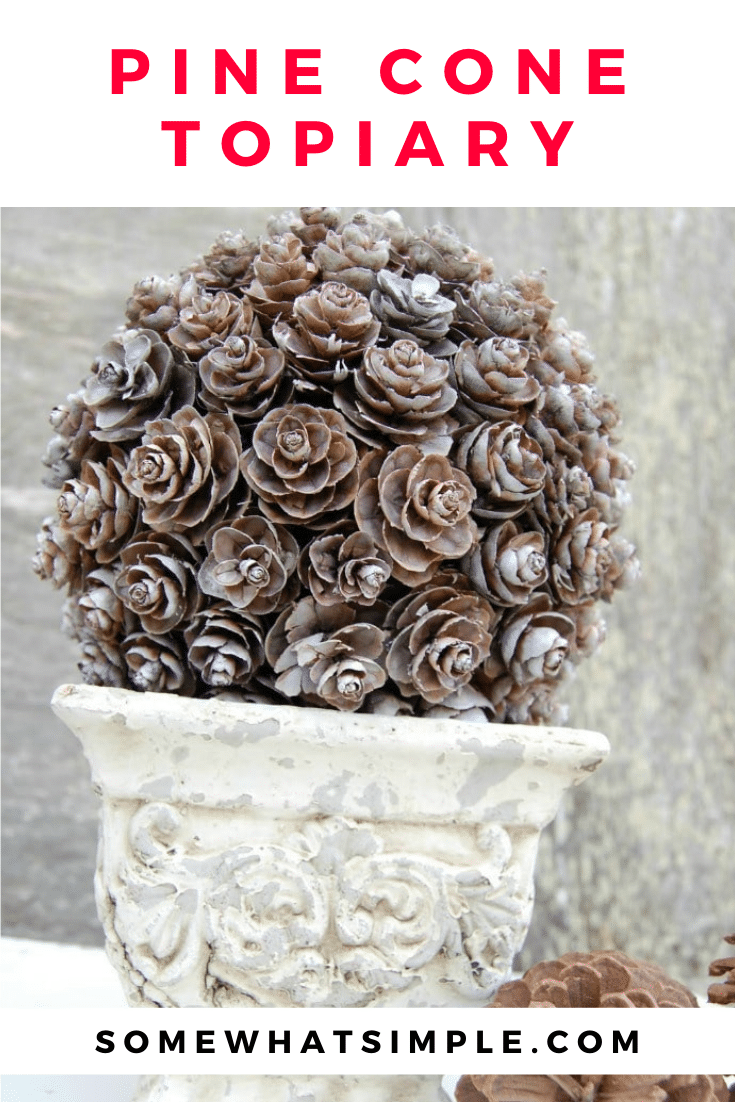
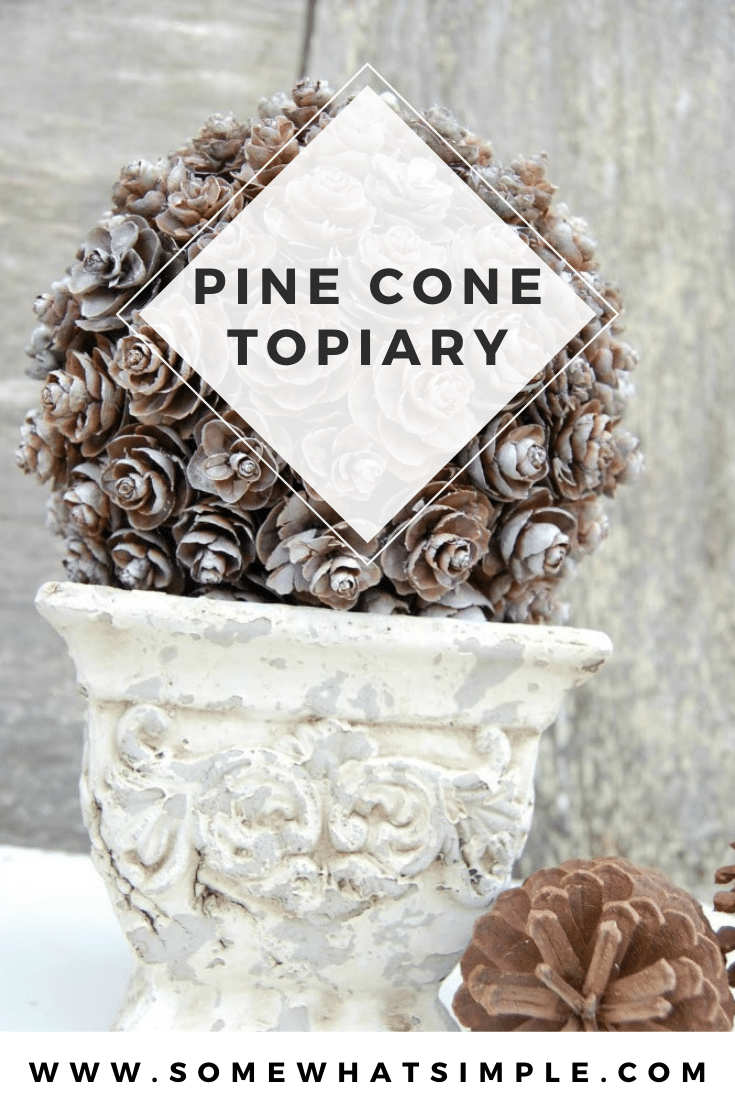
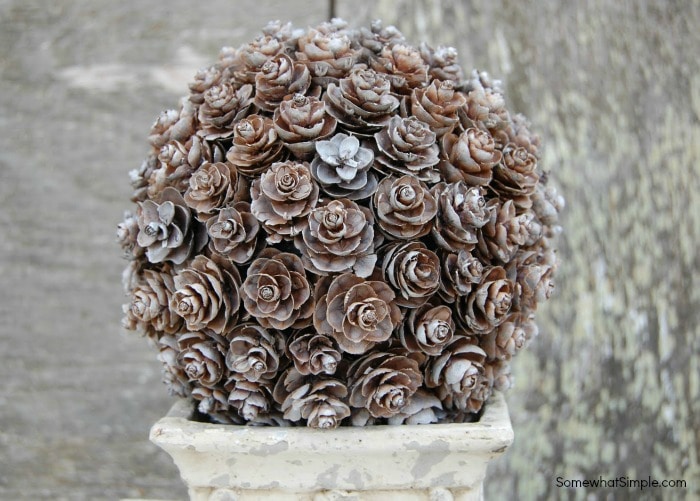
I saw a gorgeous pine cone topiary from BallardDesigns.com, but as with most things from that amazing store, the price tag was less-than-awesome! Lucky for me, this was a piece of decor I knew I could recreate for a whole lot less. (Spoiler alert: They look AMAZING!)
Even though this project was really easy to do, it can definitely be time-consuming, depending on the size you want. I made a couple of these years and years ago with a foam ball the size of a soccer ball, and they took two nights to finish, working while I watched TV with my husband, and way more pine cones than I thought.
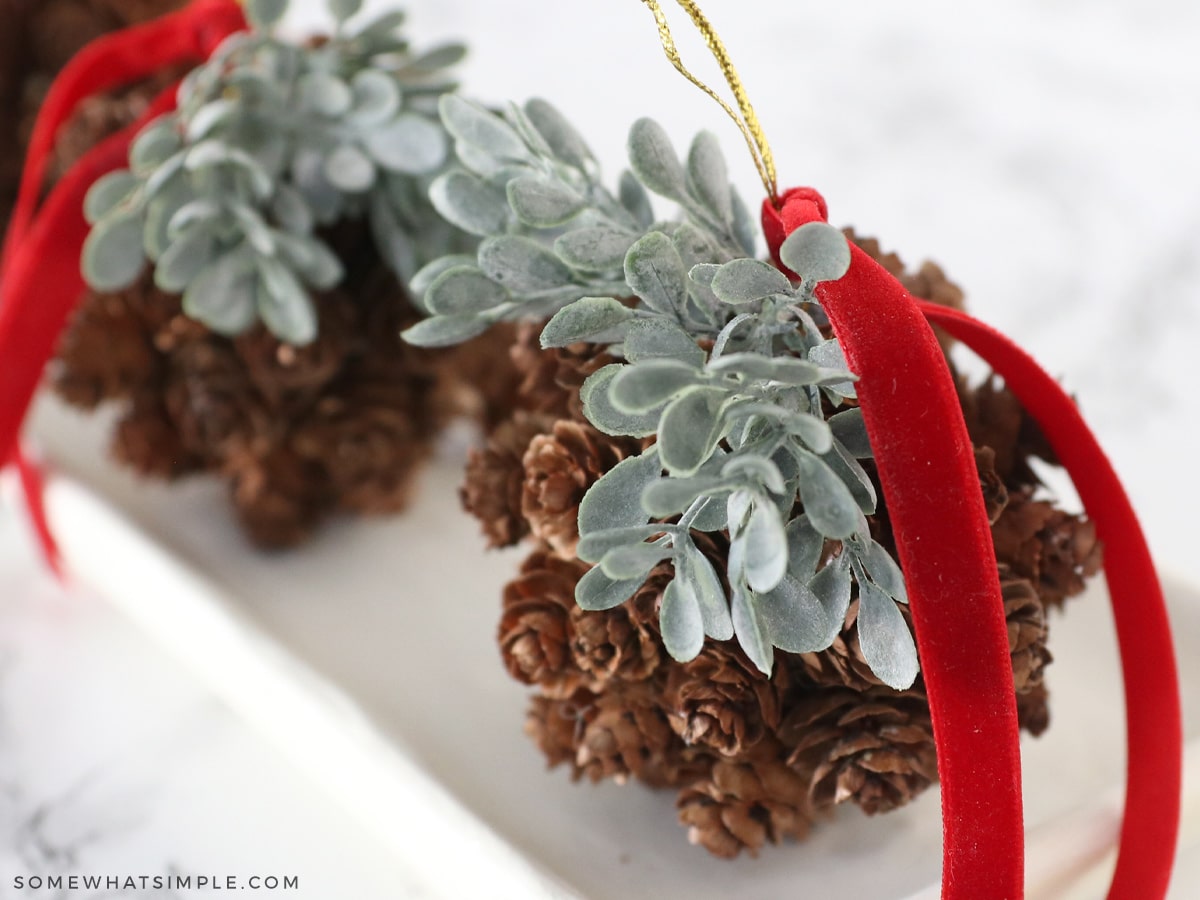
The beautiful pinecone topiaries I made this year were glued to ornaments, so they were much faster. (I made the whole thing the night of Thanksgiving and each topiary took about 20 minutes.) They look amazing in a coffee table bowl or hung on a garland.
Here is the easy tutorial –
How to Make a Pinecone Topiary
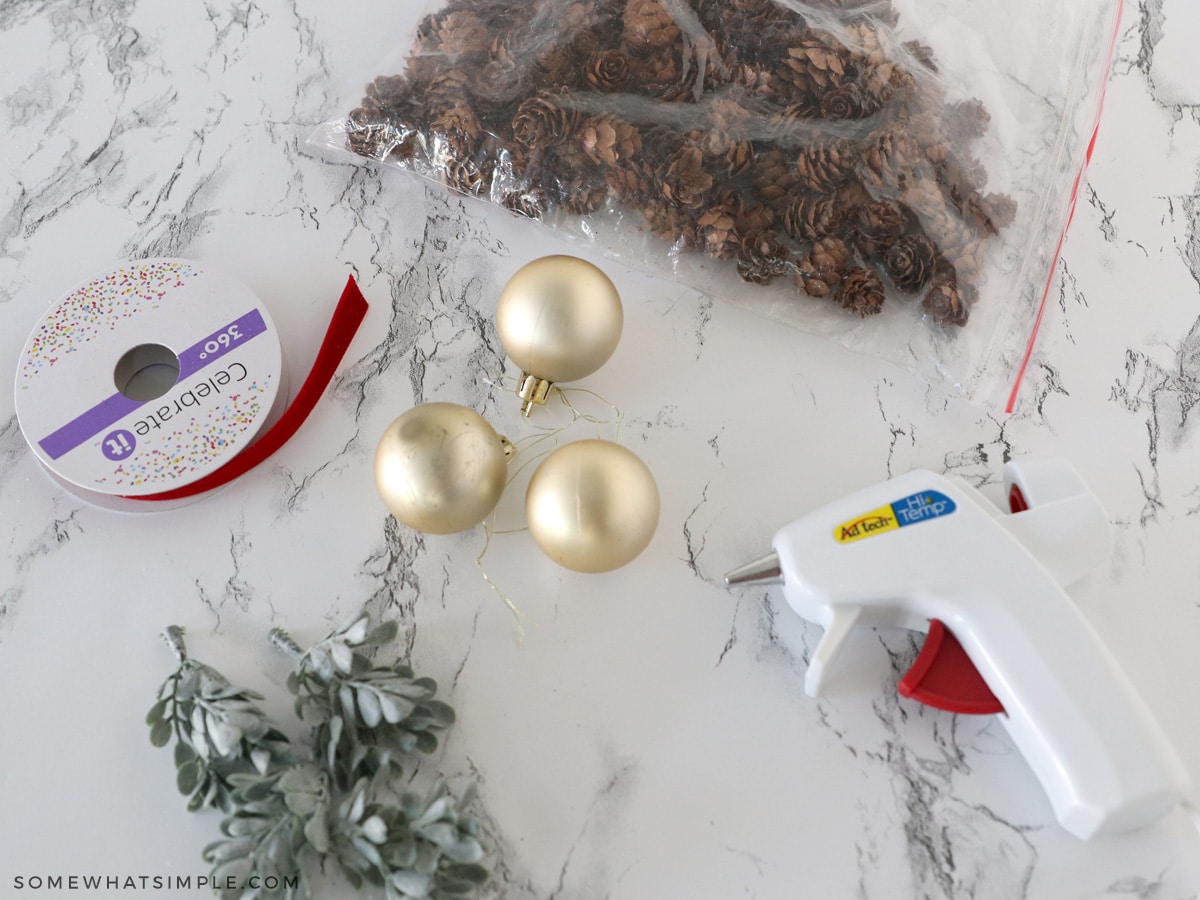
SUPPLIES –
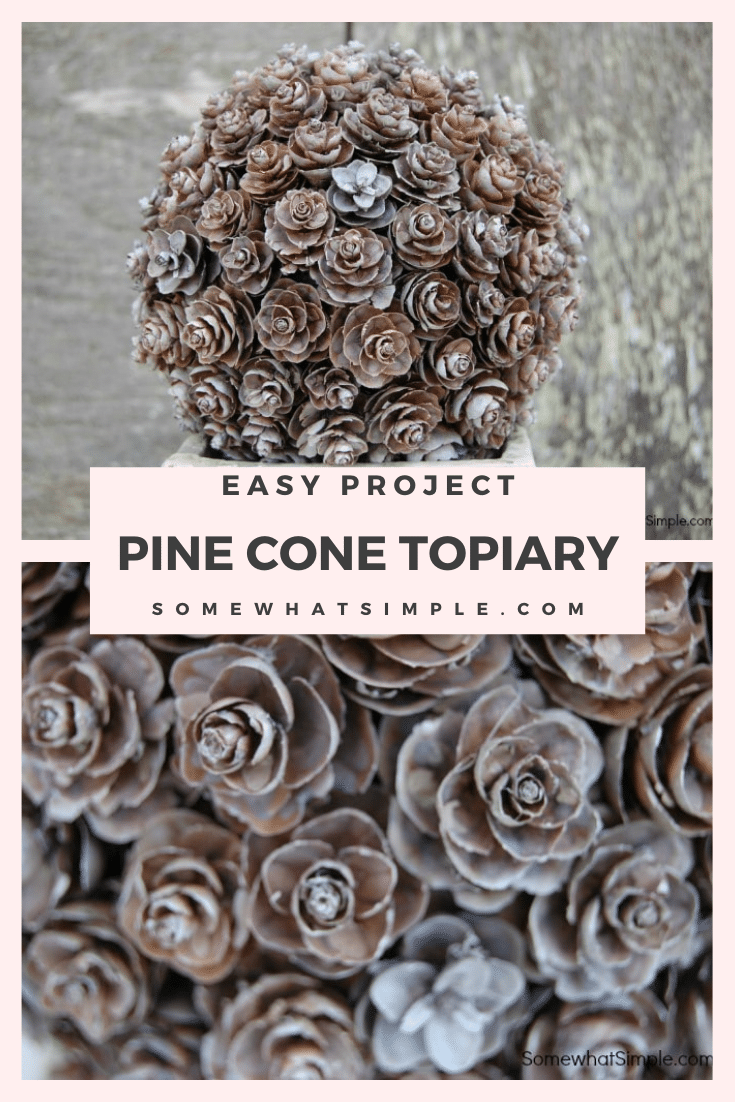
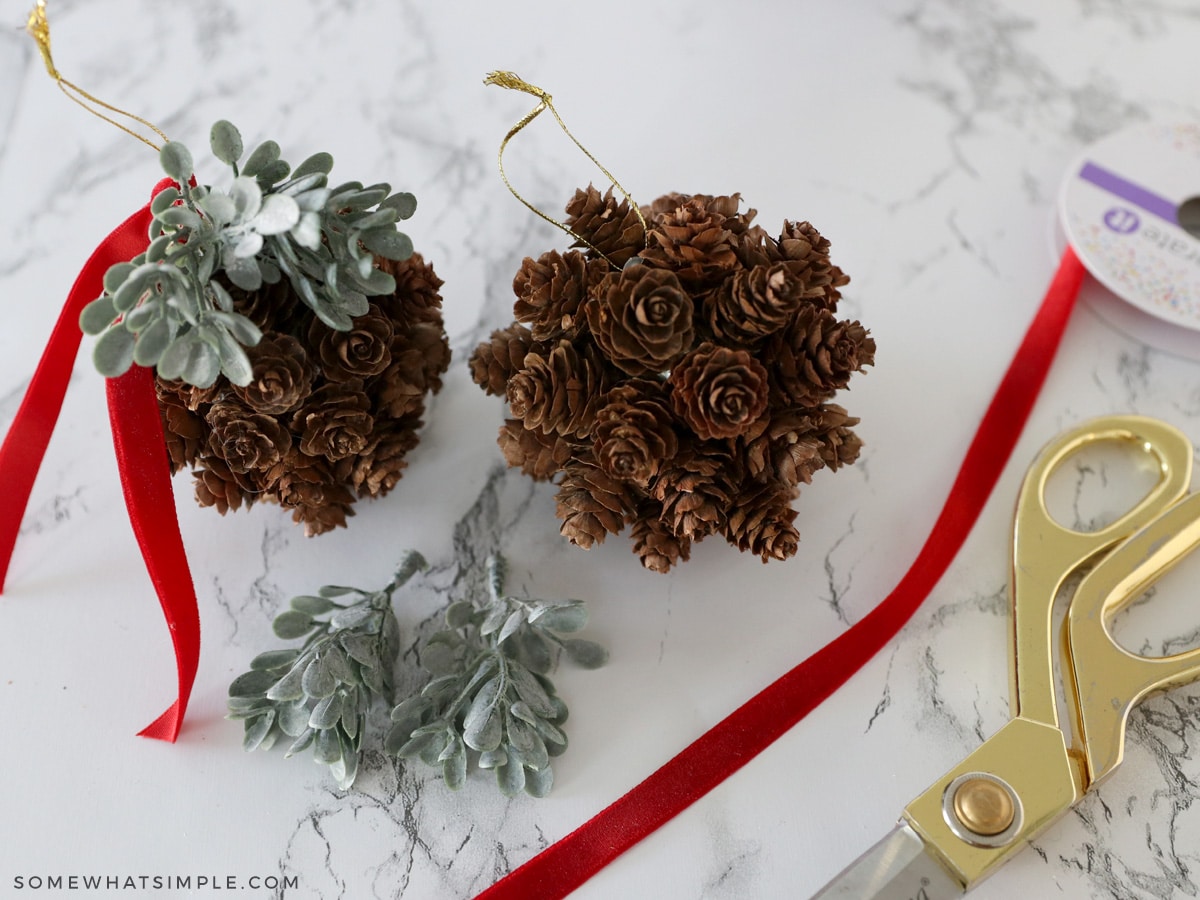
- pinecones – You can use whatever size pinecones you find, but the smaller, the better. Make sure they are round, not cone shape, and roughly the same size. Collect them on a nature walk, get them from a local craft store, or HERE on AMAZON. I enlisted the help of my mom who gathered and sent pine cones from her backyard in Washington. I had to let them dry out a bit before I could use them so they would open up, but they are seriously so pretty!
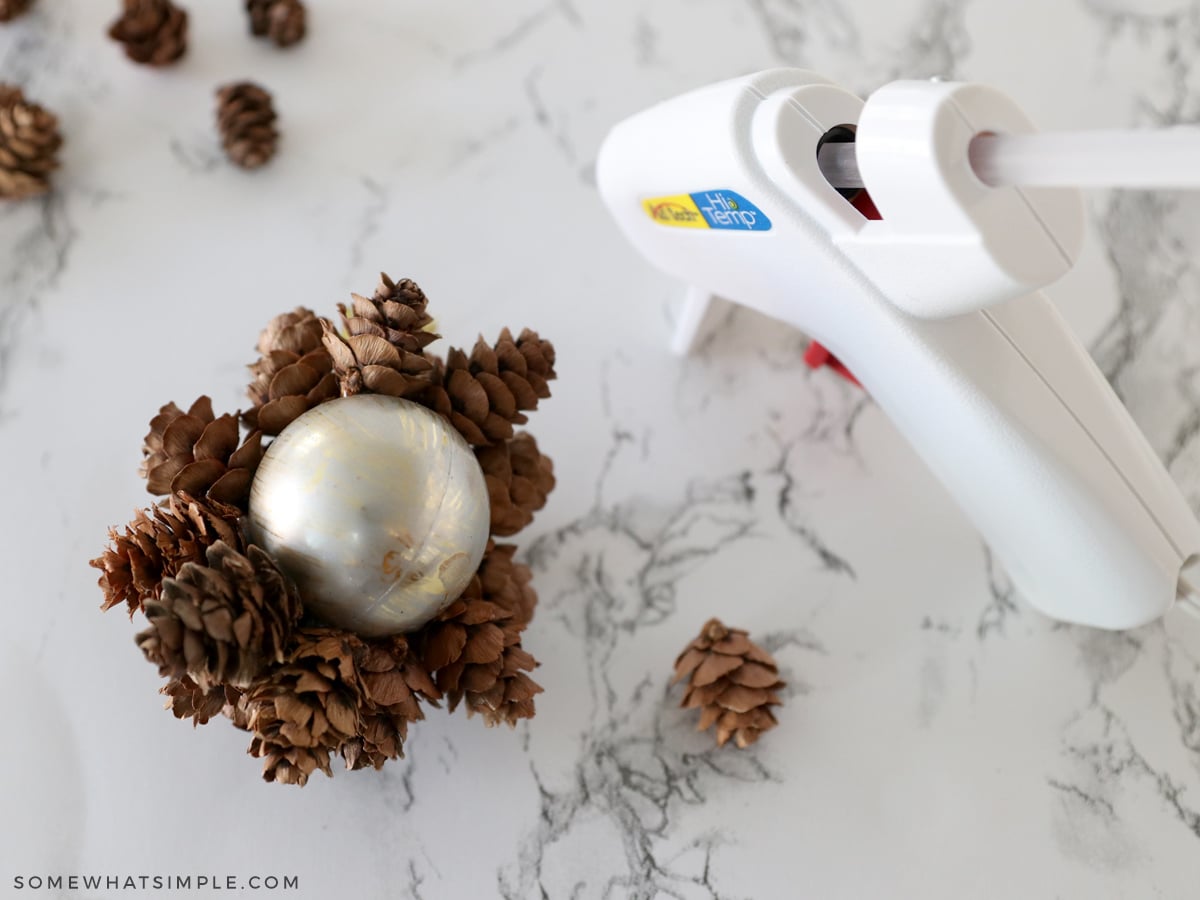
- ornaments or styrofoam balls – I used small plastic ornaments for this tutorial. If you use a styrofoam ball and notice the hot glue not sticking very well, wrap the ball with a plastic trash bag and secure it tightly to the styrofoam with hot glue. Then, glue your pinecones onto the plastic bag.
- hot glue gun
- ribbon
- greenery – I just used some faux leaves/petals from a silk plant I had.
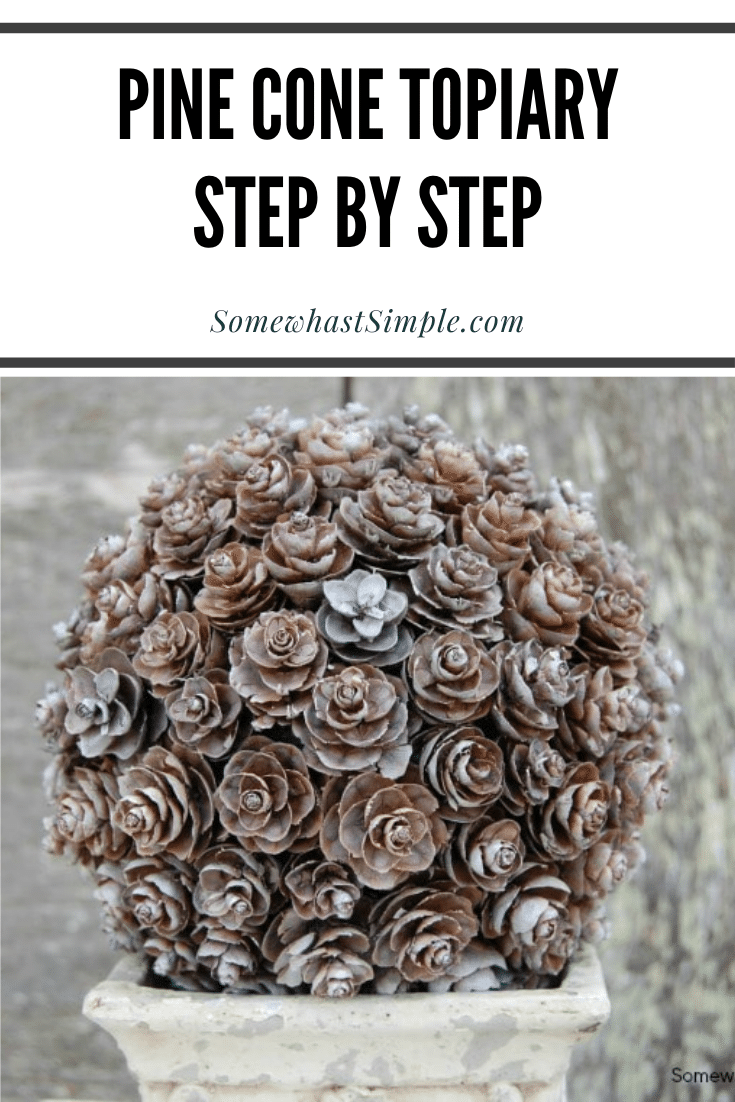
- embellishments – I like them plain as it matches my holiday decor best, but white spray paint will give them a frosted look, gold spray paint will make them shimmery, or you could add a dab of Mod Podge with a paint brush and a little glitter for some added sparkle.
DIRECTIONS:
Hot glue your pine cones onto your ornament, by adding a line of glue, starting at the top, and working your way down until you have total coverage.
EMBELLISH – (Optional) Add some gold paint or sprinkle glitter over the pinecones for a little metallic sparkle! (Wait for the wet Mod Podge or paint dries before moving on to the next step.)
FINISHING TOUCH – Add a ribbon for decoration and a ribbon to hang on a tree or on some garland with more hot glue.
CUT ENDS – Trim the ribbon ends so they are equal in length.
NOTE – Because these topiaries are made with hot glue, they may not hold up in the elements outside and are intended for indoor use.
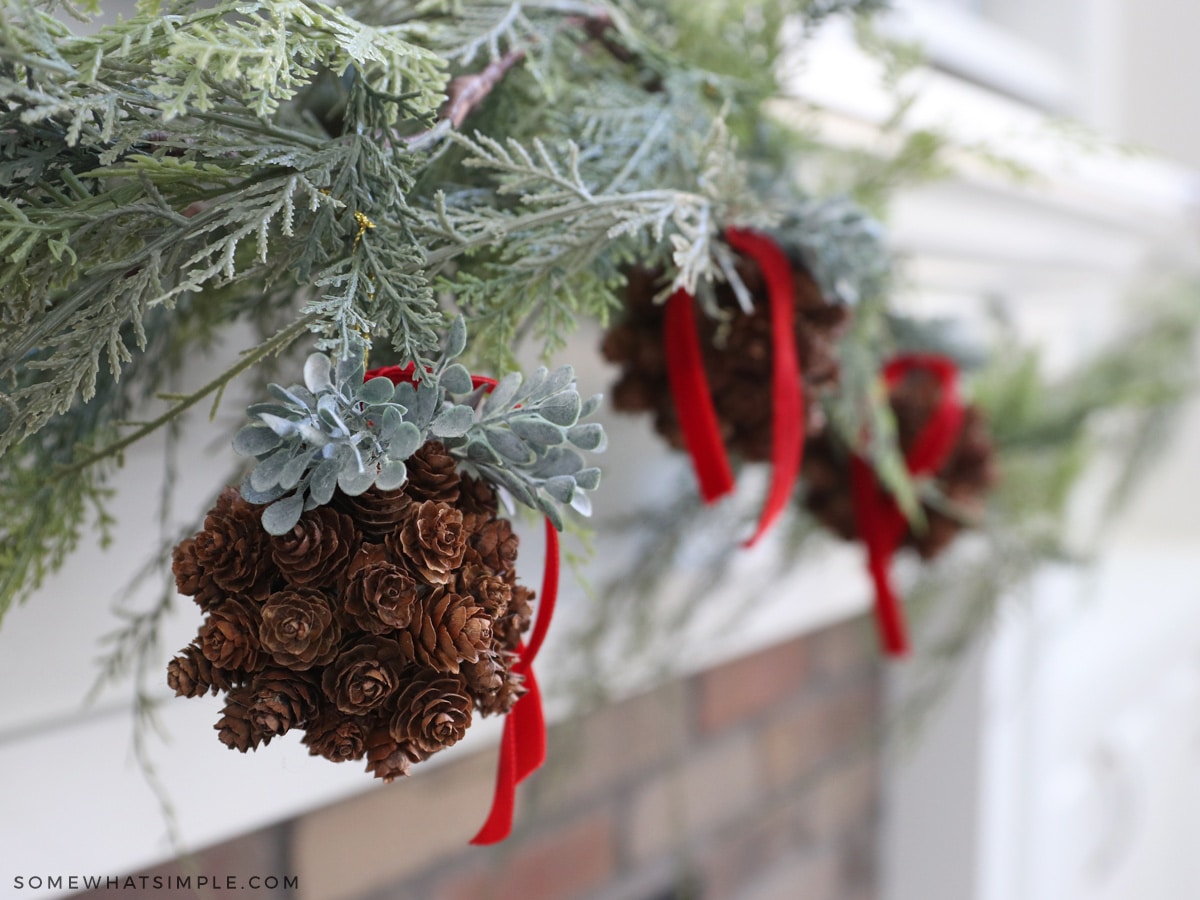
… and that’s it! Pretty easy, right? The woodland feel is a welcome addition to this seasons decor!
Added Bonus – You can keep it up all winter!
MORE DIY PROJECTS –
- Kitchen Table Caddy
- Favorite Monogram Projects
- Board Game Storage Idea
- Quick and Easy Painted Kitchen Mat
- How to Make a Purse


Love love love pine cones & your ideas
I live in oly now as well. I ha e just discovered pinecones and all the different types . Some small some giant. Some like regular pinecones and some with the rose looking top. Wish I could send pictures. I have a few varieties now. And I’m going to gather more this afternoon as a matter of fact.
That sounds like so much fun!
Lovely topiary! Why do your pinecones all look symmetrical like open roses? The top portion of my pine cones are dissimilar and not like roses at all. Am I missing something?
Your pine cone topiaries are stunning.. you are very talented! I hope it’s okay, I’ve featured your pretty topiaries in a pine cone crafts and decor round-up I just finished. You can see it here:
Also, thank you so much for sharing this tutorial. I am going to give it a go but I’m not sure mine will come out as nice as yours 🙂
I’m not sure! These were just gathered in the yard (close to Olympia, Washington.) I’m not sure if different regions drop different looking pinecones, or if the age of the tree matters etc.
wow..what a great idea….
Love this, been saving it for a while 😉 I've featured you on Craft Gossip here
If you would like a "featured by" button, you can grab one here!
TEKM, I kept mine indoors, when the pinecones get wet, they swell shut. If you collect yours after your snow melts, a good way to dry them out so they open up is to put them on cookie sheet covered with foil and stick them in the oven on warm until they open!
Beautiful idea! But I agree with Megan. They DO swell up when wet, so are we still able to take put them outside without having to have to bring them in??
I am bookmarking this for sure!! As soon as the snow melts enough for me to find the pine cones I will be gathering some for this project. Did you display yours indoors or outdoors?
what a pretty topiary! I love it, and my kids love collecting pine cones. Thanks for linking up to Topsy Turvy Tuesday's!
Wow!! Really looks fabulous!
Wow!!! So easy and so pretty!
I love this idea! Thanks for sharing!
-April
It's linky party time again! I hope to have you come link up and enter my $50 american Express giveaway! Happy holidays!
-Dana, Saturday Mornings
http://danajeanward.blogspot.com/2010/12/50-american-express-giveaway-ends.html
that is BEAUTIFUL! and could be used through january! hmmm…maybe i'll ask mom to bring some over for Christmas…
That is so cute! Makes me wish I had pine trees around too!
Love love love this!!! I have a ton of pine cones just waiting for a project…I think I found it!!! Thanks for sharing!
LaKeta
1luckeegirl.blogspot.com
Another GREAT idea! Love Crazy Domestic so much. I am I'm awarding you the Stylish Blogger Award – for more info about it go to http://eyespydiy.blogspot.com/2010/12/stylish-blogger-award.html
Before tossing those bottoms of the pinecones away, look closely for some that may be fairly flat. Choose as many as possible and spray with spring colors and paint the little hole in the middle yellow and add a red dot in the middle – voila! You now have a beautiful “zinnia” to make a spring/summer topiary! Google “pinecone zinnias” for pics and ideas.
That sounds amazing! Thanks for the tip Terri! 🙂
I love this idea… so easy and Beautiful… Will have to do this for next year for sure!! Thanks! :O)
Beautiful, they turned out great! I want to make one!
Gorgeous! What a beautiful idea!