St. Patrick’s Day Decoration
This post may contain affiliate links. Read our disclosure policy.
Celebrate March 17 by making this easy St. Patrick’s Day Decoration for your home!
Easy holiday decor is kind of our jam around here! Our Lucky Garland, Printable St. Patrick’s Day Quote, and this Lucky Wood Cutout will have your home looking green and festive in no time at all!
Easy St. Patrick’s Day Decoration
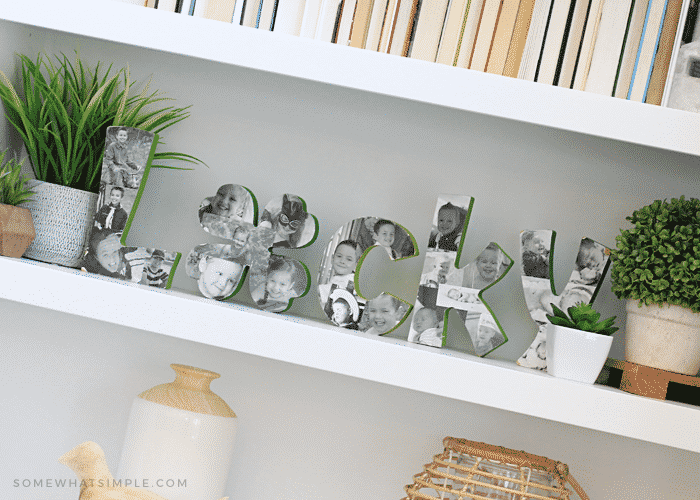
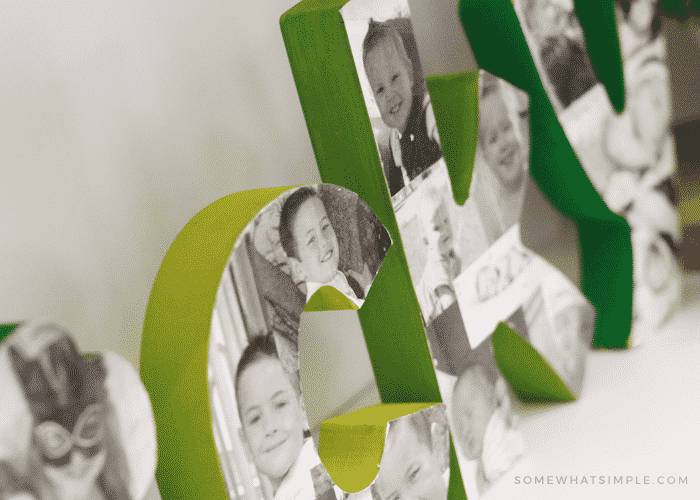
Looking for an easy way to add some festive decor this St. Patrick’s Day? This wood cutout is something I made 5 years ago and I still absolutely LOVE it! I bring it out each and every year, and it just makes me smile.
I chose to spell out the word LUCKY, and since there are 5 letters and I have 5 kids, I dedicated a letter to each of my kids – displaying some of my favorite pictures of them!
Not only is this project super easy, it is also super affordable! Hobby Lobby puts their wood letters on sale every month, and they also sell a cardboard version that would work well too!
How to Make Your Own Mod Podge St. Patrick’s Decoration
Mod-podging pictures onto wood letters is a fun way to decorate for any holiday or season! This project will take just a couple hours from start to finish… including the drying time for the Mod Podge. Want to make your own? Here is how!
Materials Needed:
- wood letters, in the size of your choice. I get mine from Hobby Lobby when they are on sale, but they are also available on Amazon.
- pictures- I used 4-6 pictures for each letter, but you may need more or less, depending on the size of your letters. I printed these at home on regular computer paper.
- paint- I used 3 different shades of green
- Mod Podge
- 2 sponge brushes; 1 for the paint & 1 for the Mod Podge
- X-Acto Knife & cutting board
Directions:
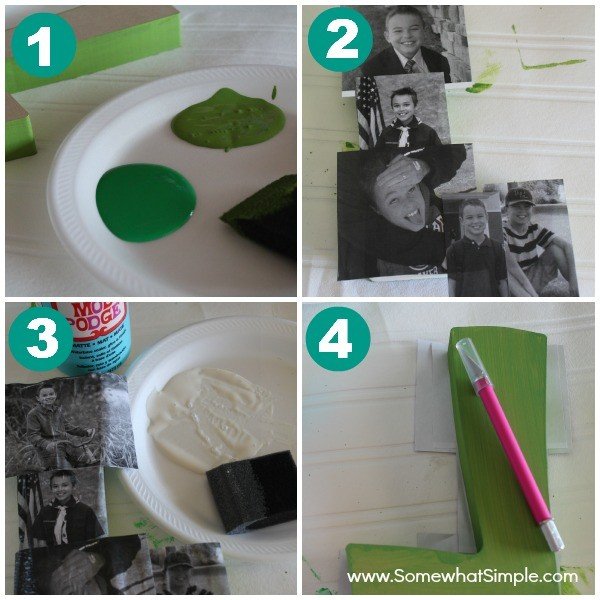
- Paint the back and the sides of your letters. Let dry completely.
- Place a thin layer of Mod Podge on your letters, then place your pictures on the Mod Podge, smoothing out any wrinkles in the paper.
- Brush one last coat of Mod Podge over the top of your pictures to seal them to the wood, then let this dry completely.
- Flip your letters over so the pictures are face down. Using your X-Acto knife, trim the excess paper from around each letter.
Display & enjoy!
So easy, and so fun!

I’d get letters to spell out our last name for some family room decor!
I’d definitely get the cut out word SPRING since it can’t/won’t get here soon enough!
I’d buy the word LOVE and display it in my kids’ room so that they know that they’re loved everyday
I think I’d pick a special word and keep it up year round.
I love it! I have a big shelf dying for some decor like this!
I’d love to get our last name in uppercase letters!