Cereal Box Purse
This post may contain affiliate links. Read our disclosure policy.
Making a cereal box purse is a fun afternoon activity that the kids will love! A great way to recycle your trash into something useful!
Here are a few more kid’s crafts we think you should try – Puppet Show Printables, Grandparent’s Gift, and Homemade Crayons.

The kids and I have made Cereal Box Purses a few times now. They are simple to create and they make the perfect totes for church – a coloring book, some crayons and a bag of fruit snacks fit very nicely!
I like this idea because you can decorate and embellish them to your liking, cut them down or use a bigger or smaller box to adjust the size etc. We’ve used boxes from granola bars, frozen waffles, and more. All the varying shapes can be a lot of fun!
I think it’s cute to use a cereal box you love and just attach some ribbon handles to it, but if you’re looking for something a little less obvious, or something more fun for the kids to decorate, grab some craft paper and let’s make some cereal box purses. Here’s how –
How to Make a Cereal Box Purse
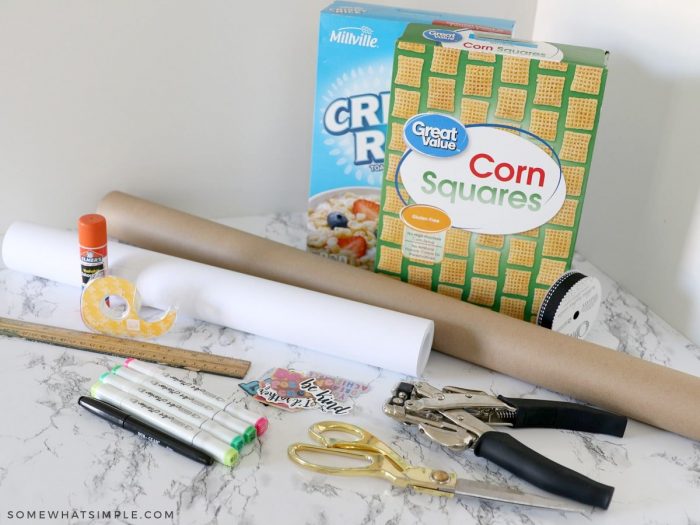
SUPPLIES –
- cereal box
- scissors
- scrapbook/ craft paper
- glue
- tape
- ruler
- pens/ pencil
- hole punch
- embellishments- stickers, markers, rhinestones, etc.
DIRECTIONS –
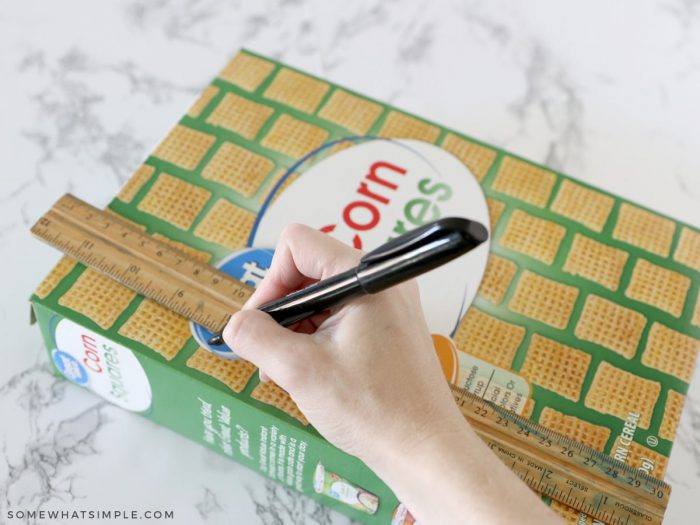
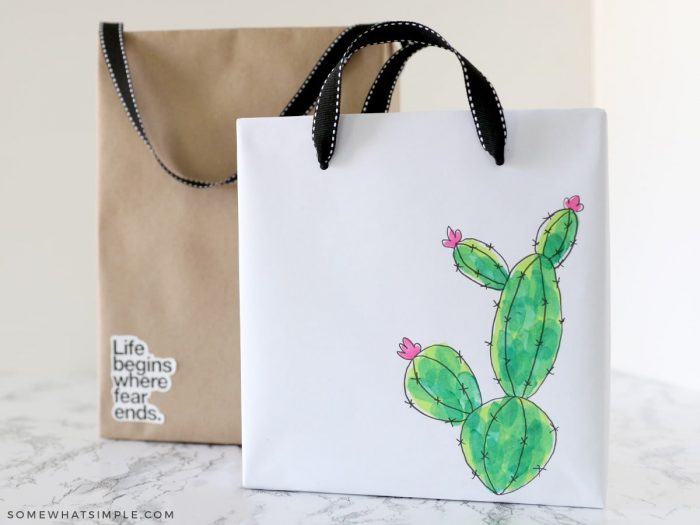
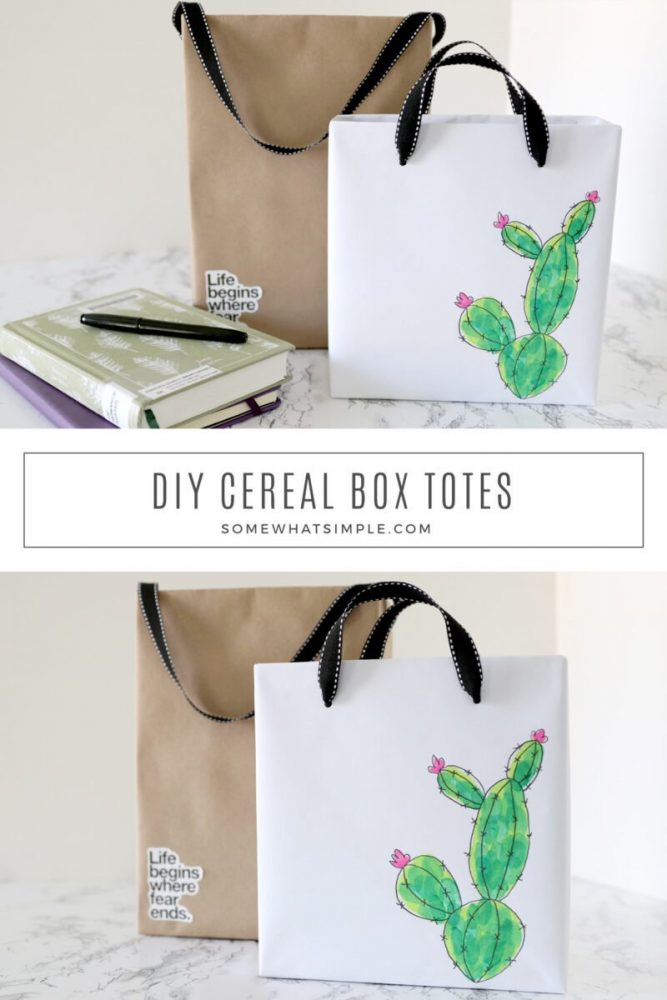
Using your ruler and pen, measure and outline how big you want your box to be. For this tutorial, I made a full-size box and then one where I cut several inches off the top so that the end result was more of a square purse. You choose what size you want and cut it with your scissors.
If you are using a full box, just make sure you cut the 4 top flaps off the top.
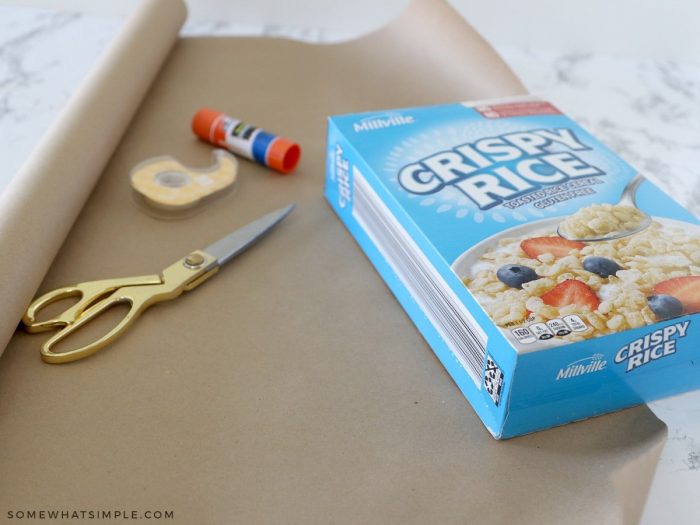
Wrap your craft paper around your cereal box to measure how much you’ll need, then cut the measured amount. Add some glue to each side of your cereal box so the paper will stay down, then wrap the box in the paper like you would a present, securing with tape.
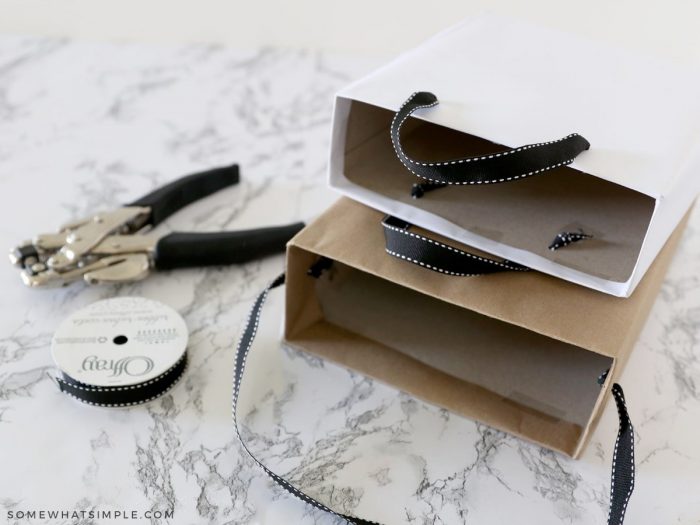
Punch some holes for your ribbon in your desired location. The image above shows you two of the ways you can do this. Add your ribbon by looping through the holes and securing with a knot.
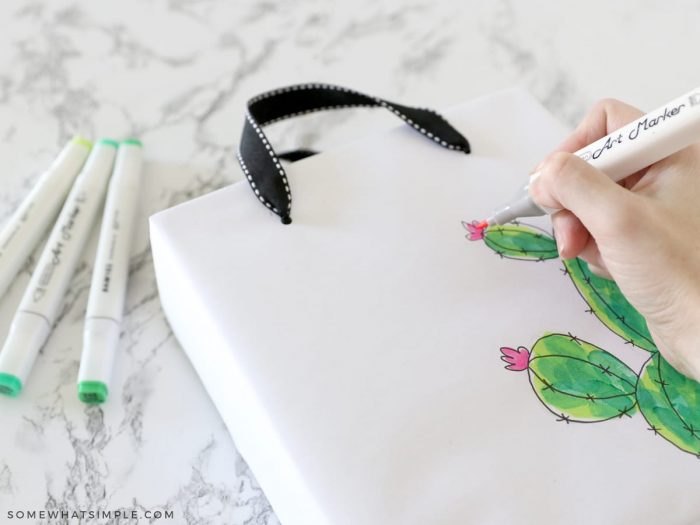
Embellish, if you’d like. This is where my kid’s “creativity” comes out. They can go a little crazy with rhinestones, stickers, silk flowers, etc. But it’s all in the name of fun, right?
… and you’re done!!!
What do you think?
Here is a simple video tutorial we made YEARS ago with another method made with Mod Podge –
Have fun making your own!
I saw this in Family Fun a couple of years back only they used a bunch of smaller pieces of ripped up paper. My daughter was totally bored with it before we even had one side done. Perhaps this version could have held her interest!
THis is the cutest idea and I could sooooo do this with my two girlies as a fun project. Thanks.
Just precious! Fun ideas and way to be green!
Stop by and enter my giveaway…set of 12 berry wreath napking rings…and see all the other ways you can use the napkin rings.
Karin
I love these simple, but very useful ideas. I featured this at somedaycrafts.blogspot.com
That is soooo cute! I love stuff like this! Thanks!
I saw this on somedaycrafts.com and fell in love with this idea. 🙂 This will be cute for Christmas. Thanks for a great tutorial!
Very creative!
Chelsea
I like it! I think they could make very neat ususable gift bags too! I think I shall have to try it!
who woulda thunk? Great idea
That is so cute and easy to do! Thanks for posting!
This is a great project to do with the kids to get their creative juices flowing. Thanks for sharing.
So cute! What a cute idea for wrapping a small gift. I also wanted to send you a link for something. I posted my link to your blog a week or so ago about my trip to work in the OCC warehouse. I write for a local magazine and wrote my column this month about it (and other things). Here is the link to my column: http://www.jonesborooccasions.com/shailanov09.html
Love this idea! I have file it away at thecraftersfilebox.blgospot.com.
Thanks so much for sharing!
I really like this idea and yours turned out so cute!
pk @ Room Remix
love it. My dd would love doing this she is 3… thanks
They did a great job with their designs!! I love the simplicity of these!! It's awesome that you can have the kids help. Very clever!! You'll have to let us know how they hold up as church bags.
Thanks for the link!!
~Andy@ Poppies@Play
I saw this on Someday Crafts & loved it! So Cute! Such a great idea! I made some today it was SO easy – thanks! I posted my totes & linked you.
I wonder if it would work the same with light weight fabric– might be better for a church bag. Thanks for the tutorial.
These are so cute! It kills 2 birds with one stone,,lol I needed to do something "green" and make a tote to give gifts in,,, your Awesome!
http://abbyshabbyb.blogspot.com
And i just threw away 5 cereal boxes…the big ones too :/
Thanks for this idea.
I am using it for Valentine’s Day cards holders for my DD.
I’m not crafty or creative but this worked out well.