My Little Pony Headbands – No Sew!
This post may contain affiliate links. Read our disclosure policy.
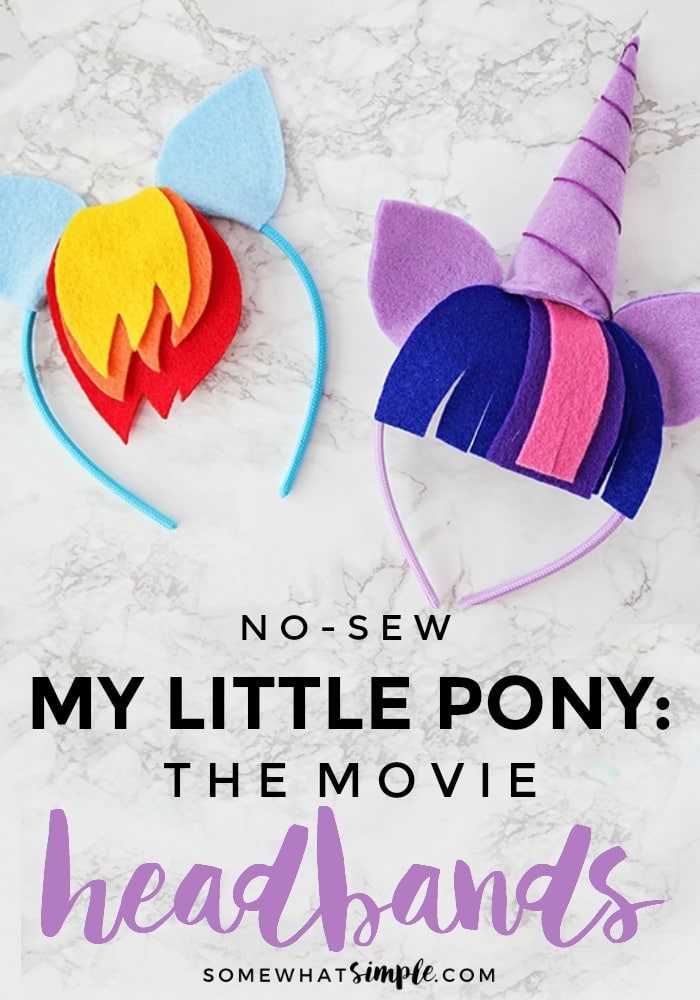
No-sew My Little Pony headbands will make your Rainbow Dash or Pinkie Pie look darling! They’re simple to make and perfect for any pony costume!
Here are a few more costume ideas you might find helpful – Rapunzel Wig Tutorial, No-Sew Superhero Capes, 30 DIY Costumes for Kids, and 10 DIY Baby Costumes.
My Little Pony Headbands
If my kids had to pick a favorite TV show, it has to be My Little Pony! We’ve been loyal fans since the first season, and both of my girls love watching all the adventures of Twilight Sparkle and her friends, in Ponyville and beyond.
I love that not only is the show entertaining, but it also focuses on positive values like kindness, loyalty, honesty, and generosity. No matter the challenge, friendship will always save the day!
This year they decided to be ponies for Halloween, so we set out to make our own costumes. Each of my girls chose to make a headband representing her favorite character, and I helped with the hot glue to ensure that there were no burnt fingers.
The pony headbands turned out so cute, and they were easy to make, too! Here’s how –
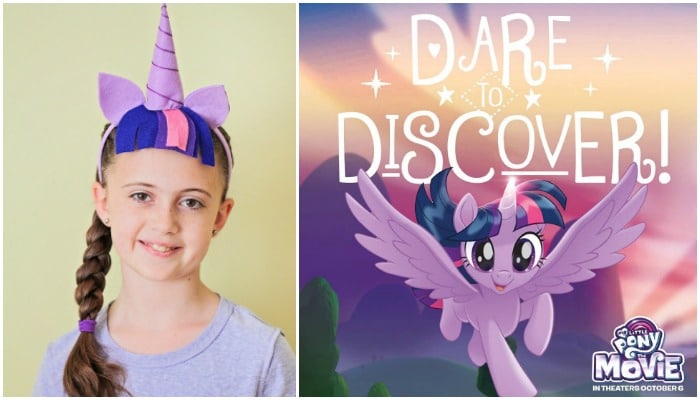
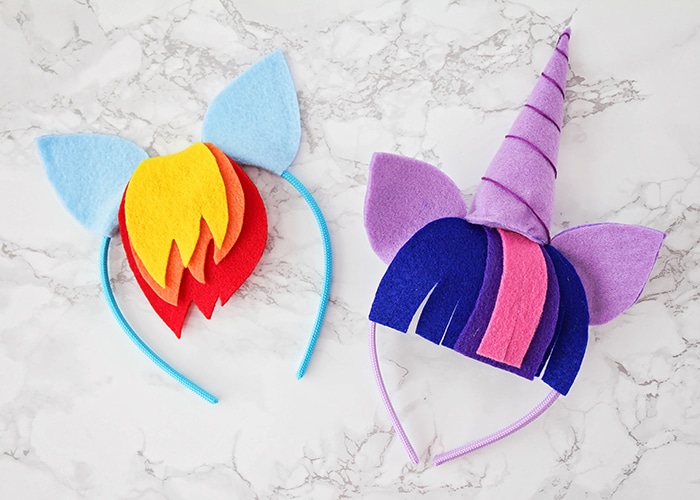
Twilight Sparkle Pony Headband
My oldest loves Twilight Sparkle, so it was an easy choice for her. Just like Twilight Sparkle, she is clever, funny, brave, and a great problem solver. She loves her new headband!
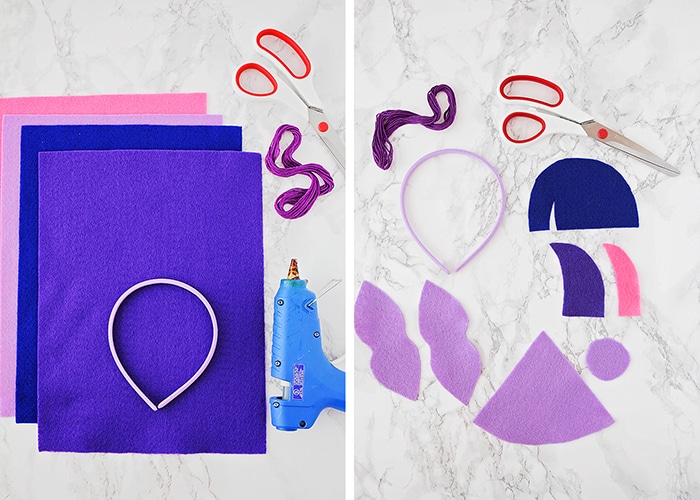
SUPPLIES –
- Twilight Sparkle pattern pieces (download below)
- purple headband
- light purple felt
- dark purple felt
- navy blue felt
- pink felt
- purple embroidery thread
- fiberfill stuffing (or cotton balls)
- scissors
- hot glue gun
DIRECTIONS –
- Cut the pattern pieces out of the felt sheets.
- Glue the ears around the headband. I found that the easiest way to do this was to put a strip of hot glue on the center of the earpiece, then hold it against the underside of the headband. Next, put hot glue on one side of the inside of the ears, fold both sides around the headband, and stick them together.
- To make the hair, glue the pink hair piece (Hair 3) to the dark purple hair piece (Hair 2), gluing only at the top so the pieces can move. Glue both pieces to the dark blue hair piece (Hair 1), spacing about one inch away from the right side of the piece, using a dot of glue at the top. Cut slits in the hair, spacing about every 1/2 inch, and extending up about halfway, to look like bangs. Glue the hair to the top of the headband, between the ears.
- To make the horn, glue the piece labeled “Horn 1” into a cone shape. Stuff with fiberfill (or pull apart cotton balls to make stuffing). Place a circle of hot glue around the piece labeled “Horn 2” and stick the filled horn onto it, pressing to seal. Let cool. Glue a long piece of embroidery thread to the bottom of the horn. Wind the embroidery thread around the horn, spacing the loops about 3/4 inch apart. Secure with glue at the top of the horn and cut any excess embroidery thread. Glue to the top of the hair pieces on top of the headband, between the ears.
- Let the glue set completely before wearing it.
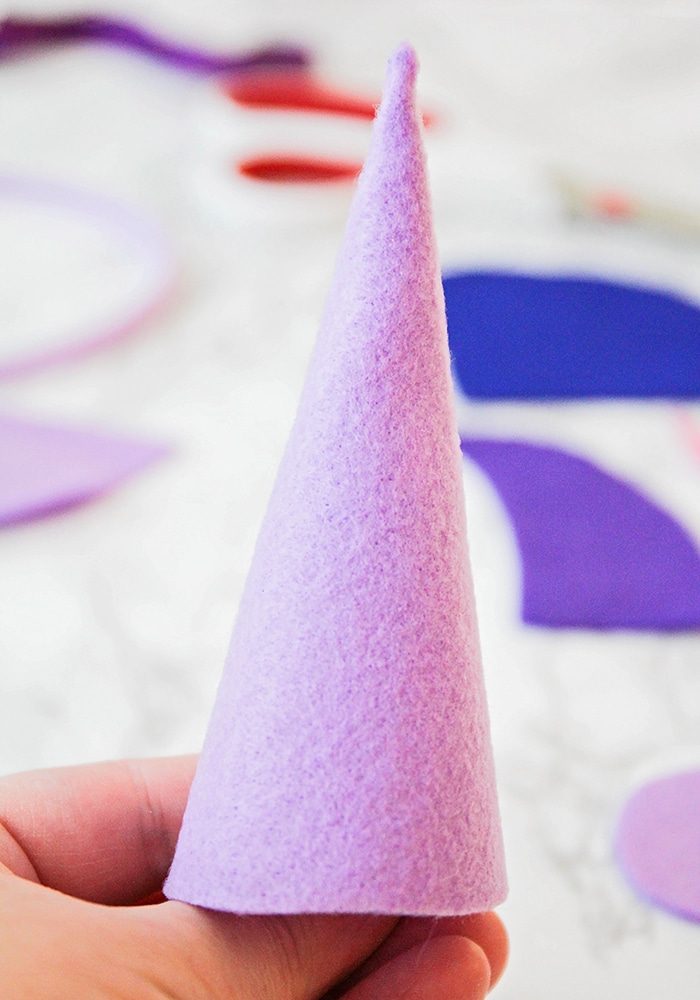
The trickiest part of making this headband is definitely the horn, so I added a few pictures of the process to help. Put a line of hot glue on one side of the cone, then fold over the other side to make a cone shape. Hold it in place for a minute to help it stay together.
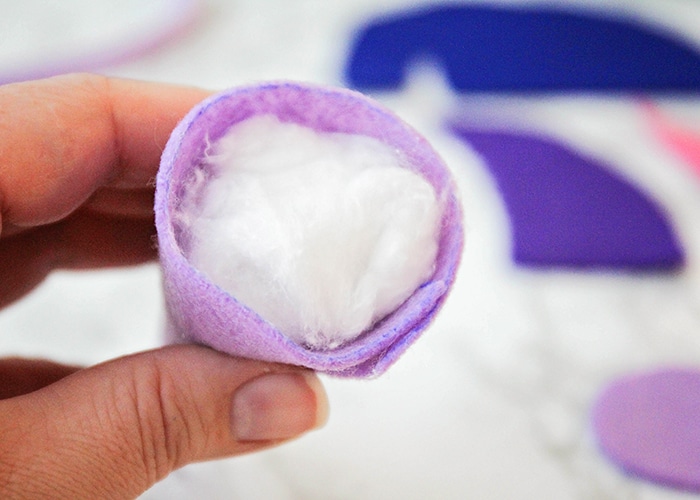
I would ordinarily have filled it with Fiberfill stuffing, but I didn’t have any on hand, so cotton balls worked nicely instead. I pulled them apart to form a pile of fluff, then filled the cone with it. After you stuff the horn, you’ll glue it to the felt base. I also added a fun little detail with embroidery thread. I glued mine on, but you could easily sew it on if you prefer.
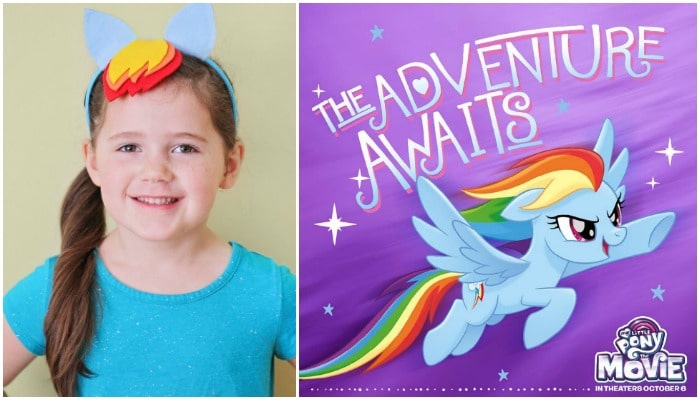
Rainbow Dash Headband
My younger daughter loves Rainbow Dash, and just like Rainbow Dash, she is energetic and spunky, but also loyal and true to those she loves. This headband was the perfect fit for her!
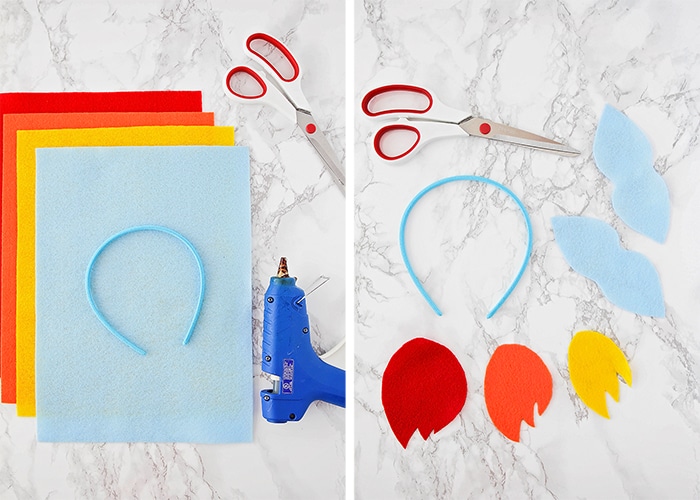
SUPPLIES –
- Rainbow Dash pattern pieces (download below)
- light blue headband
- red felt
- orange felt
- yellow felt
- scissors
- hot glue gun
DIRECTIONS –
- Cut the pattern pieces out of felt.
- Glue the ears around the headband. I found that the easiest way to do this was to put a strip of hot glue on the center of the earpiece, then hold it against the underside of the headband. Next, put hot glue on one side of the inside of the ears, fold both sides around the headband, and stick them together.
- Glue the yellow hair piece (Hair 3) to the orange hair piece (Hair 2) with a dot of glue at the top. Next, glue the orange hair piece to the red hair piece (Hair 1) with a dot of glue at the top. Finally, glue the hair to the top of the headband between the ears.
- Let the glue set completely before wearing it.
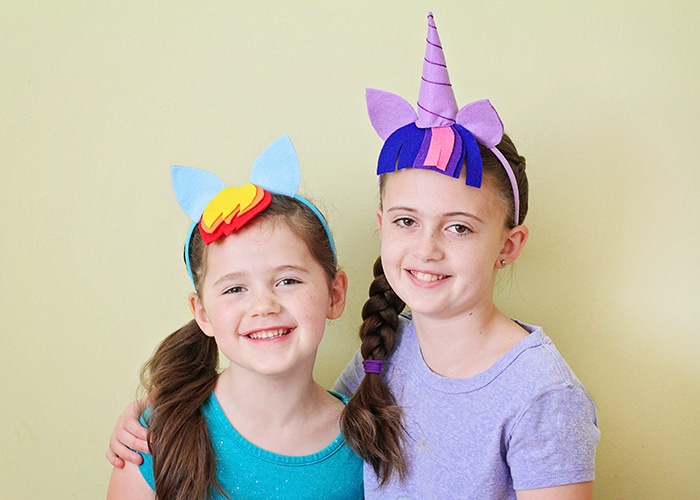
My girls can’t wait to wear their pony headbands for Halloween! My six-year-old hasn’t taken hers off since we made it and has been demanding to sleep in it, too! (I think they were a success!)
They’re definitely a great start for a Halloween costume!
Headband Pattern
Enter your name and email address below for immediate access to our printable pattern –