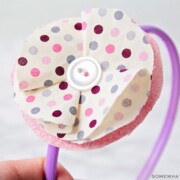
Easy Fabric Flower Headbands
Fabric Flower Headbands are super cute hair accessories that are so easy to make! Make one for your little girl in 5 minutes or less!
Equipment
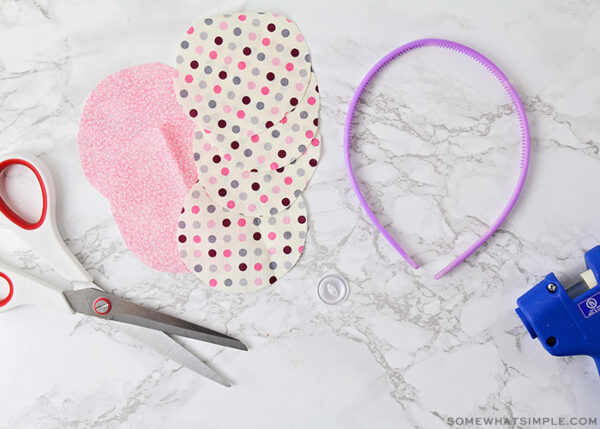
- *You can use any size circles you want, just make sure you have 2 of the same size for the larger circles and 4 of the same size that are smaller than the large ones. You can use all the same fabric, but I usually use 1 print for the large circles and another for the smaller ones.
- Glue gun
- scissors
Ingredients
- headband
- 1 piece of rectangular fabric approx. 1/2 inch by 1 inch
- 6 fabric circles- 2 large and 4 smaller*
Instructions
- Take your to you larger fabric circles and glue them on top of each other by hot-gluing a small little dab in the center of one and pressing the other circle on top.
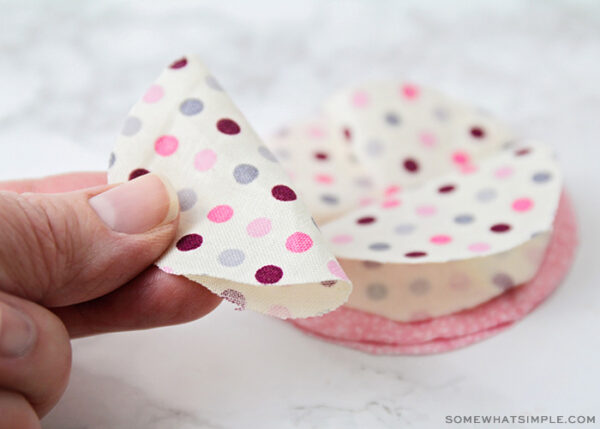
- For the smaller circles, fold them in half and then layer them one at a time on top of each other, stacking them on the larger fabric circles. The rounded part of the fabric will line up with the round part of the large fabric circles and the straight, folded edge will be in the center.
- Add several small dabs of glue under the layered fabric and as close to the center of the flower as possible to secure.

- When you're done you can glue a button or a rhinestone in the center… whatever you’d prefer!

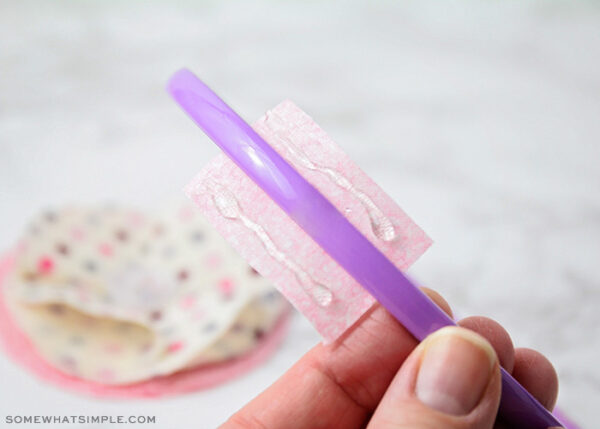
- To secure the flower to the headband, place a generous amount of glue on your rectangular fabric, then place it on the underside of your headband. Center your headband on the fabric, then place the flower on top of the headband and press firmly to secure.
Video
Notes
*You can use any size circles you want, just make sure you have 2 of the same size for the larger circles and 4 of the same size that are smaller than the large ones. You can use all the same fabric, but I usually use 1 print for the large circles and another for the smaller ones.