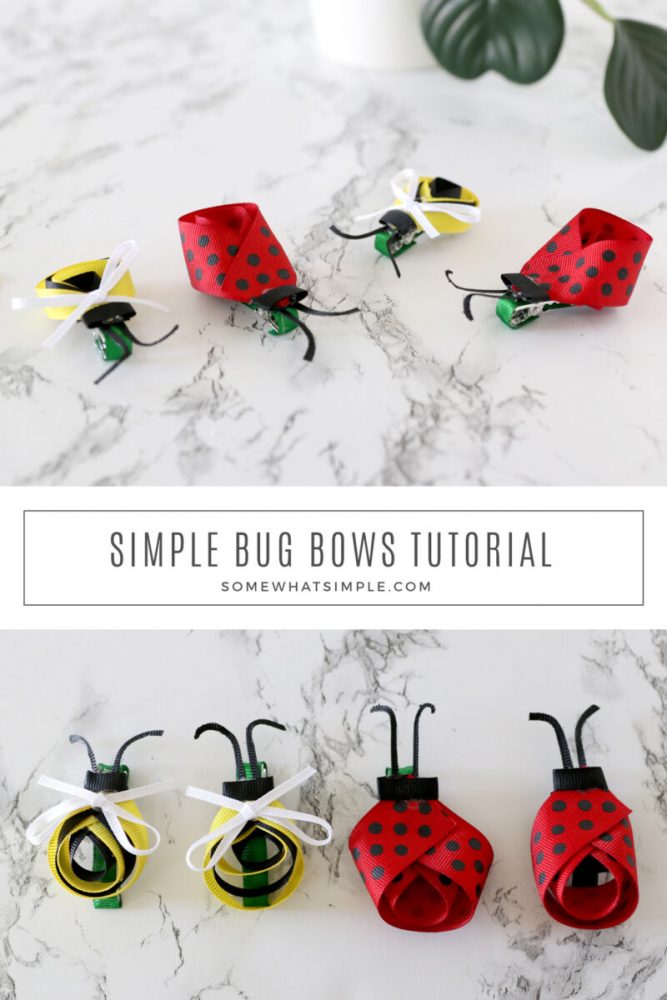
Bug Bows
This post may contain affiliate links. Read our disclosure policy.
Simple little Bug Bows are easy to make and will look darling in your little girl’s hair!
Here are a few more hair ideas we think you’ll love – Fabric Hair Bows, Easy Ribbon Hair Bows, and DIY Bow Holder.
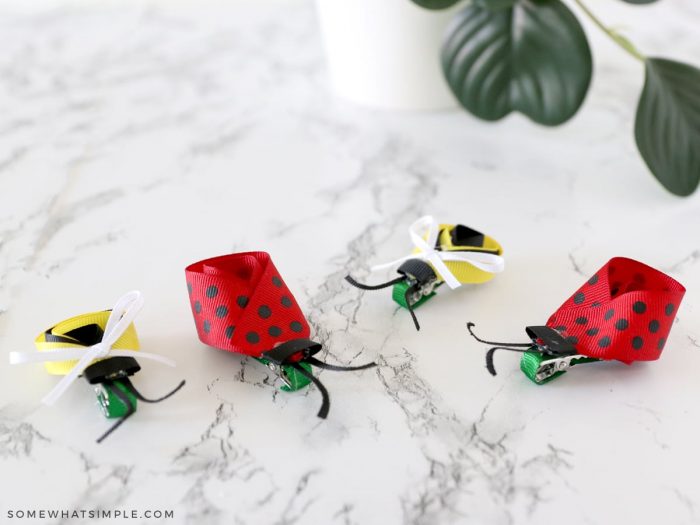
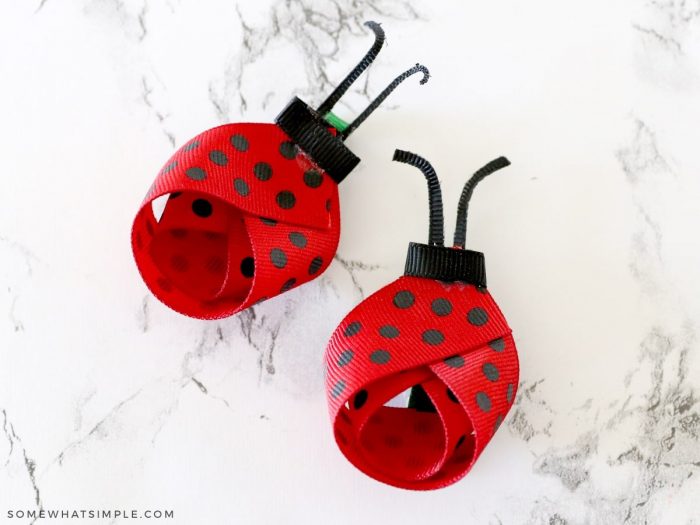
These bug bows are a fun way to add some variety to your daughter’s hair bow collection. I’ll teach you the basic tutorial by showing you a darling ladybug and bumblebee, but you can make butterflies, dragonflies, and all kinds of colorful bugs using the same technique!
I have the written tutorial below, but the video I made shows this tutorial waaaaaay better than I could type it!
[adthrive-in-post-video-player video-id=”5d1B3UWG” upload-date=”2017-01-18T20:18:06.000Z” name=”Bug Bows” description=”how to make lady bug hairbows and bumblebee hairbows for little girls” player-type=”default” override-embed=”default”]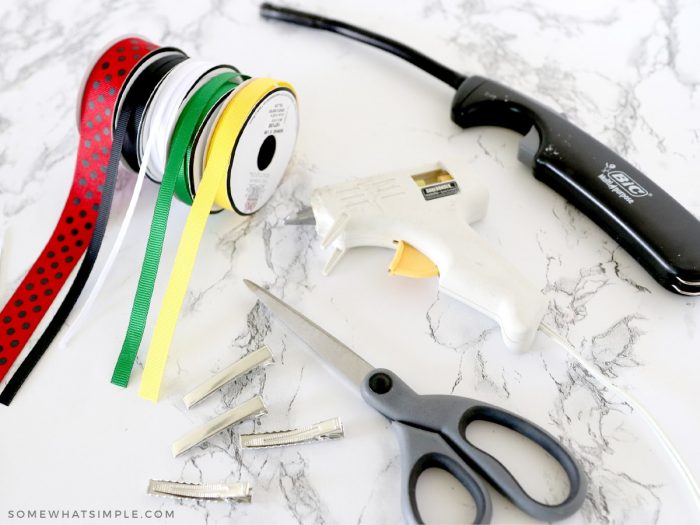
How to Make Bug Bows
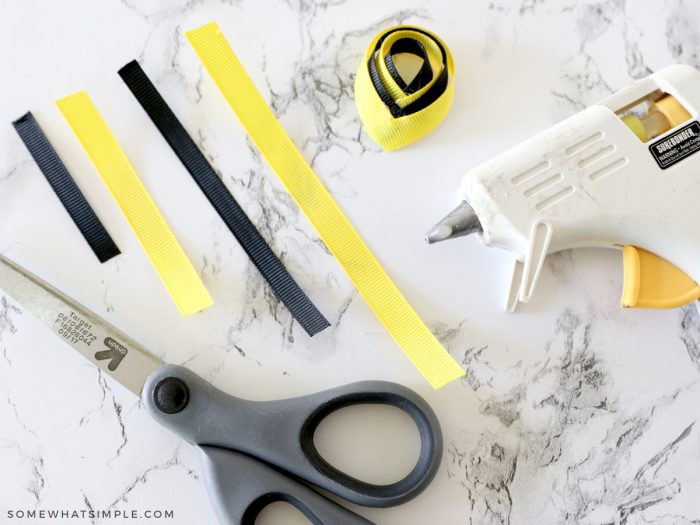
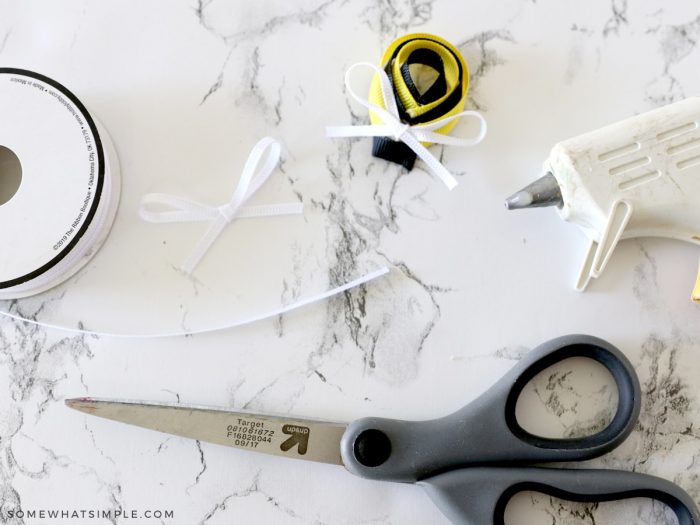
I used grosgrain ribbon for these bows, but you can use whatever ribbon you’d like!
SUPPLIES NEEDED –
for the antennae
- black 3/8″ ribbon
- lighter
for the lady bug
- red and black polka dot 5/8″ ribbon
- black 3/8″ ribbon
for the bumblebee
- yellow 3/8″ ribbon
- black 3/8″ ribbon
- white black 3/8″ ribbon (or smaller)
you will also need
- ribbon lined alligator clips <<< easy tutorial here.
- scissors
- hot glue gun & hot glue sticks
DIRECTIONS –
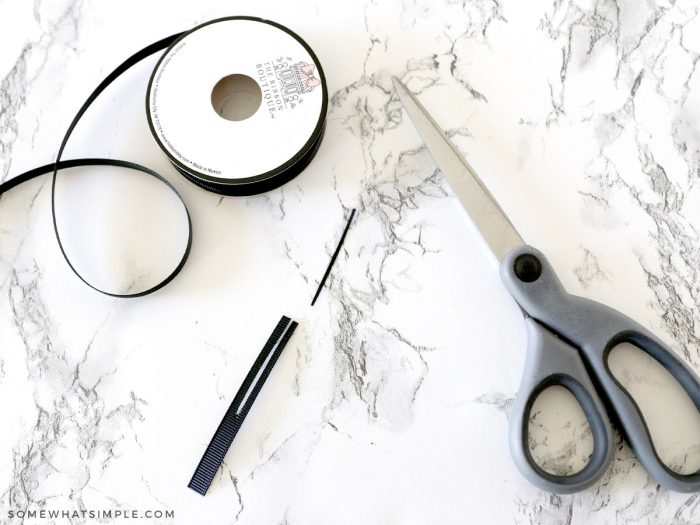
ANTENNAE –
Cut about a 2-inch piece of black ribbon. Hold one end of the ribbon and cut out the center, all the way down to about 1/4 inch of the other end. This will leave 2 straight edges of the ribbon. (You can throw the middle section away.)
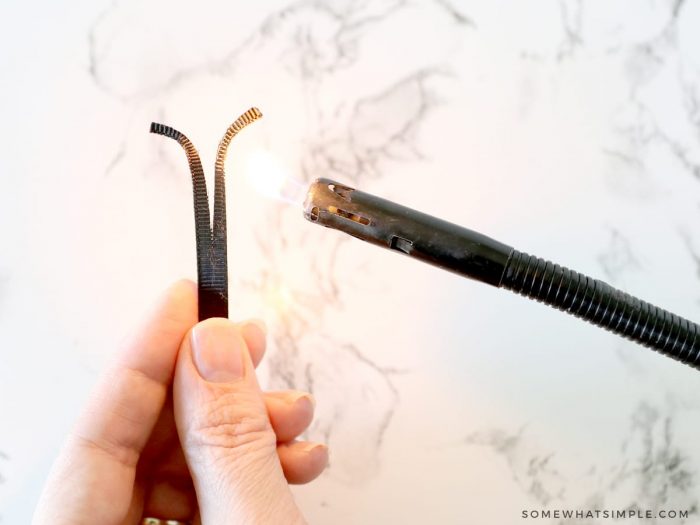
Take your lighter and gently brush the outside of each edge with the flame. Be careful not to get too close or it will catch fire. Concentrate the flame in one area so the ribbon curls over the flame.
Continue with the other side until you have 2 antennae curling outward.
HOW TO MAKE A LADYBUG BOW –
*You can make these whatever size you’d like by making the loops bigger or smaller.
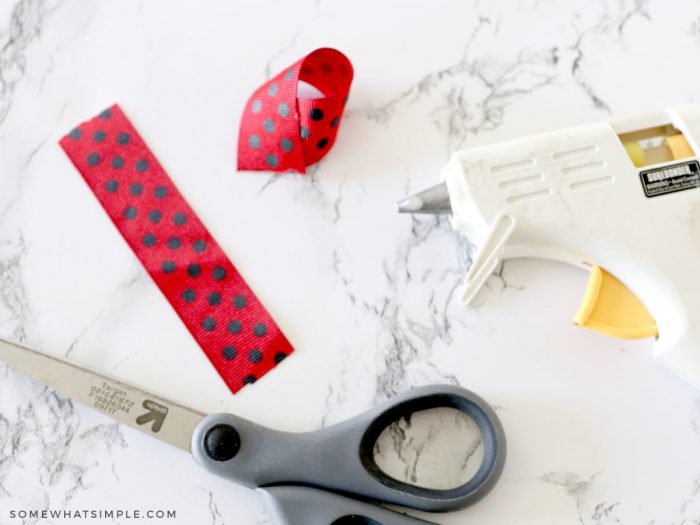
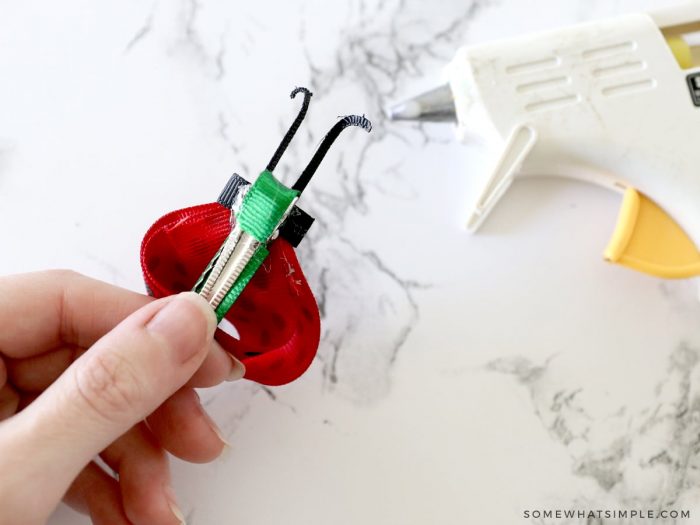
Cut a 3″ piece of polka dot ribbon. Make a loop with the ribbon and have each end sit flush, one on top of the other. Secure the loop by placing a small dab of hot glue in between the ribbons where they meet.
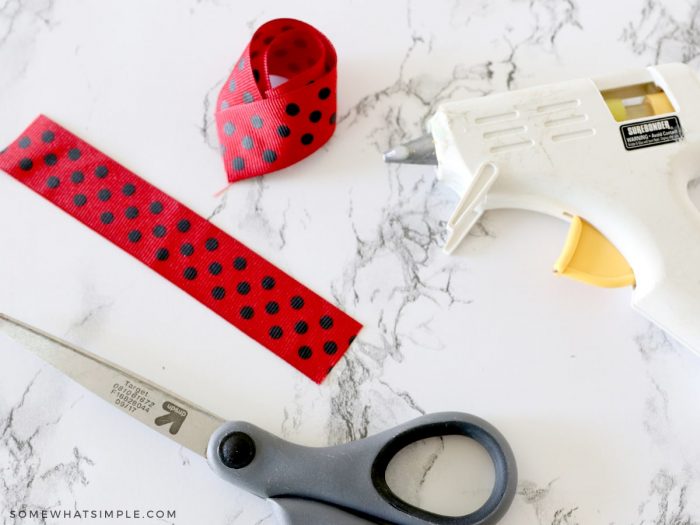
Cut a 4″ piece of polka dot ribbon. Place a dab of hot glue on the top of the point of the loop you just made and press one end of the next strip of ribbon on top.
Make another loop around the outside of the first loop and secured this with a dab of hot glue at the point. You should now have 2 loops of ribbon, one inside the other.
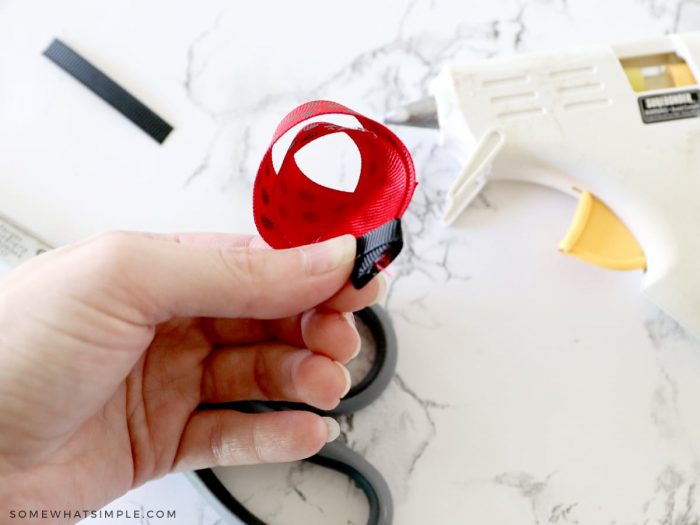
Cut 1″ of black ribbon and center it on the point of the 2 loops. Add a dab of glue to secure it. Wrap each end of the black ribbon around the point and secure it on the backside with another dab of glue. You now have the “face” of the ladybug!
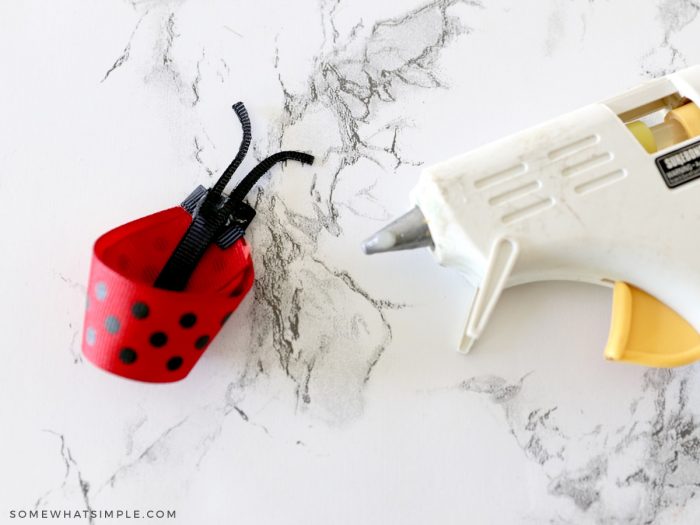
Glue some antennae to the back side of the face.
Secure your lady bug with some hot glue to a ribbon-lined alligator clip and you’re done!
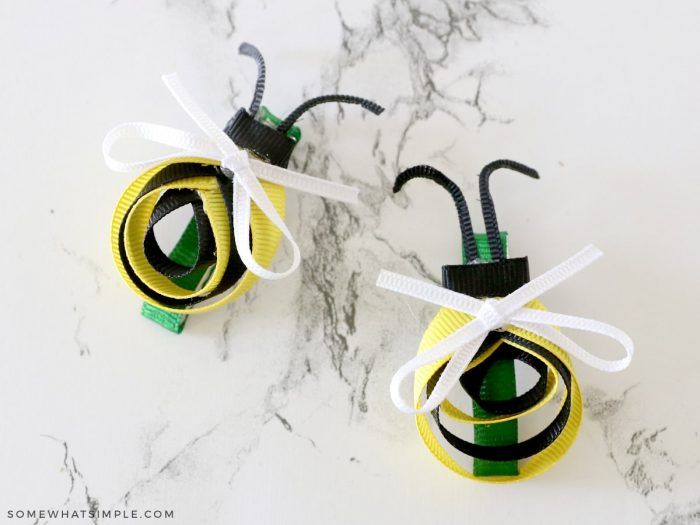
HOW TO MAKE A BUMBLEBEE BOW –
To make the body of the bumblebee, just follow the same steps as the lady bug, but make 4 loops – 2 yellow and 2 black. Alternate the sizing so that the black and yellow fit inside each other.
Once you have the face and the antennae, add some white wings. Cut a 3-inch piece of white ribbon and loop it in a figure 8, or tie a small bow, securing with hot glue in the center. Cutting off any excess ribbon once you decide how long you want your wings to be. Glue your wings just between the face and the body, then secure to a ribbon-lined alligator clip.
…and you’re done!!!
A little girl can’t have too many bows, so get creating!!
This post originally published in January 2010 and was updated in May 2021.
Very cute and fun! My little girls would love these.
-Crystal
I love this idea!
These are sooooo cute! I know some little girls who would love these. Thanks!
Ok, is it bad that I want the bee one for myself?!
These are so cute!
I adore the cute bee and the ladybug. Thanks for sharing!
This is super cute! I am going to have to share the idea with my daughter!
Thanks Amanda! 🙂
So cute!
What a darling idea, Stephanie!
So cute! They are definitely love bugs. Thanks for sharing them with SYC.
hugs,
Jann
Very cute! Thanks for sharing at Home Sweet Home!