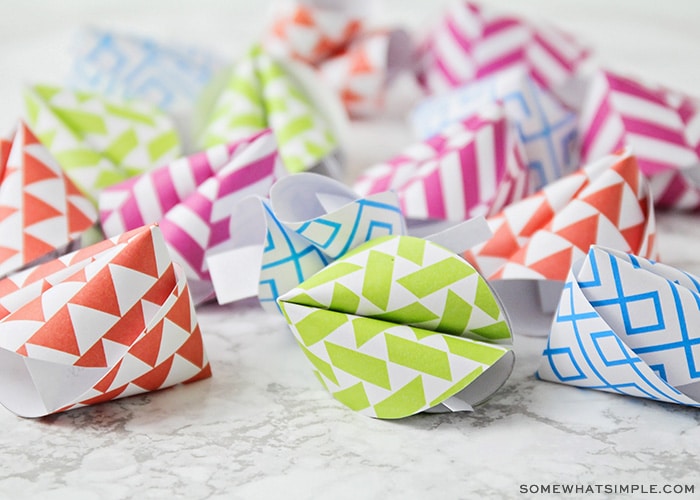
Paper Fortune Cookies are a fun surprise gift or a memorable birthday party keepsake. Learn how to make them with this easy step-by-step tutorial.
Get inspired by some of our favorite paper projects – Printable Paper Treat Box, Paint Chip Notebook, and Vacation Countdown Chain. We also have an entire set of Chinese New Years Crafts we think you’ll LOVE!
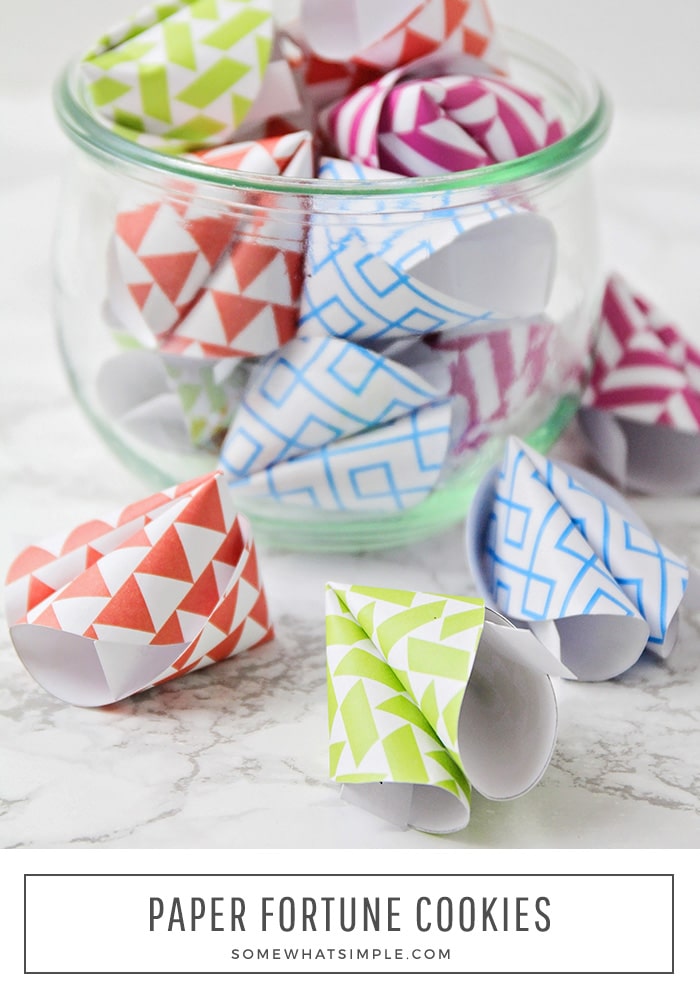
My little Elle just turned one and it was such a special day! I know she won’t remember a thing, but I did my best to capture as many memories as I possibly could. I obviously took a TON of pictures, and since her birthday party was a Chinese theme, we made her a special cookie jar full of birthday fortunes/wishes from her party guests. Similar to the concept of a time capsule, the fortunes are to be kept unopened until a later moment in time, like her 16th birthday or high school graduation.
I had a table set up where guests would write birthday fortunes to Elle as they entered the party. I also had friends and family who live out of state or were unable to attend her party email me their fortunes. The entire idea worked out so well, and I am excited for Elle to have this special keepsake.
If you’ve never made paper fortune cookies before, let me show you just how simple they are!
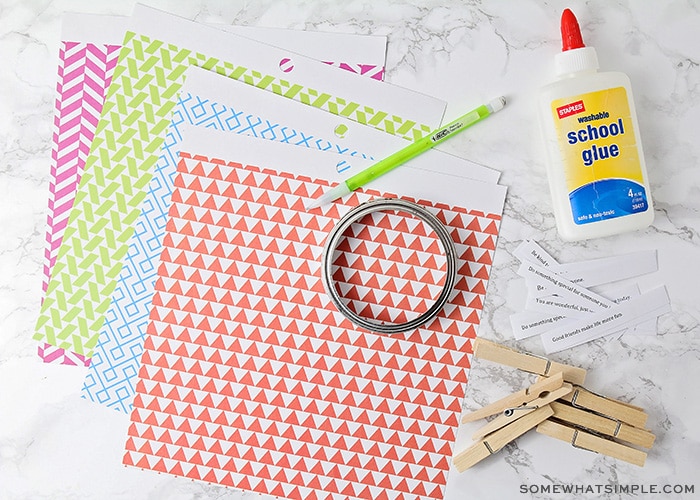
What You’ll Need
- Cardstock with your favorite colors and patterns
- A pattern that has a 3 inch diameter. I used the top of a large canning lid
- Pencil
- Scissors
- Fortune strips to place inside the paper cookies
- Glue
- Clothes pins
- Cookie Jar
How to Make Paper Fortune Cookies
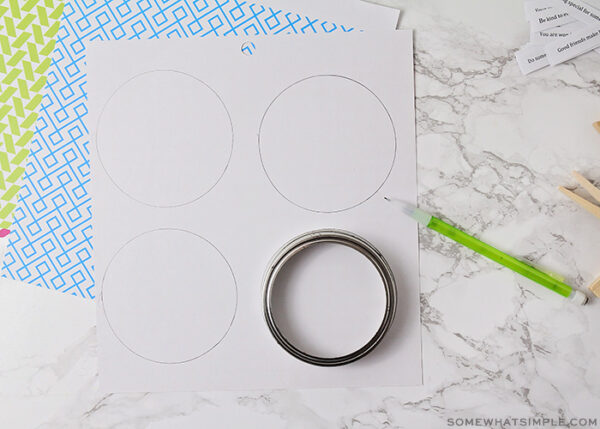
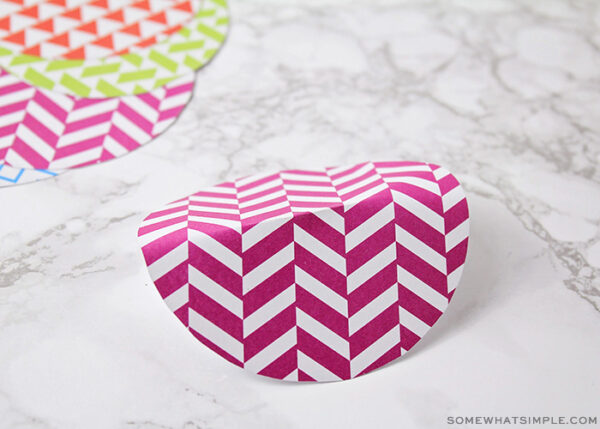
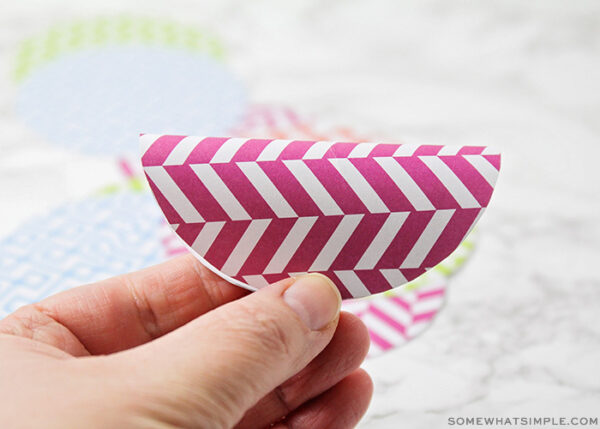
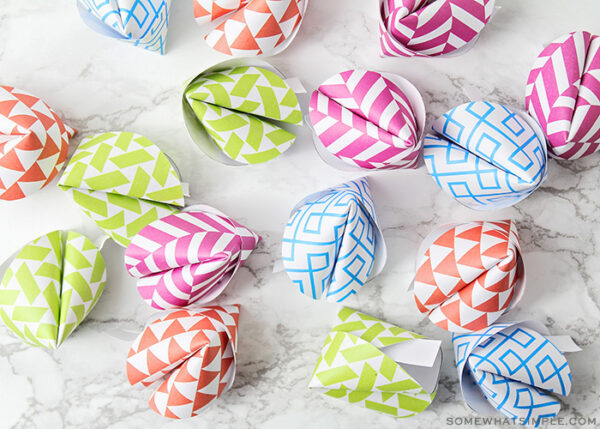
Trace & Cut – You’ll want to use your circle template to trace and cut out as many circles as you want.
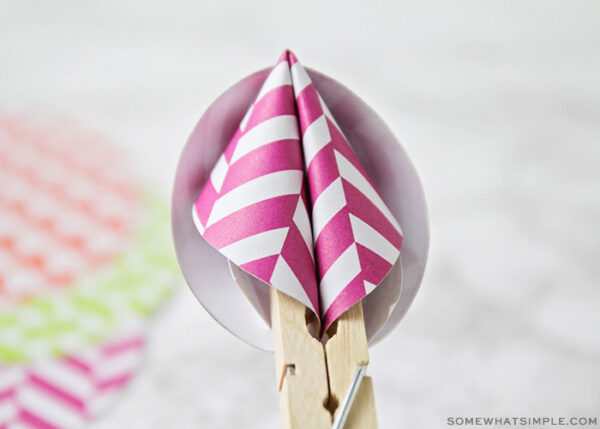
Easy Origami – Fold each circular piece of paper using the directions below to make your fortune cookies.
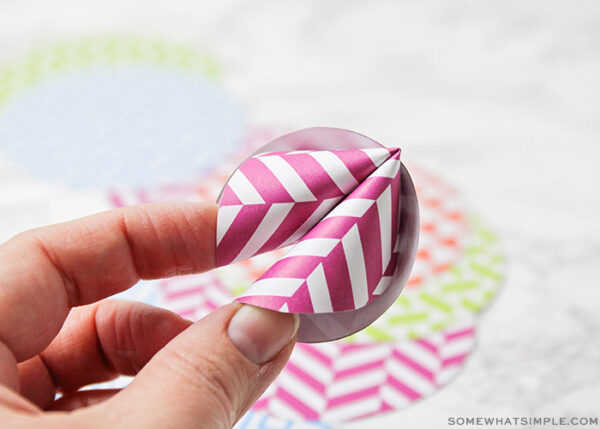
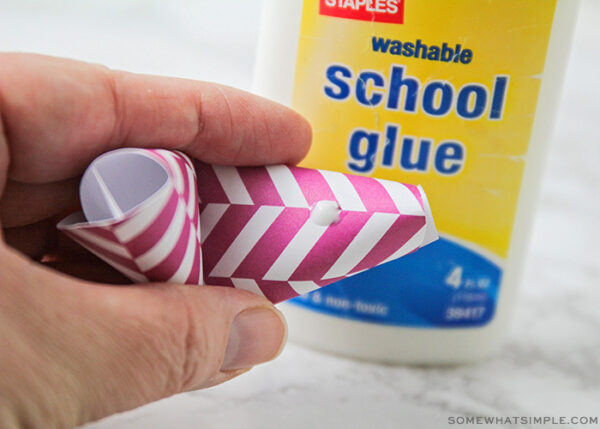
Add Fortune & Close – Once you’ve made your paper cookie, slide the strip with the fortune on it inside the cookie. Once inside, you will close the cookie with a dab of white glue. You’ll also want to use a rubber band or clothes pin to help the cookie hold its shape while it dries.
How to Make Paper Fortune Cookies
Equipment
- scissors
- Pencil
Ingredients
- colorful cardstock
- circle template approx. 3″ diameter – I used a canning lid
- paper fortune strips
- white glue
- clothespins or rubber bands
- cookie jar
Instructions
- Place your circle template on the backside of your cardstock and trace as many circles as you need with your pencil. Cut out each circle.

- Choose one of the cut circles and gently fold it in half. Tightly crease only the very center – do not crease across the entire circle.
- Fold the circle in half again, this time in the opposite direction from the crease you just made. (This first crease will now be perpendicular to your new fold.)
- Carefully push the fold to the center while using your thumb and middle finger to bring both ends together.
- Add a fortune slip into one of the side openings before bringing both ends completely together. Add a small dab of glue near the fold to hold the cookie’s shape.
- Use a clothespin to hold the cookie together until the glue dries.
- Place the cookies in a jar for safekeeping, and you’re done!
ABOUT THE AUTHOR – Tiffany Bird is the creative mom of three little girls and the author of the blog Simply Modern Mom. Tiffany was a guest blogger on Somewhat Simple in February of 2010. This post was updated in 2020.


This is so very awesome! Was looking for something special to do with the kids…thanks!
Thanks Jozie! So glad you like this idea! Thanks for stopping by……….
These are the sweetest things ever. They would be great done in Christmas colors for small co-worker gifts!!
I love this! I will be making these as party decorations for my business parties. I sell Origami Owl Custom Jewelry and these are perfect. Thank you so much.
These are so cute! I love how simple they seem to be to make. It’ll be cute to do in fall colors for Thanksgiving… have family email you what they’re thankful for and make a fun game at dinnertime opening them up and guessing who’s thankful for what. 🙂
-Melissa
How fun! You could also use these to plan a date with your hubby…he can open them throughout the night to decide your date! But I definitely love the idea of opening them on a future birthday.
These are darling!!! I love the papers you used. I will definitely be using this idea.
what a fantastic idea!
What a great project! I love it!
Wow – what a brilliant idea! Fantastic tutorial too. 🙂
this is so beautiful what an awesome idea
Whata super cute presentation idea- can be used a countdown calendars too, or a word or theme of the day /week in your home, the possibilites are endless- and this is so easy!! Thanks again!
Aaaaaaadorable. Can't wait to try it.