A sewing project from items in your husbands closet – here is how to make a dress out of a shirt!
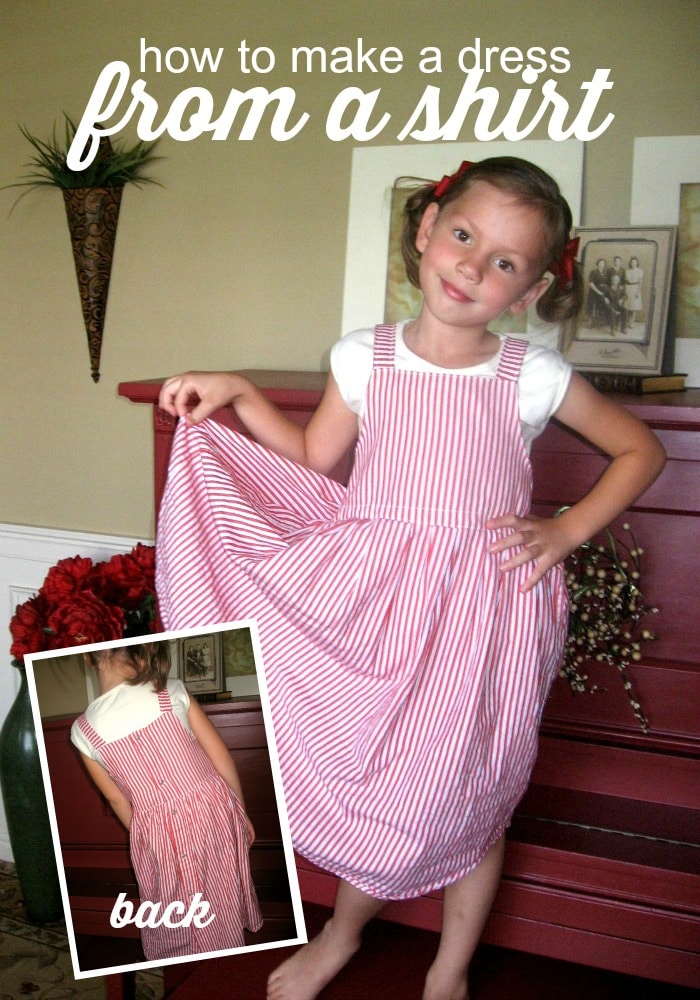
In honor of Father’s Day, I made some dresses for my girls out of my husband’s old dress shirts! It is such a fun way to reuse a couple shirts that would have otherwise been given away. I really love the way they turned out! And the beauty of this dress is in the steps you get to skip- you use the bottom section of a skirt so it is already hemmed and finished on the bottom and the sides and buttons make little to no work for the back! Here’s how you turn an old favorite of Dad’s into a new favorite dress …
How to Make a Dress Out of a Shirt
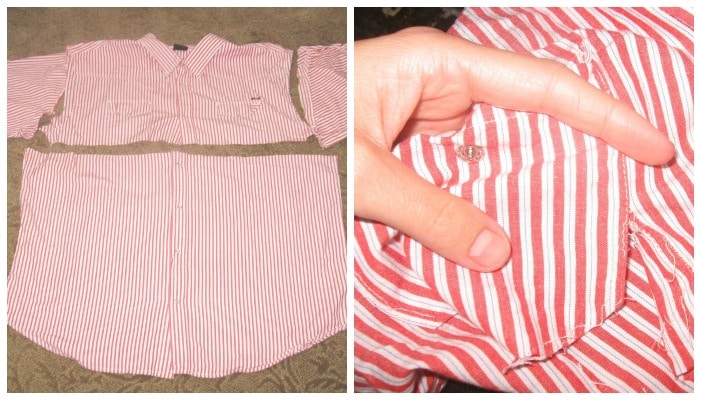
1. Grab a dress shirt and cut off the sleeves and the bottom half just below the arms.
2. Remove the pockets by using a seam ripper.
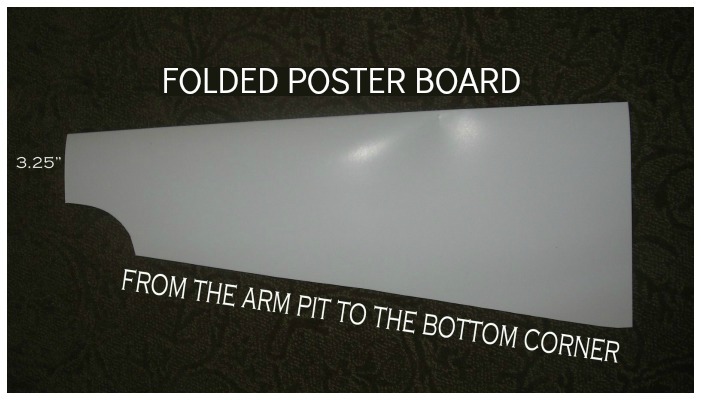
3. To make a pattern you need a poster board and a tank top.
- Fold the poster board in half the long way.
- Measure your daughters chest area to get an idea of how wide you want the dress.
- For my girls I measured 7″.
- Add 1/2″ to that measurement for seam allowance and then divide in half because we are making our pattern on a folded poster board.
- Starting at the top of the poster board, on the fold, measure and mark off your half measurement.
- Now take your tank top and trace the arm curve. From the bottom of the arm curve, use a straight edge and draw a line to the bottom corner of the poster board.
- I use this entire template to make an A line dress out of dress shirts as well, but for this tutorial we will only be using the top sections when we trace out the top of the dress.
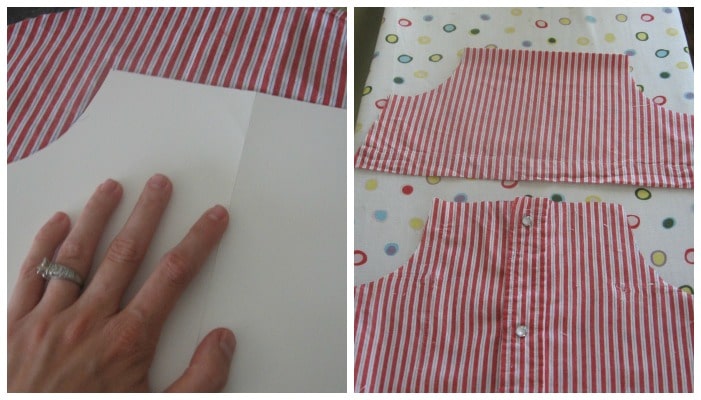
4. Using the top half of the shirt, both front and back, trace and cut out two pieces that will then look like the above image.
NOTE:
Line up the template about 1″ above a button. Be sure to use the crease mark in the template to make sure you are straight. The crease should line up with the buttons. The length of this section is determined by holding up the template to your daughter and getting an idea of how long you need it.
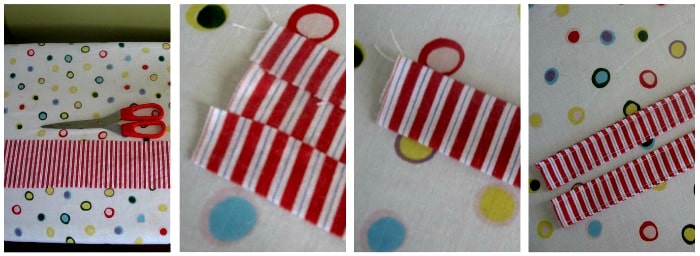
5. Now we will make the straps. Using fabric from one of the sleeves or left over from the top of the shirt, cut a piece 3″ by 20″. Fold and iron both length wise. Fold that in half and iron. Sew with a straight stitch both length wise sides and cut the strip in half. You should now have two 10″ strips. ( You can make the straps as wide or skinny as you want!)

6. Fold and iron the top of the bodice and the arm curve section. Pin on your strap 1/4″ from the edge. Fold over edge and sew starting from the bottom of one arm curve , across the straps and down the second arm curve.
7. For the back side, separate the two buttoned sections. Measure on your daughter how long you need the straps and iron and pin the same way. Once you have sewn both back sides, re-button. Place the front and back sections of the bodice together,right sides facing in and sew up each side section.
Turn it right side out and now you have a completed top section of your dress.
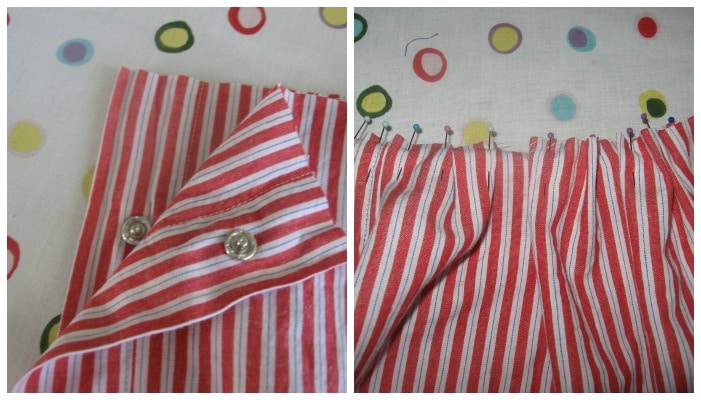
8. Now we’ll work on the skirt! Unbutton and open your bodice and lie it length wise facing up on your ironing board. Take your bottom section of the shirt, the skirt, and unbutton it. With it’s right side facing down, line up the same sides, meaning button side to button side bodice. Pin then together.
9. We are now going to start to gather and pin our shirt. I do this one section at a time to ensure I have even gathers. You have already pinned the button edge together, so take the first seam and match it up to the first seam in the bodice. Pin it there as well. You should have a loose section of skirt fabric. Now gather and pin the skirt fabric to the bodice fabric. Repeat now on the last two sections, the middle and other end by using the trick of first pinning each seam together and then pinning down the loose skirt fabric. Repeat the pinning till it’s been pinned entirely.
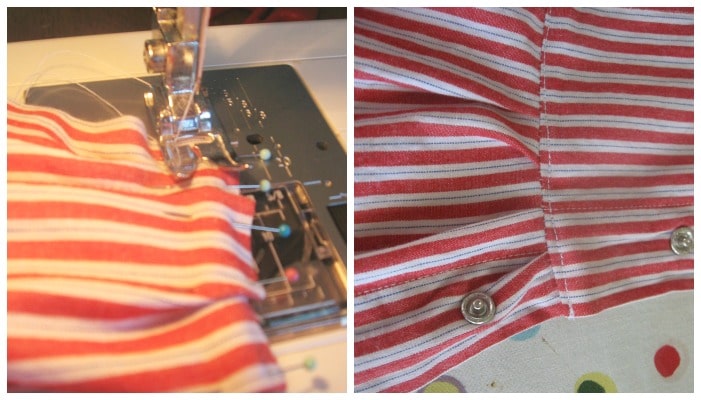
10. Sew a straight stitch and attach the skirt.
11. Turn the dress right side out and press and stitch one more time on top to give it a finished look.
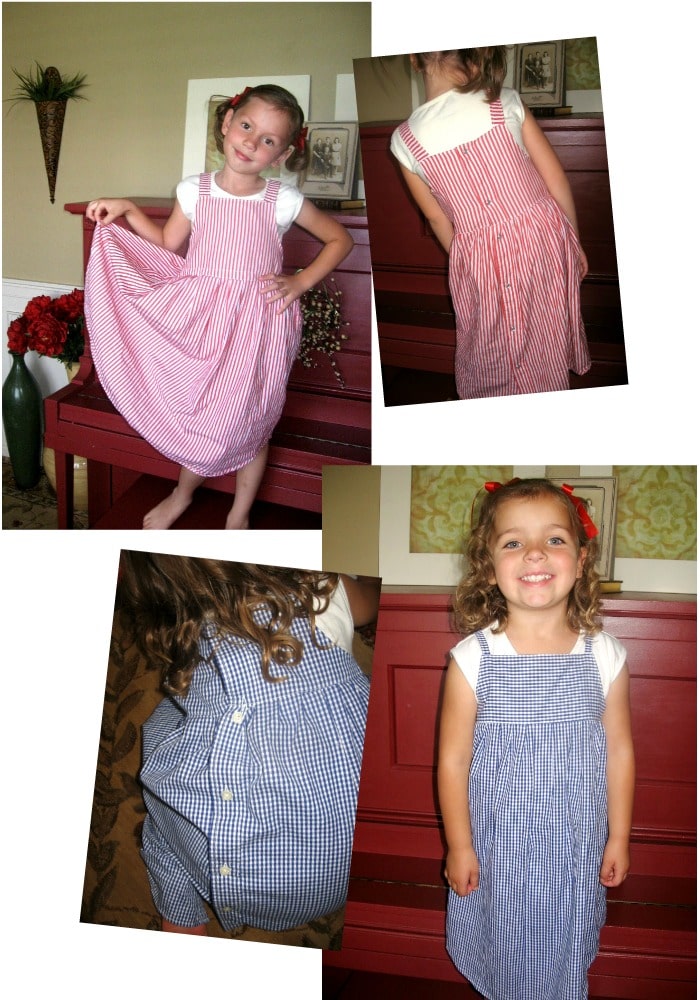
There you go!!!
. . . . .
This guest post first published on Somewhat Simple in June 2010.


What a great idea! My brother recently passed away and I am wondering what my nieces can do with his ties and clothes.
I am simply in awe of someone as talented as you!! You make everything you do look so easy!
All the Best
Dennis
This is such a pretty dress. I totally doesn't look like it was made from a man's shirt.
I've snatched up my husbands shirts just recently to make dolls with. He didn't mind. 😀
I have a box of the hubby's shirts that I was thinking of something to do with them to recycle… Thanks for the idea!!
I know my husband will love this!
Really sweet! I made one of my little girls a dress out of my husbands old work shirts that has his name, and fathers business name embroidered on it. There is nothing sweeter then seeing their little girl in one of their shirts!! Thanks for the tutorial!