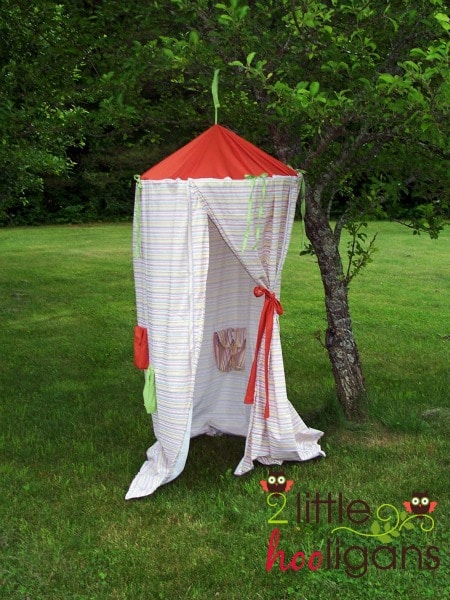
We’re sharing a simple play tent tutorial for beginners that is super cute and will only take 2-3 hours to complete!
We’re finally starting to experience some warmer weather and sunshine over here, and that means its time for some outdoor play. I’ve seen several fabric play tents both in store and online, but the prices of these tents always scare me away! And so I set out to make my own budget-friendly version, and this is what I came up with. A hanging play tent made from $3 bed sheets – you definitely can’t beat that!!! Here is the simple tutorial and a few helpful sewing tips.
How to Make A Play Tent
Play Tent Materials –
-
- 3 twin flat sheets – 2 of the sheets should be of the same pattern.
- ribbon or bias tape
- 1 hula hoop
- sewing supplies
Directions –
Sewing Tips:
- Use a stitch length of 1.
- Avoid fraying by zig-zag stitching or serging all the raw edges.
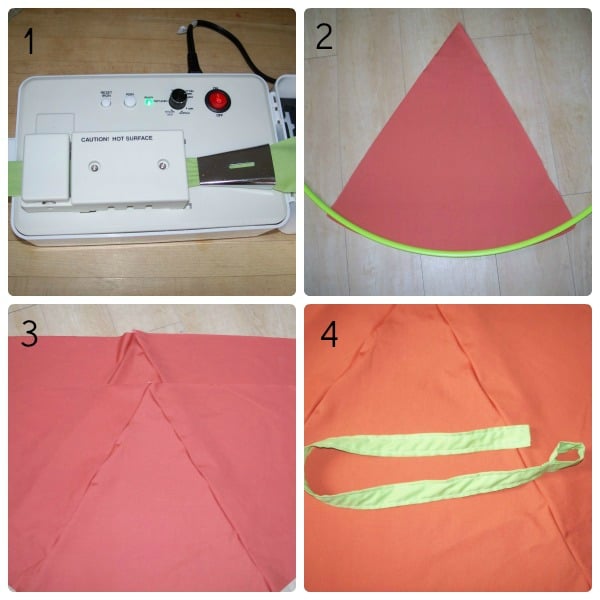
1 – You will need ribbon or bias tape cut to the following sizes-
- Four- 60 x by 1/2″ wide – this will be used to attach the hula hoop to tent
- One – 30 x 1″ wide – this will be used to hang the tent
- One – 80 x 2″wide – this will be used to keep door open
2 – Measure and cut 6 triangles about 24″ long on the sides and 22″ wide at the base. Make a curve in the base of the triangle by placing the hula hoop on the bottom edge, then trace and cut. Your triangles will now be about 21 1/2″ from tip of triangle to the middle of curve.
3. Sew two triangles together on one side, then sew one more triangle to the other two. You should have three triangles sewn together, as pictured above. Repeat with the other three triangles.
4. Take the 30″ by 1″ wide tie and sew a loop on one end. This will be used inside of tent to hang things on.
Now onto the next part…
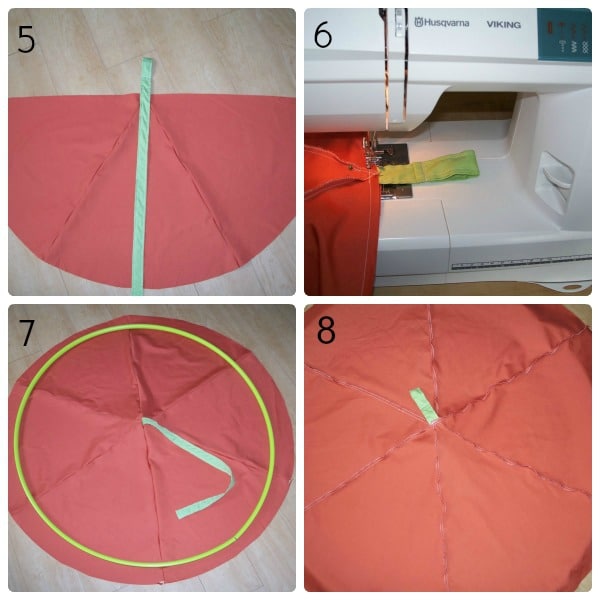
5. Take one of the triangle sets and pin the looped tie to right side of fabric. Let it overhang a few inches as seen above.
6. Pin other triangle set on top of the first one. Pin in place on the straight edge only and sew. Make sure you back stitch a few times over the tie. This needs to be very sturdy because it is what the tent will hang by.
7. This is what you’re should look like at this point.
8. And it should look like this on bottom side.
(Still with me? Let’s keep going!)
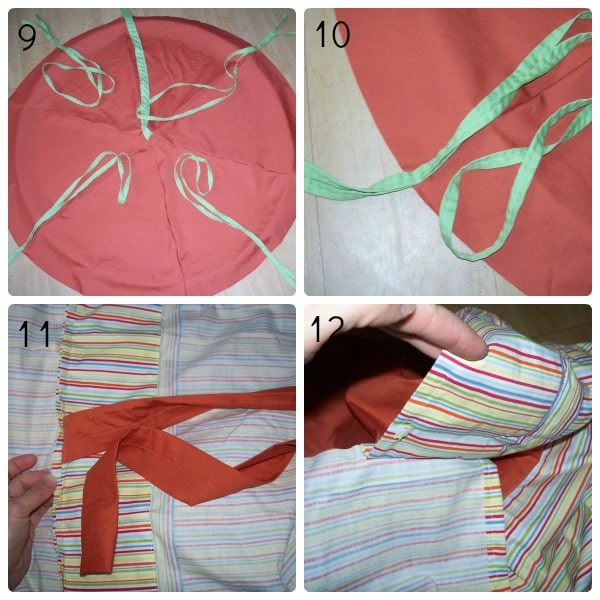
9. Gather four 1/2″ ties and evenly space them around the top circle. Pin the ties in place. I left about 8″ hanging off the top, which will be used to tie the hula hoop on. The longest part of the ties are going to end up being on the outside of tent and will be tied into a bow.
10. Sew the tie in place, and remember to back stitch a few times! Set the top aside.
11. Grab the two sheets for the sides of tent. Since the sheets only measure 96″ long, cut about 35″ off of the second sheet and attach it to the first sheet. Pin the right sides of sheets together.
Before you sew the sheets together, measure down about 25″ from the top of where the two sheets will be sewn together. Place the middle of the 80″ by 2″ wide tie half way in. You will end up with half of the tie on the right sides of fabric and the other half will be hanging out. Sew the sheets together.
12. Pin the right sides of top circle and the sheets together. Make sure that the long ties are tucked in and the short ties are hanging on the outside.The sheets will overlap one another about 3″ or so at the end. That is what you want so that the opening of the tent a little sturdier.
We are almost done…
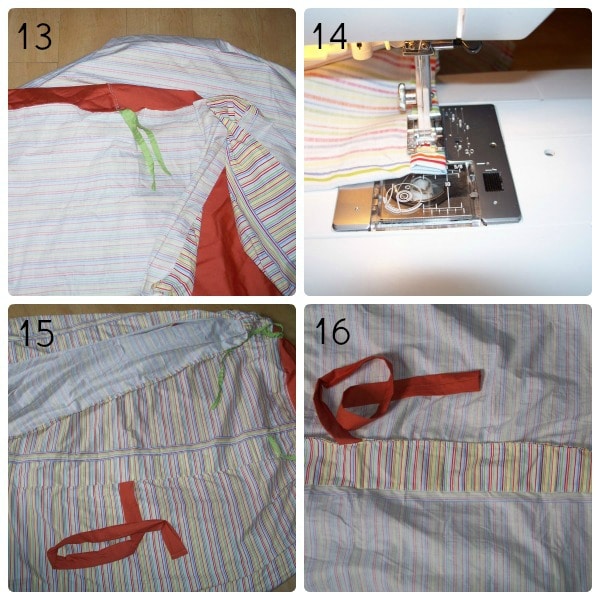
13. Here is the overlap and the opening that will be the door. (You can see the extra sheet that was sewn together and the overlapped part.)
14. Finish off the raw edges of sheet.
15. Here is what the outside looks like.
16. Here is what the inside looks like.
OPTIONAL STEP:
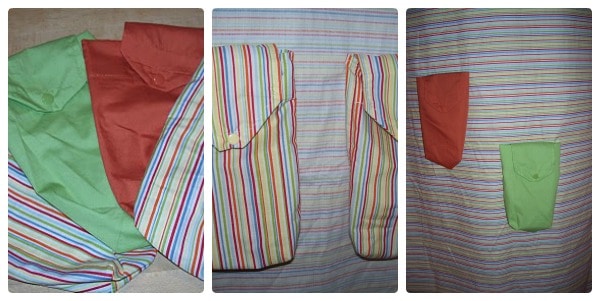
My sheets came in these cute little bags, so I had to use them. I sewed them on the inside and outside of the tent about 20″ from bottom. I placed mine about 12″ from the door at staggered heights.
Time to attach the hoop.
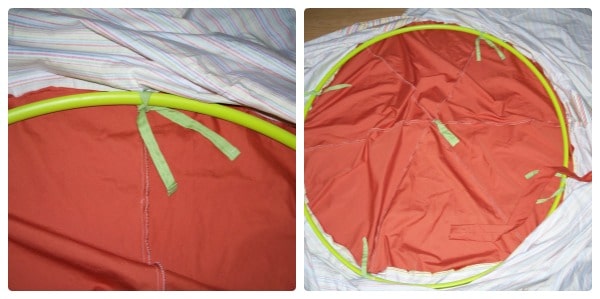
Turn tent inside out and then tie the hoop on with the little ties. Turn fabric right side out.
All there is left to do now is find a great spot to tie the tent to.
My girls LOVE their tent!!!
Do your kids have a favorite hiding spot where they like to play?
Have you ever made your own fabric tent?
Leave us a comment in the section below, we’d love to hear your thoughts!!!
. . . . .
About the Author: Christina is a stay at home mom of three little ones. She loves everything handmade, homemade, and she loves the color orange. Stop by her blog, 2 Little Hooligans, for even more fabulous inspiration.
We originally published this guest post on Somewhat Simple in June 2010.


I love this. We actually have this Land of Nod tent, but it costs $99!
http://www.landofnod.com/family.aspx?c=52&f=517
great tutorial
do link it up with us so our readers can find you
http://www.finecraftguild.com/diy-tutorial-linky-party-5/
rose
I love this idea, and will be using this very very soon..Thank you!
Thank you so much for featuring my play tent! I got the sheets from Walmart and they only cost $3.00 each! Can you believe that? Thanks again.
So Very CUTE!! I love the pockets 🙂
Very cute, love that it is portable and can go anywhere!
That is adorable…I would have loved to play in that!
have a great day.
I love this! Where did you get your sheets that they came with those adorable little bags? I WANT SOME!! I'm definitely going to have to make one of these for my three little darlings!
LOVE THIS!!
Super cute! I am bookmarking this for my to-do list and adding your blog to my google reader.
Did you design your blog? I love it!!