
Welcome the kids home from their first day of school with a simple afternoon Back to School Party!
This Back to School Party idea is sponsored by Cricut. I’ll show you how to use the Cricut Joy and my favorite Smart Materials™ to make beautiful and creative classrooms, and celebrate the start of a new school year in a simple, but meaningful way!
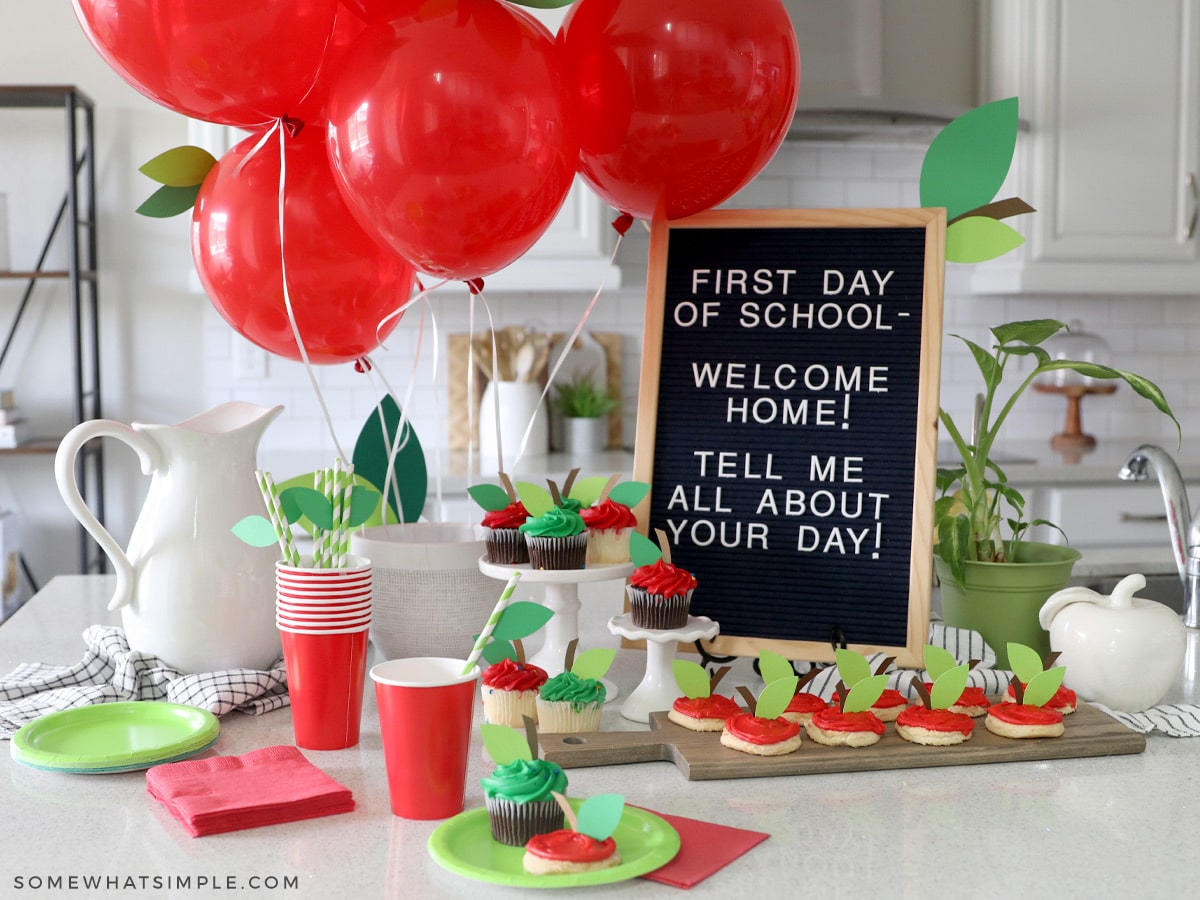
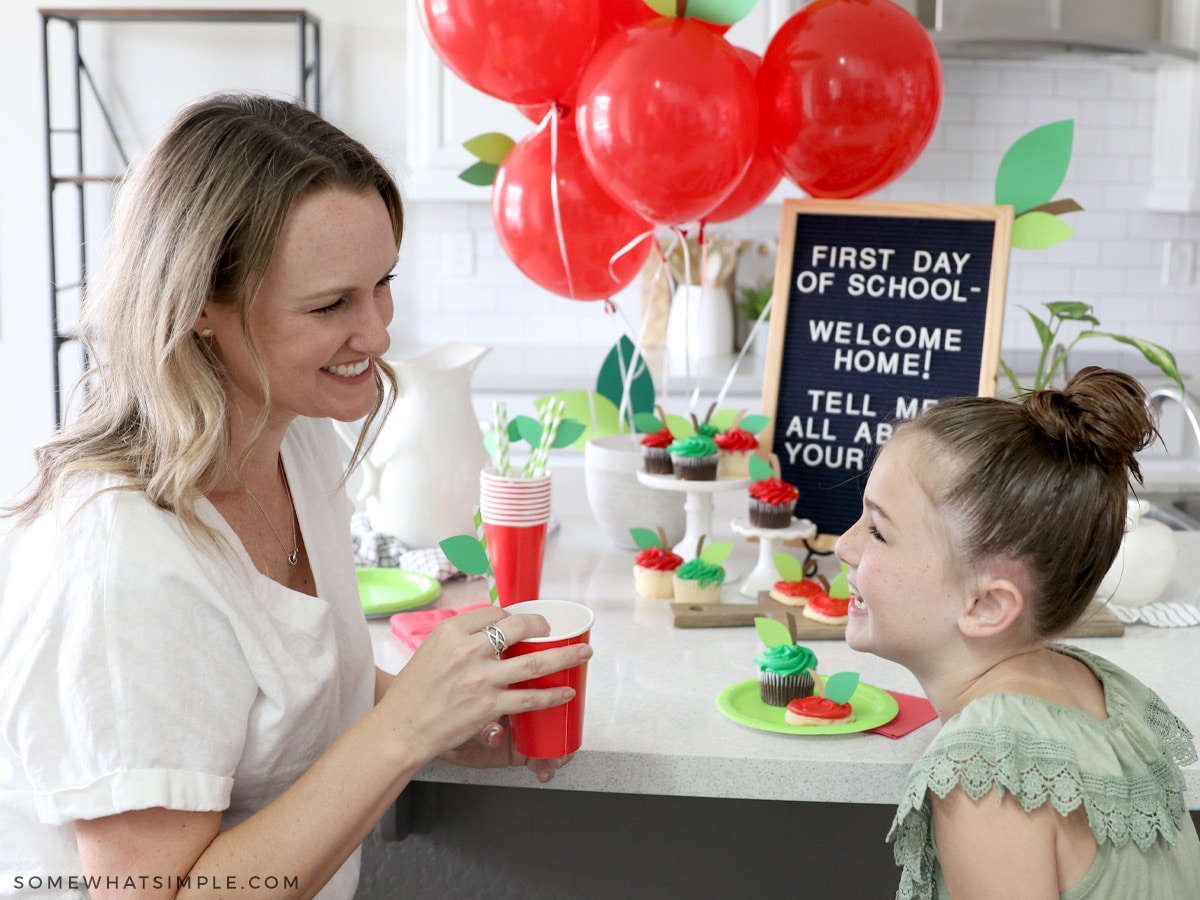
Years ago I set up a simple Back to School Cookie Station as a way to greet my kids when they got home on their first day of school. We sat and ate treats, and we talked about everything that happened that day at school.
This simple idea turned out to be our favorite Back to School tradition, and something they look forward to year after year!
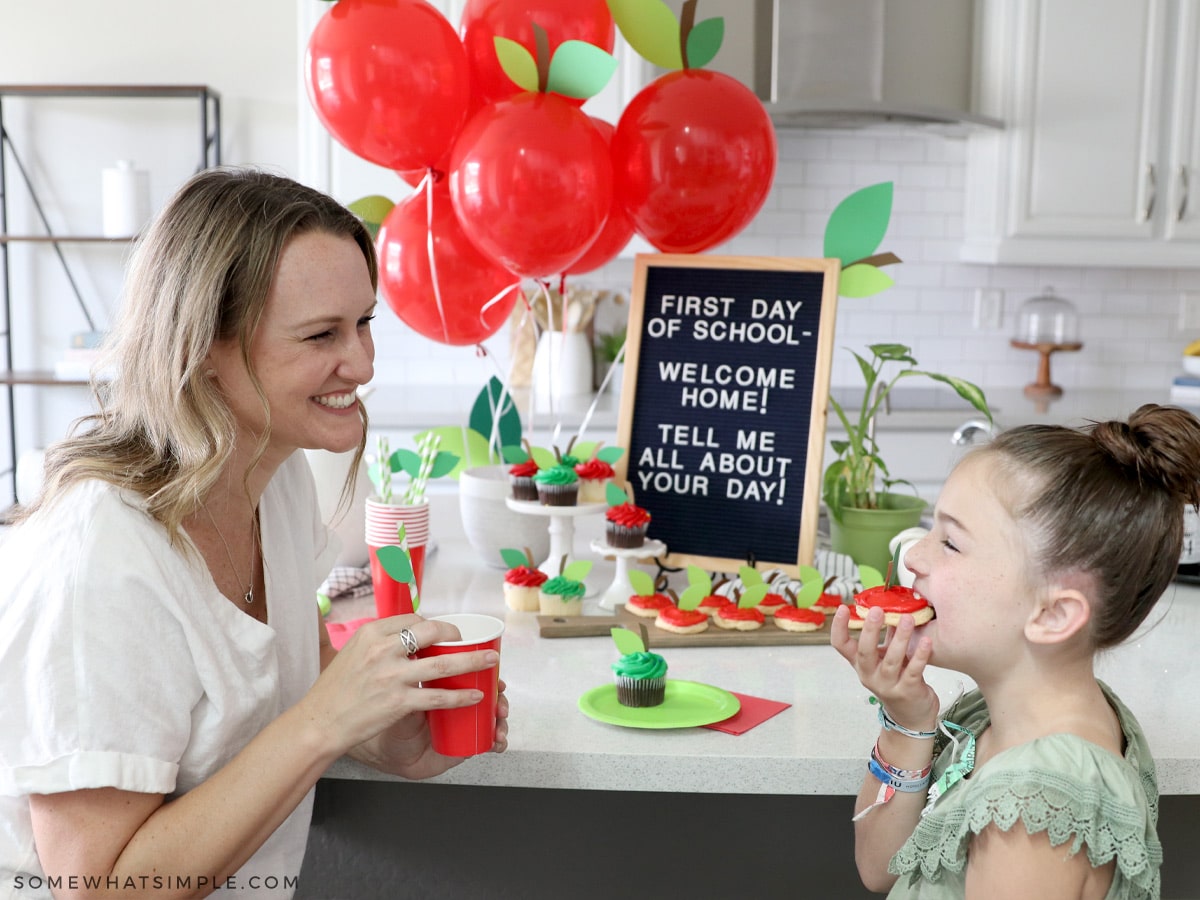
Last year’s first day of school was done via Zoom, and I all but forgot to set up our cookie station. I was reminded about it late that morning from my senior in high school. He wanted to make sure I kept the tradition going, even though school looked differently that day. It felt nice to create something “normal” since the rest of the day was definitely an adjustment!
Back to School Party Idea
If you want to make the first day of school extra special, here’s how to plan a simple Back to School Party that just might become your family’s new tradition!
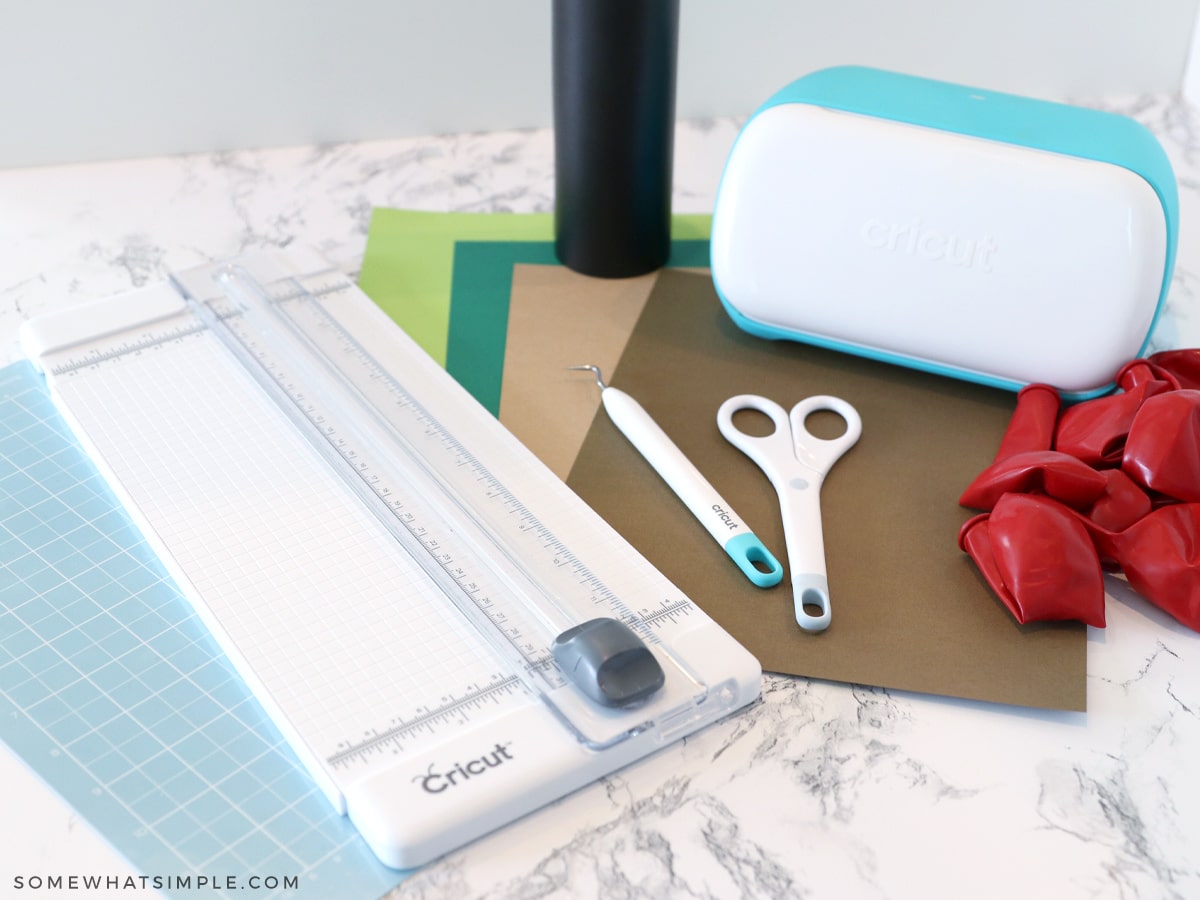
YOU WILL NEED –
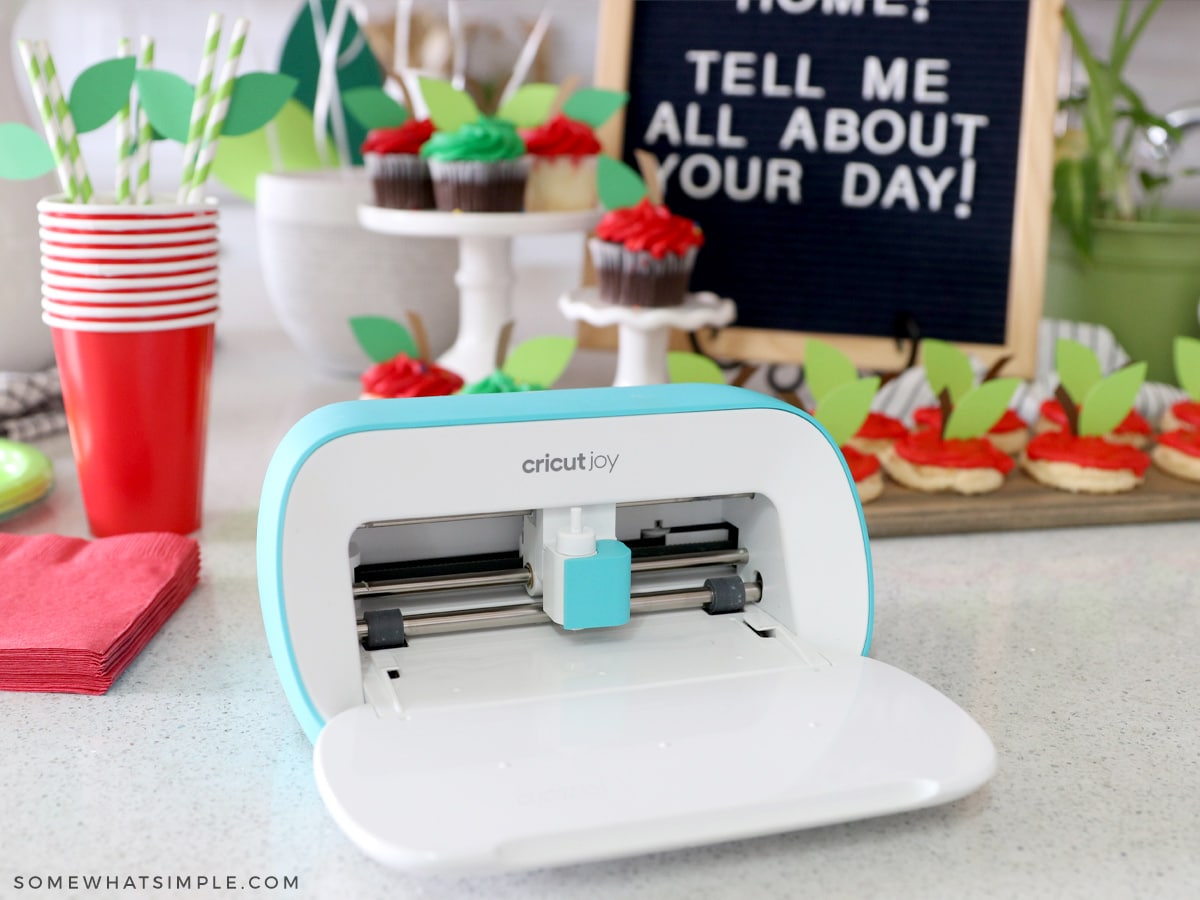
- Cricut Joy – I use this all the time for crafts, school projects, organization ideas, and more! Cricut’s machines + materials are so easy to use!
- cardstock – I used 2 different shades of green and one sheet of brown.
- cutting mat
- vinyl – I used black
- red balloons*
- clear tape
- helium tank
- red frosted cupcakes and cookies
- milk/ juice
- paper goods – napkins, straws, cups, etc.
* When purchasing your red balloons, keep in mind that bigger is better! Smaller balloons hold less helium and will get weighed down by the cardstock you’ll add to the top. We’d recommend getting 17″ balloons or bigger. If you can’t find any balloons that big, we’ll show you how to make the smaller ones work.
Party Set up
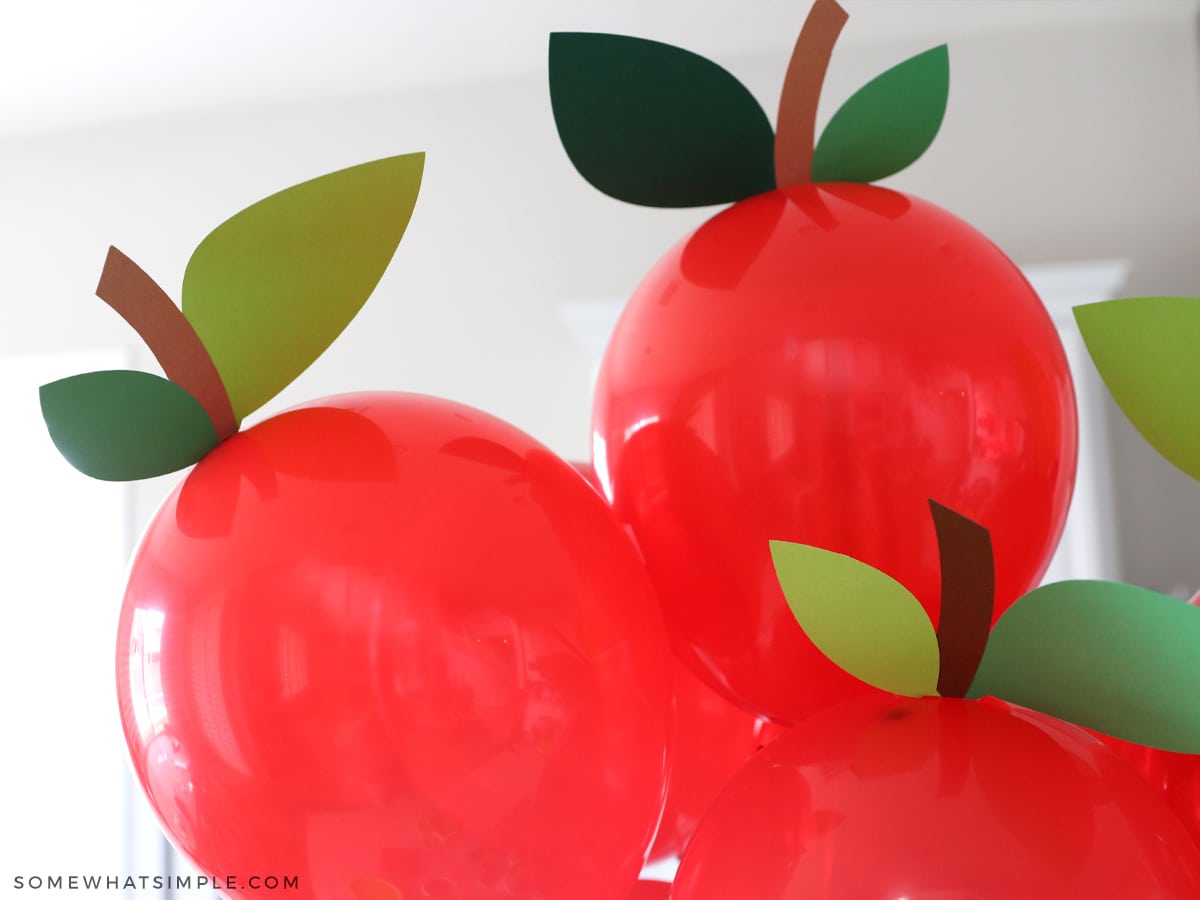
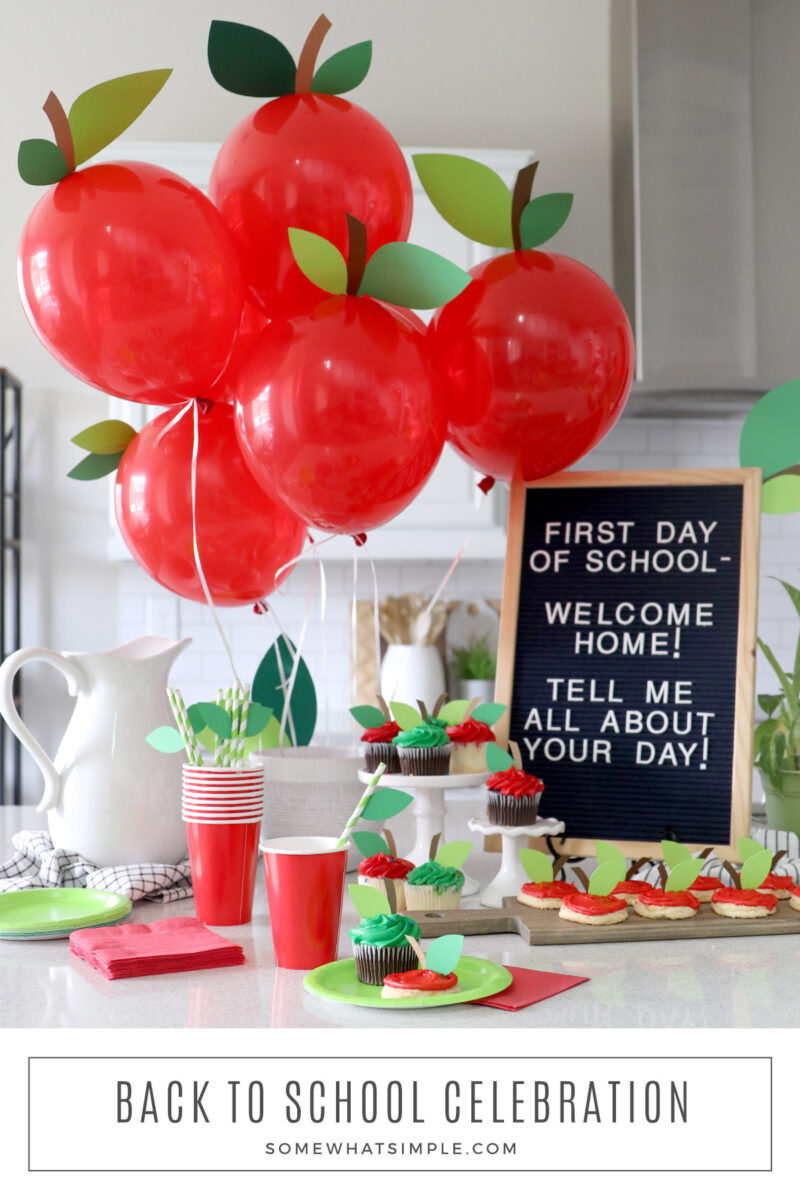
For this Back to School Treat Bar, we are going to use the Cricut Joy to cut out stems and leaves that we’ll add to our balloons and goodies to make them look like apples. Here’s how –
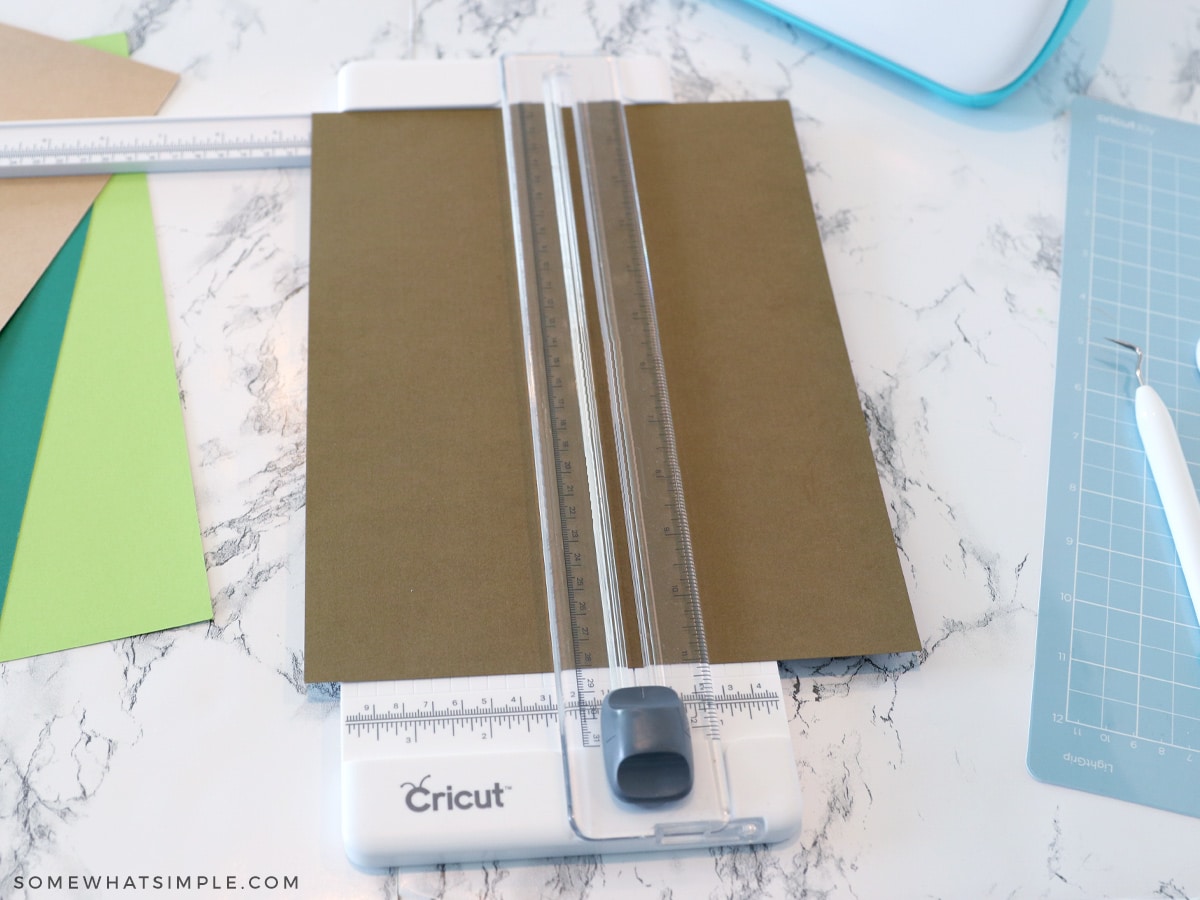
Start by trimming your cardstock to fit into your machine.
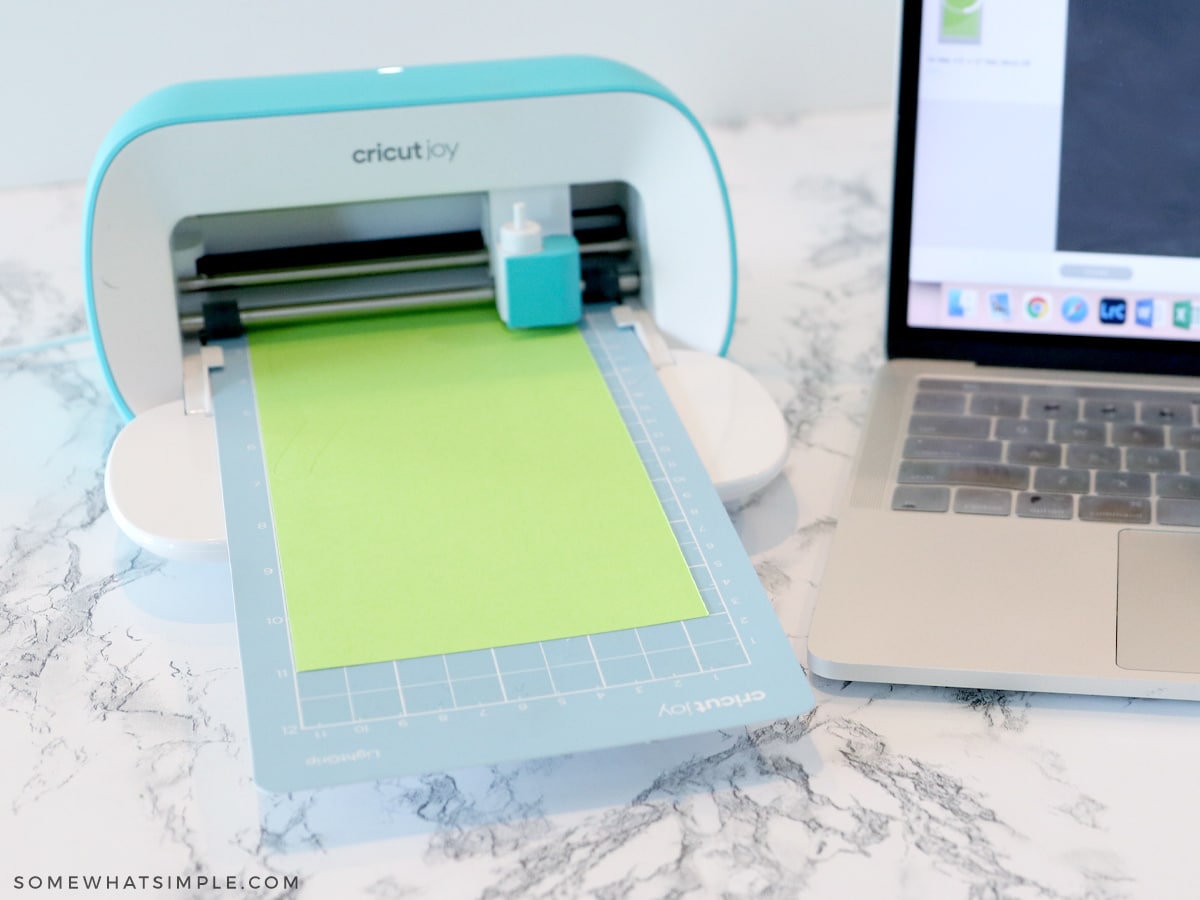
Use some premade designs for leaves and stems in Cricut Design Space, then cut them out on your cardstock.
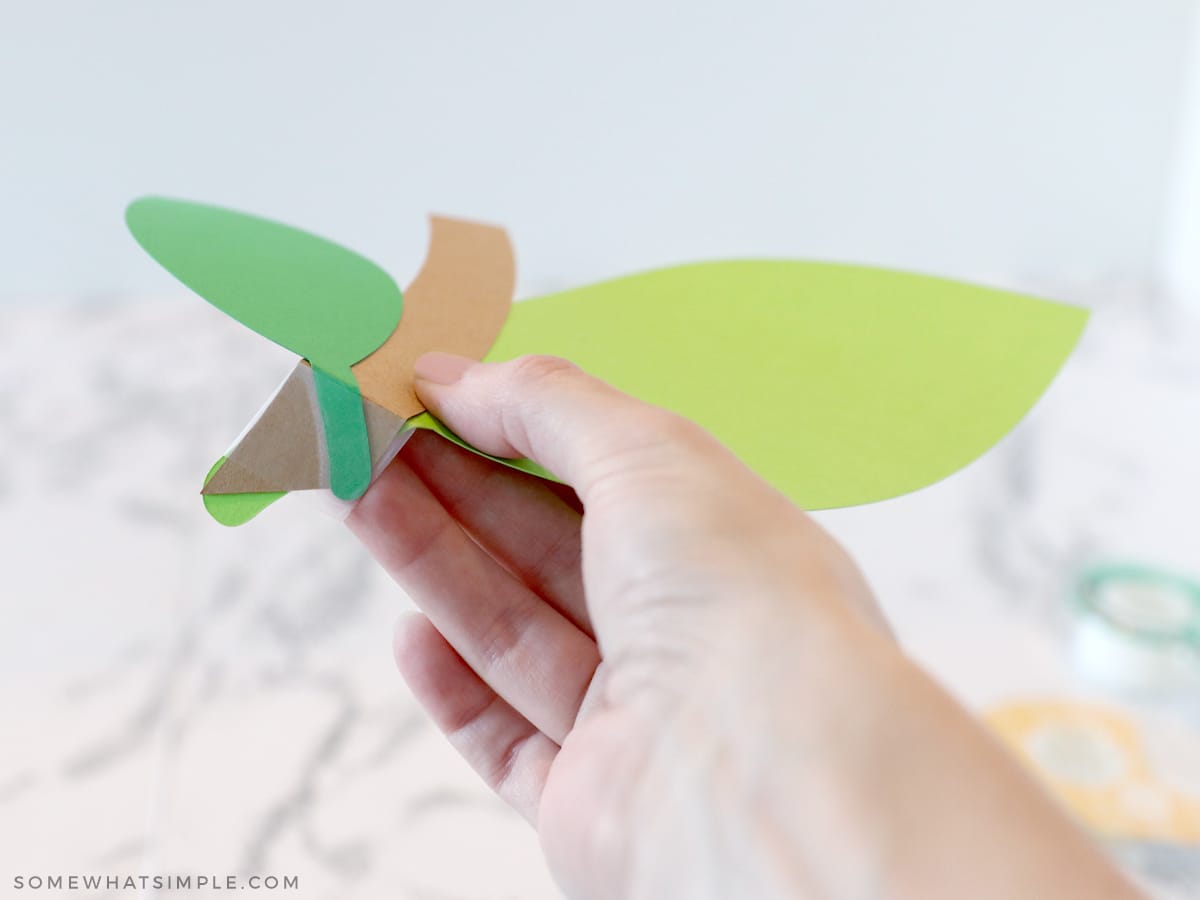
Tape the leaves to the stems, and fold the bottom to create a flap so you can secure this arrangement to the top of a balloon with some tape.
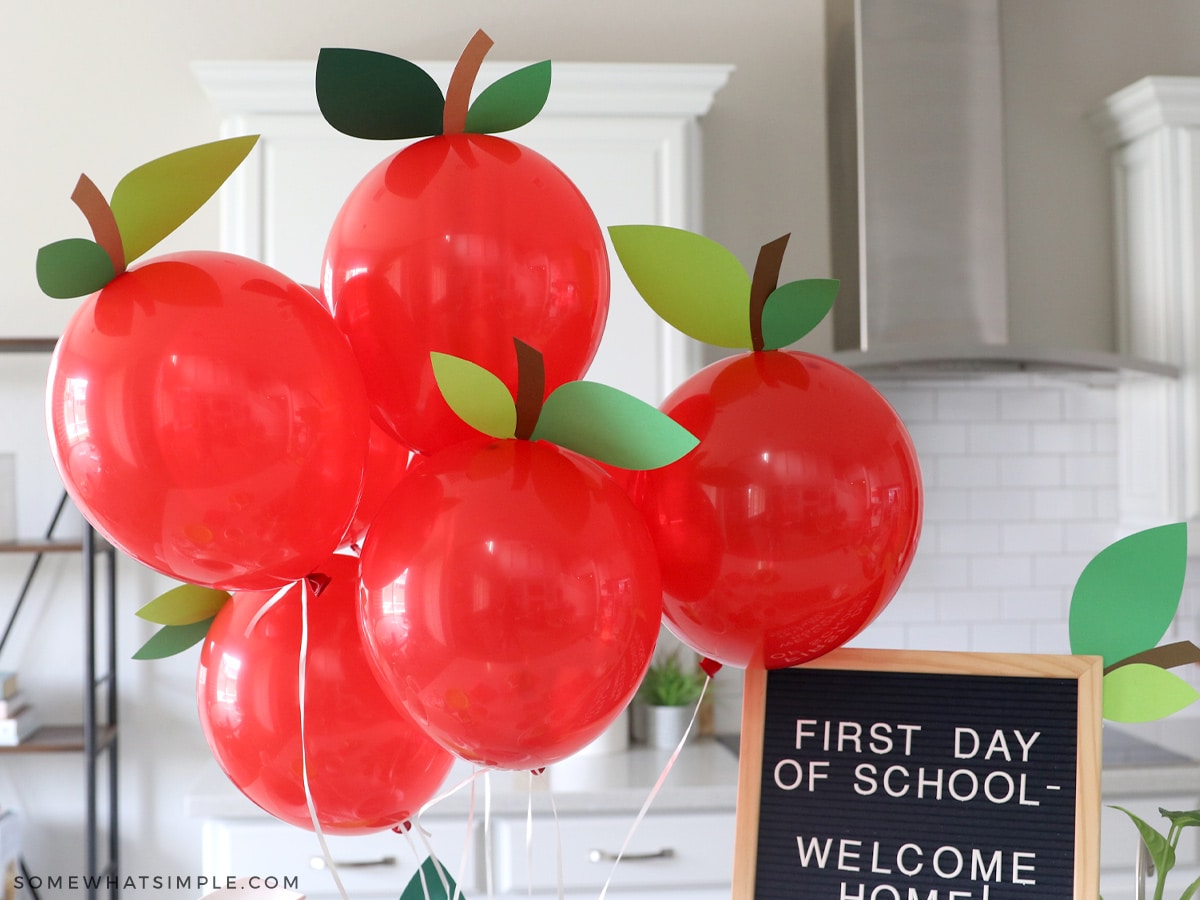
How cute are these apple balloons?!
If the weight of your cardstock stem + leaves is too much for your balloons, tape the balloons in a cluster first, then add the stems on alternating sides until everything is balanced and facing upwards. I’ll be honest, this took some time! Using bigger balloons is much easier, but don’t get discouraged – small balloons will work too!
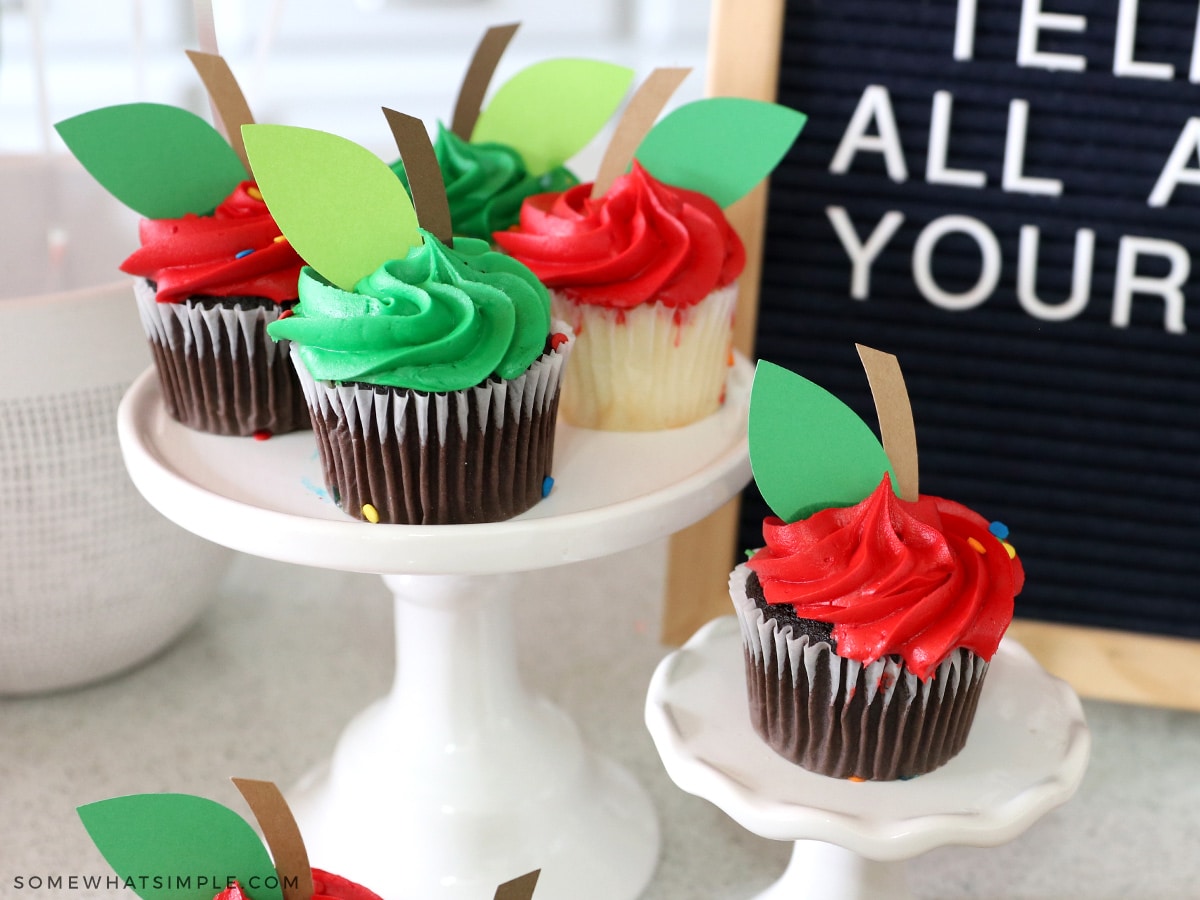
Add some smaller leaves and stems to your cupcakes…
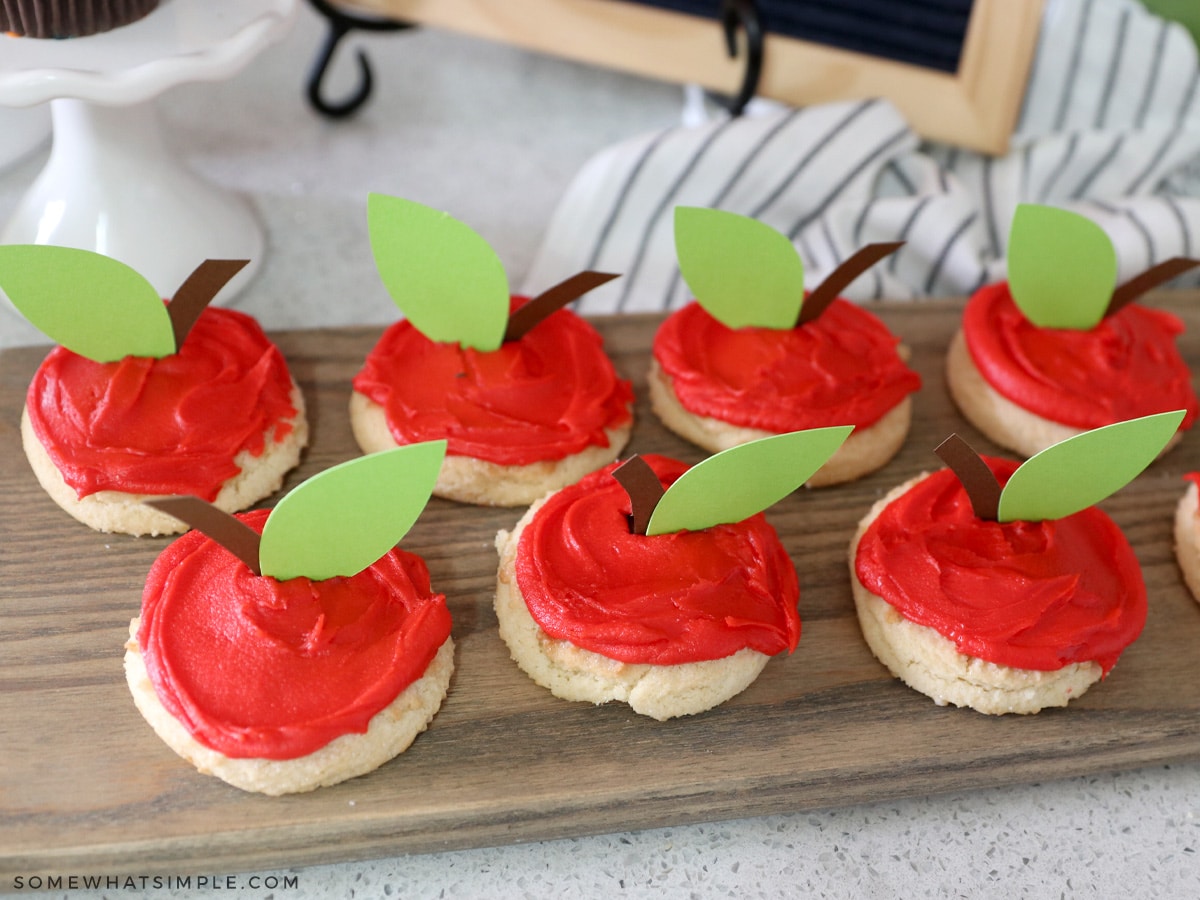
… and to your cookies…

… and to your paper straws!
This is such a simple way to make everything match and look festive!
This idea also serves as cute Back-to-School Photo Props that parents and teachers can use in their homes or classrooms.
- Make an apple balloon backdrop for kids to stand in front of. (Creativity sparks learning!)
- Add several balloons around the class for some easy classroom decor.
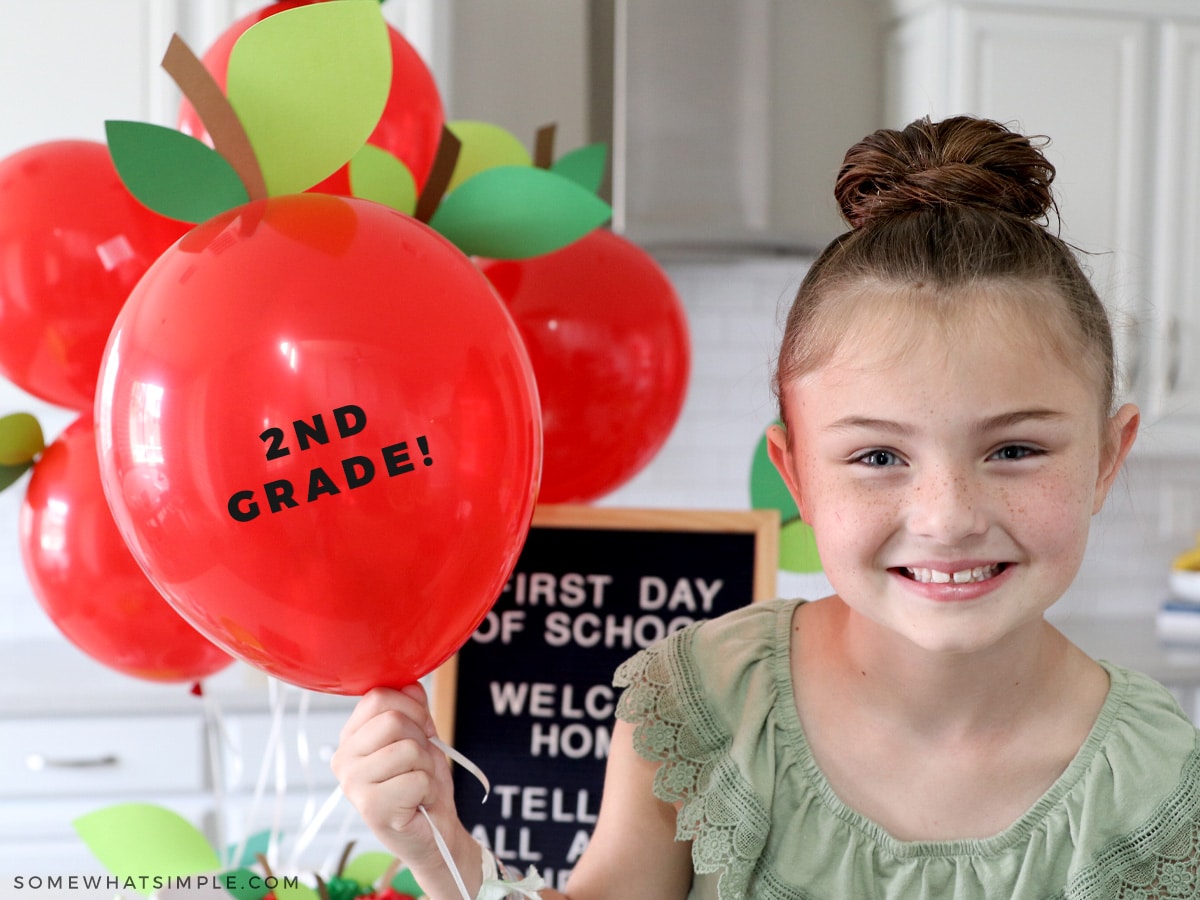
- Add some black vinyl of your child’s grade level to an apple balloon and snap a quick picture to document (and celebrate!) the start of a new school year!
So. Many. Options!!!
Cricut helps teachers and parents focus less on preparation and more on inspiration, so you can create moments with your kids that they’ll remember for a long time!
We hope you have a memorable and fun school year!
Cheers!


What a great idea for a party. I’m always so concerned getting my kids ready for school, I obviously over-looked this as an occasion to celebrate. Great pics!