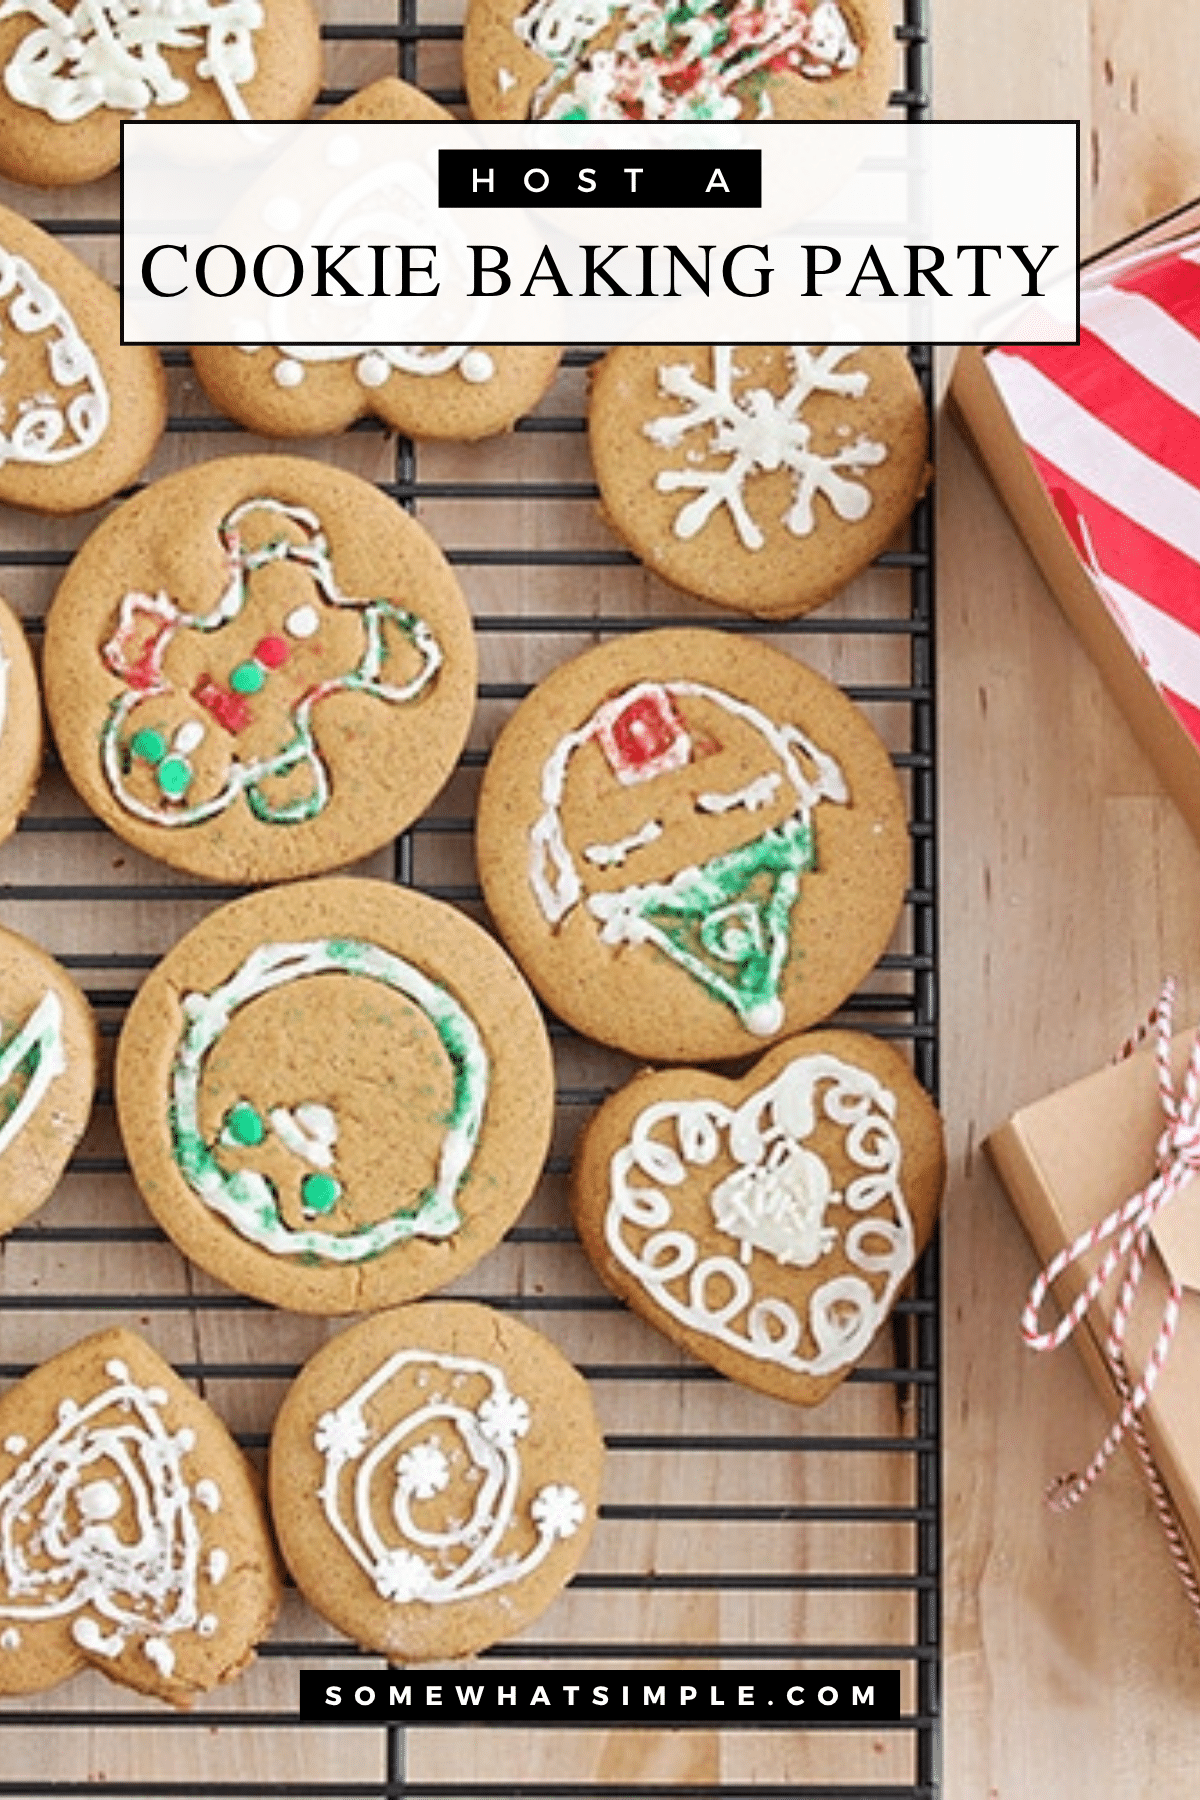

Looking for a fun, festive way to celebrate the season? A holiday cookie decorating party is the perfect blend of creativity, sweetness, and family fun. From setup ideas and icing recipes to sprinkle bars and gift packaging, here’s everything you need to host a cookie decorating party everyone will love.
This post is sponsored by Pampered Chef, but all opinions, sugar highs, and and frosting fingerprints are 100% mine.
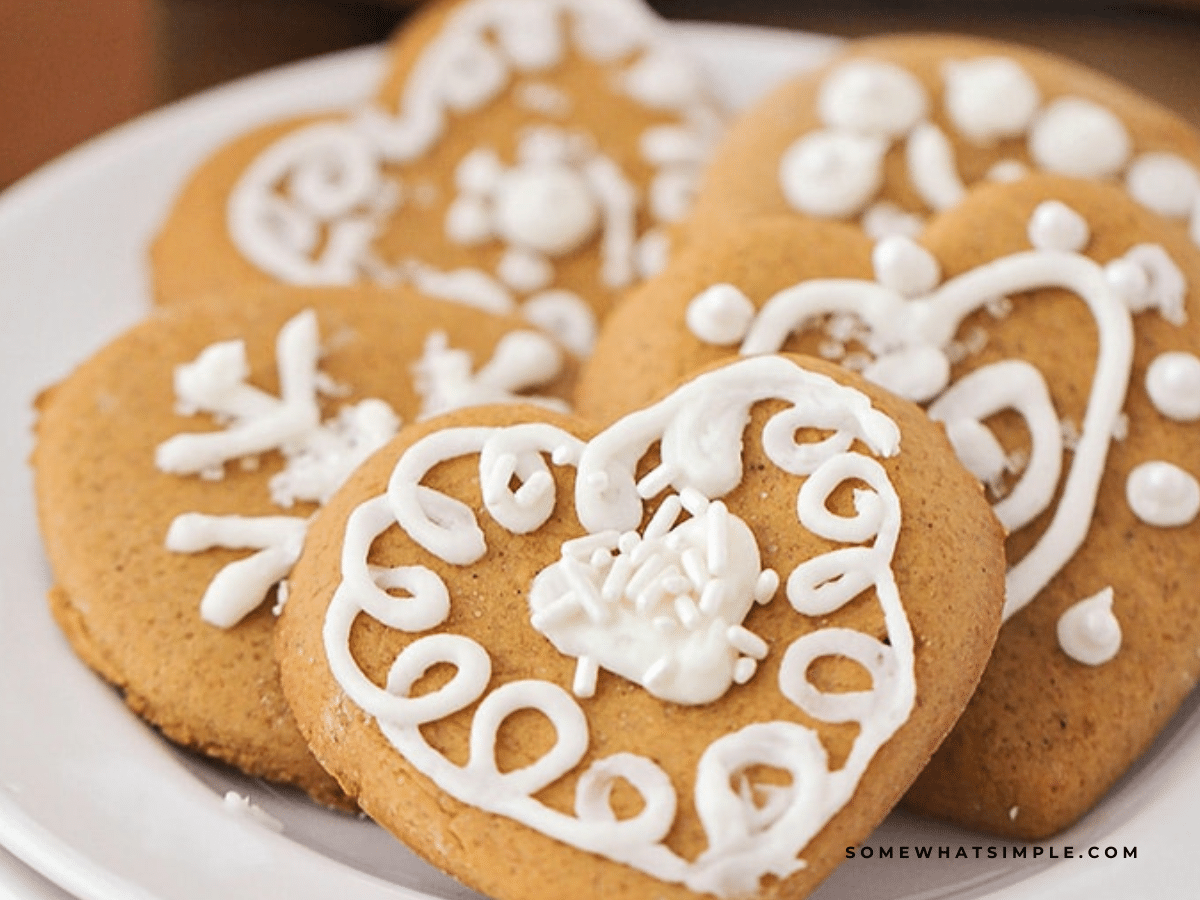
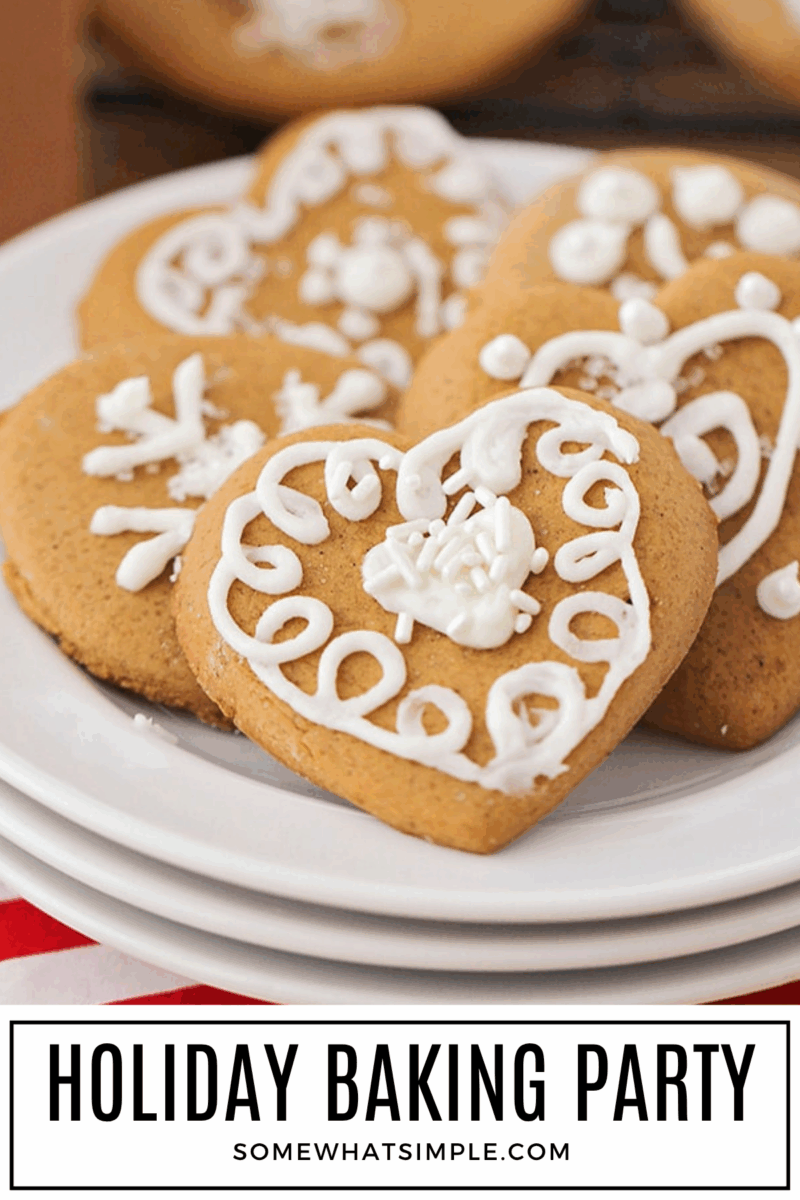
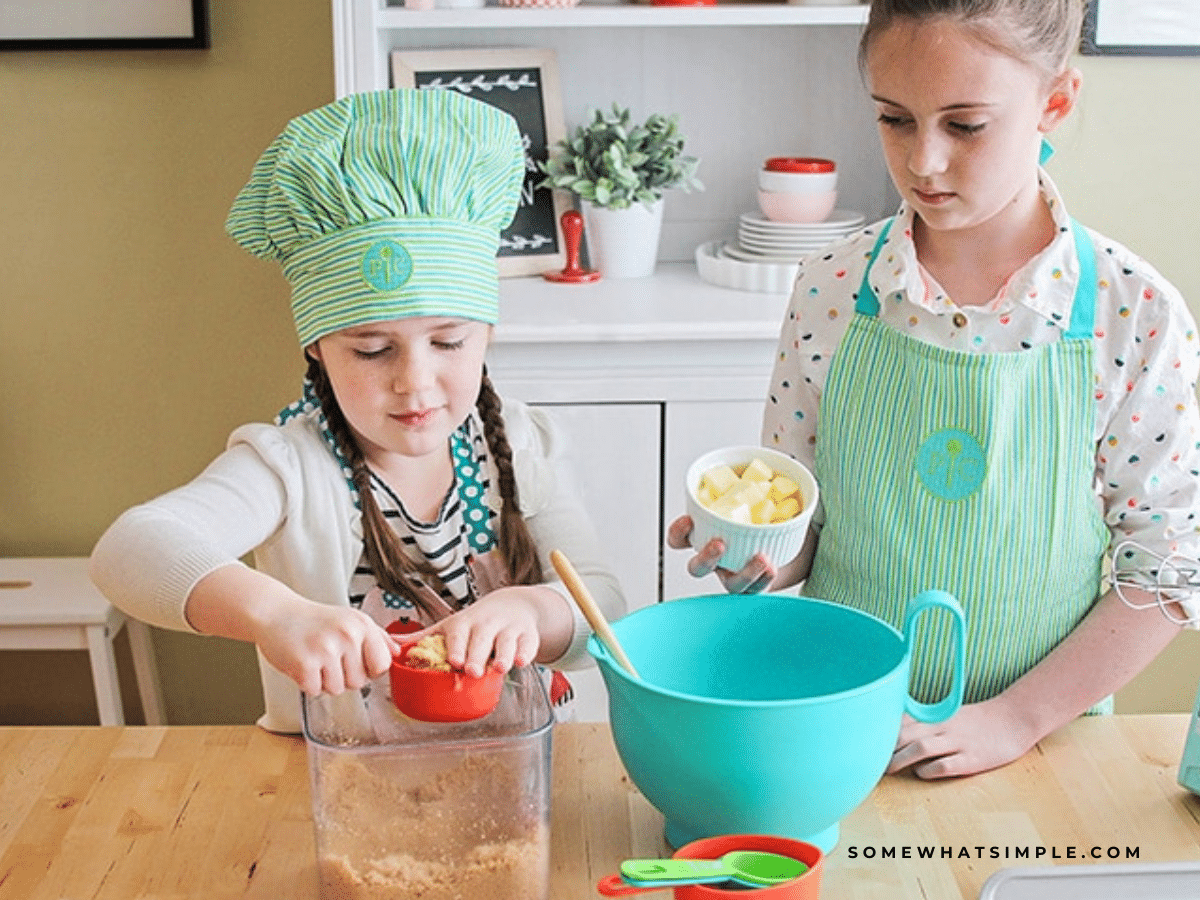
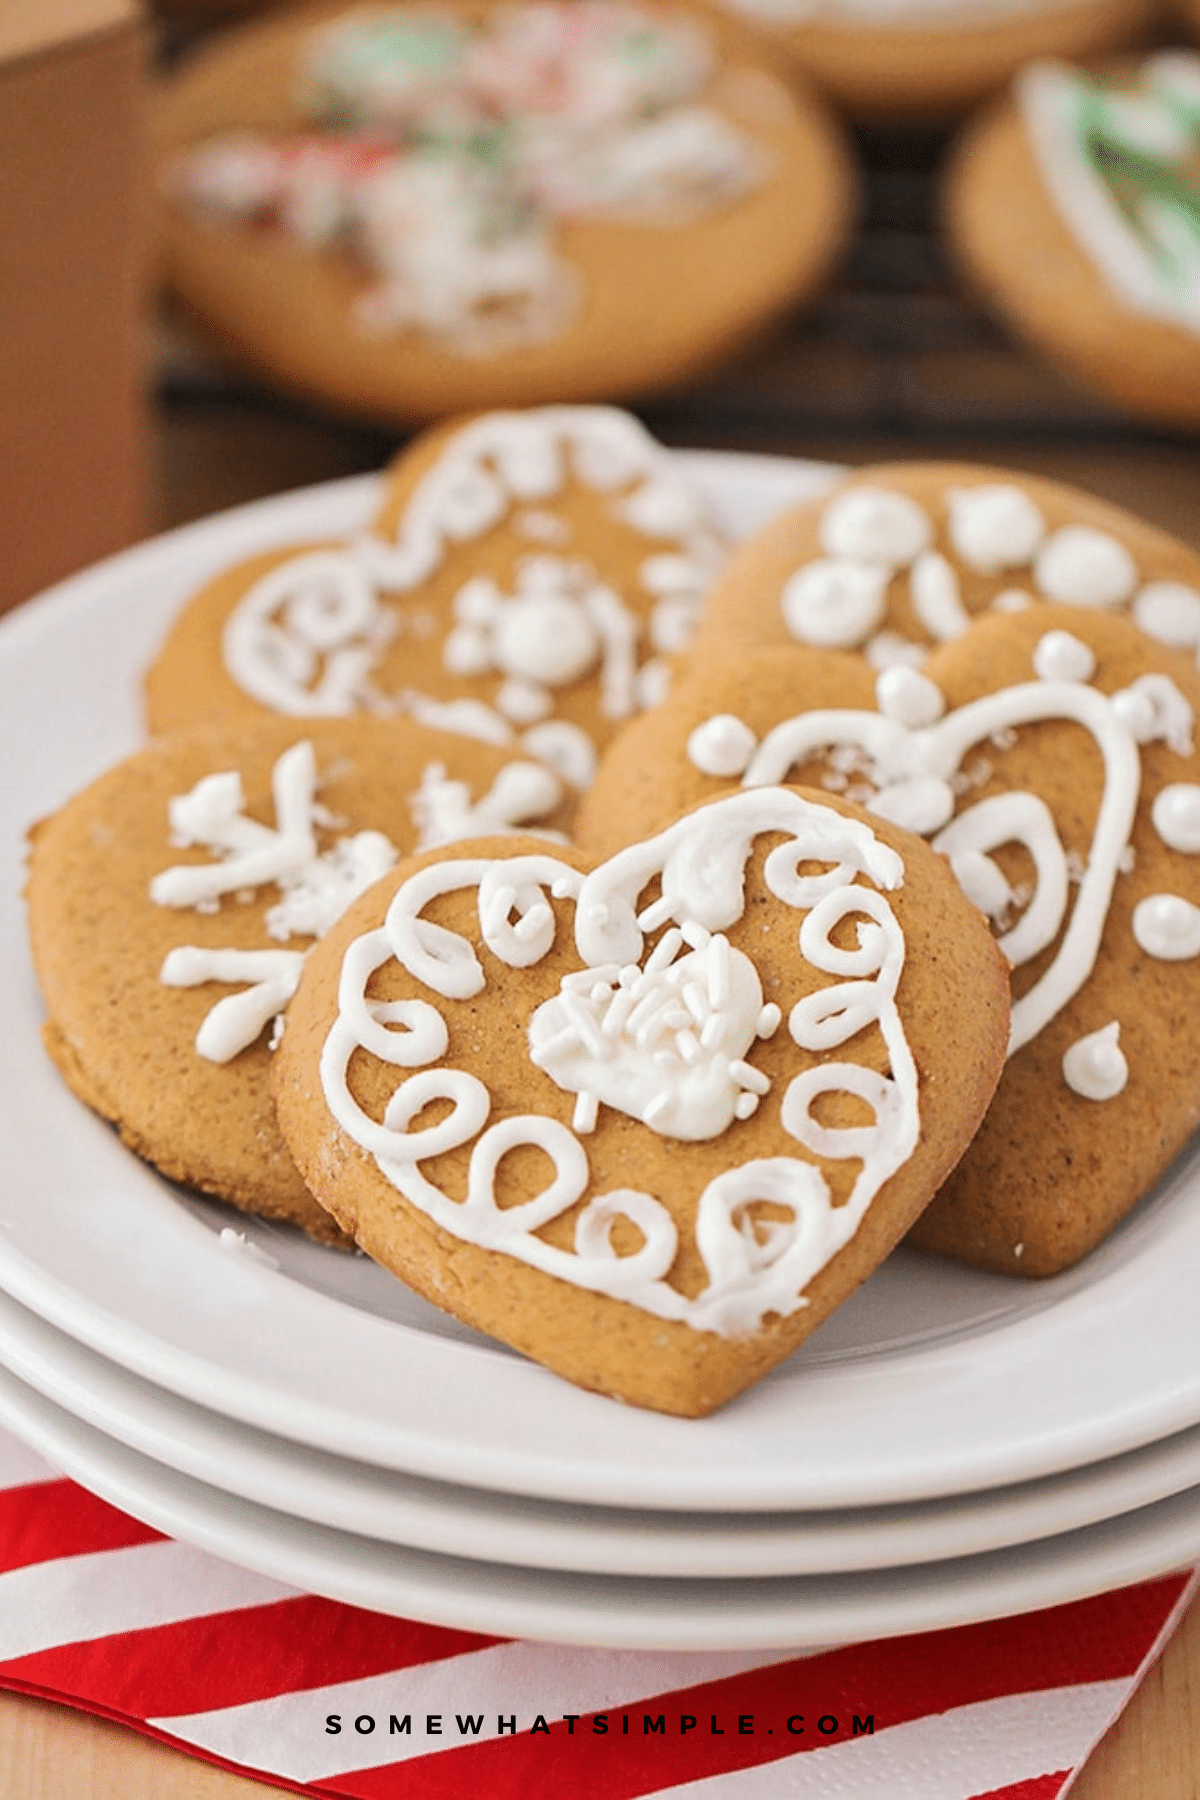
I love this time of year, even if it does always seem to slip by way too fast. It’s full of happy family activities, visits with friends and loved ones and so much delicious food. To get everyone in the holiday spirit this year, I decided to plan a fun holiday baking party with the kids. We had a great afternoon baking and decorating Gingerbread Cookies, then we spent the evening delivering treats to our friends and family. It was the perfect way to kick off our holiday season!
Why a Cookie Decorating Party is Pure Holiday Magic
Between wrapping gifts, attending a dozen school activities, and trying to find that one missing ornament, the holidays can get busy. But this? This is the kind of chaos you’ll actually enjoy.
A cookie decorating party gives everyone — kids, neighbors, even that one grumpy teenager — a reason to slow down and create something sweet together. Plus, it doubles as a gift-making session. Decorate a few cookies, package them up in cute boxes, and boom — you’ve just checked “neighbor gifts” off your to-do list.

Step 1: Set the Scene (and the Table)
The key to hosting a successful cookie decorating party is prep — but don’t worry, this is the fun kind.
Here’s what you’ll need to set the mood:
- A festive playlist. Think “Rockin’ Around the Christmas Tree” and “Jingle Bell Rock.”
- A decorating station. Cover your table with parchment paper or a disposable tablecloth. Trust me, frosting will end up everywhere.
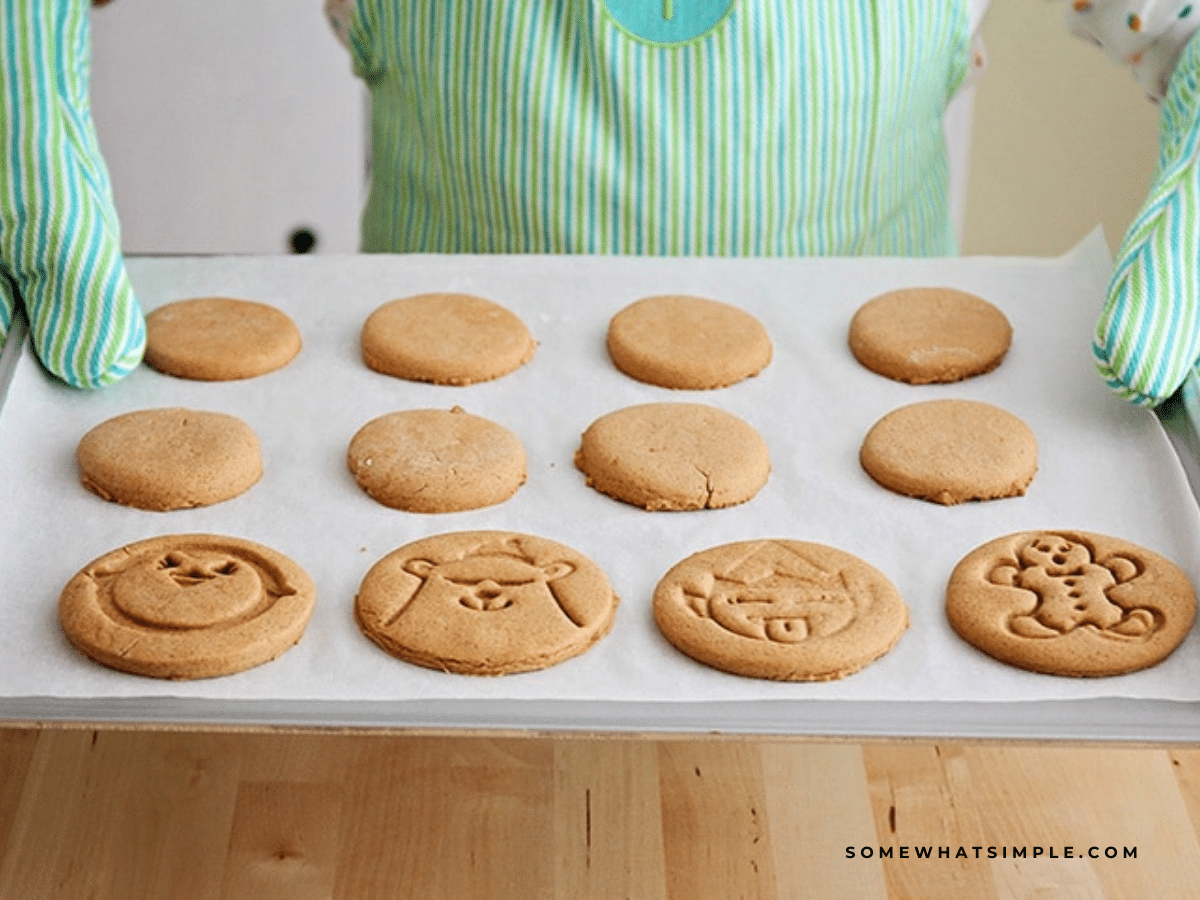
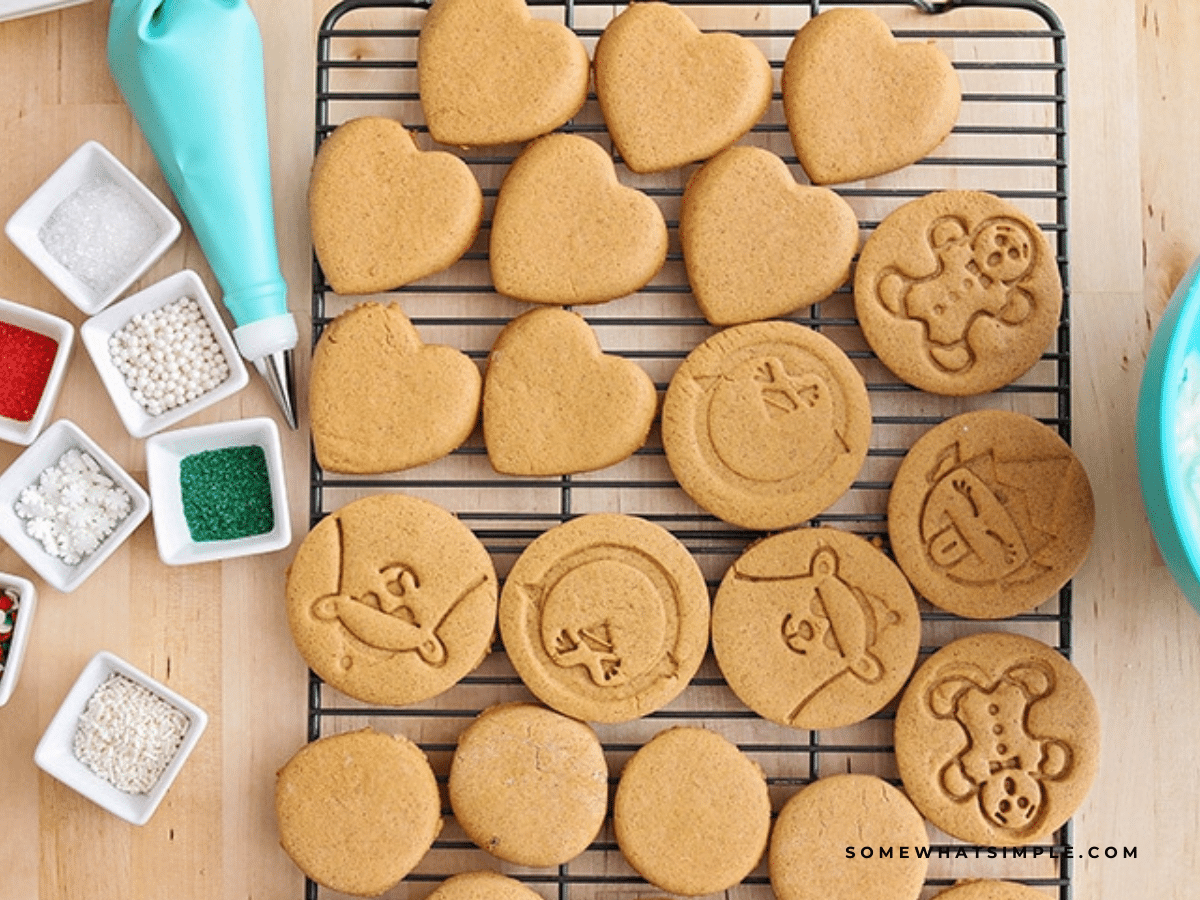
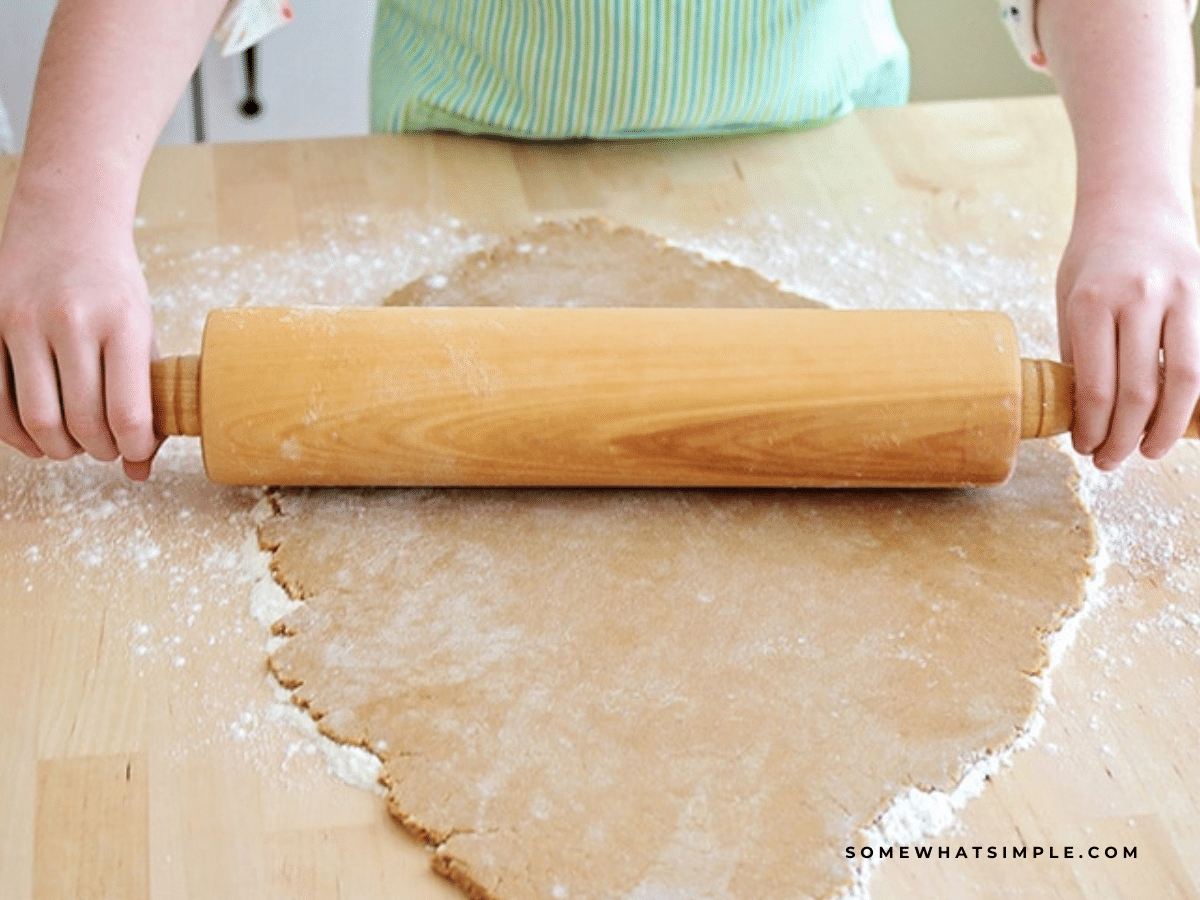
- Plenty of cookies. Bake a few batches ahead of time so they’re cooled and ready to decorate. (Gingerbread, sugar cookies, or shortbread all work great.)
- Aprons for everyone. The Pampered Chef Kids’ Apron + Chef Hat Set made my little bakers feel like pros — and saved their clothes from frosting disasters.
Step 2: Gather the Supplies
You don’t need a professional bakery setup to pull this off — but the right tools make a big difference.
Here’s what we used and loved from Pampered Chef:
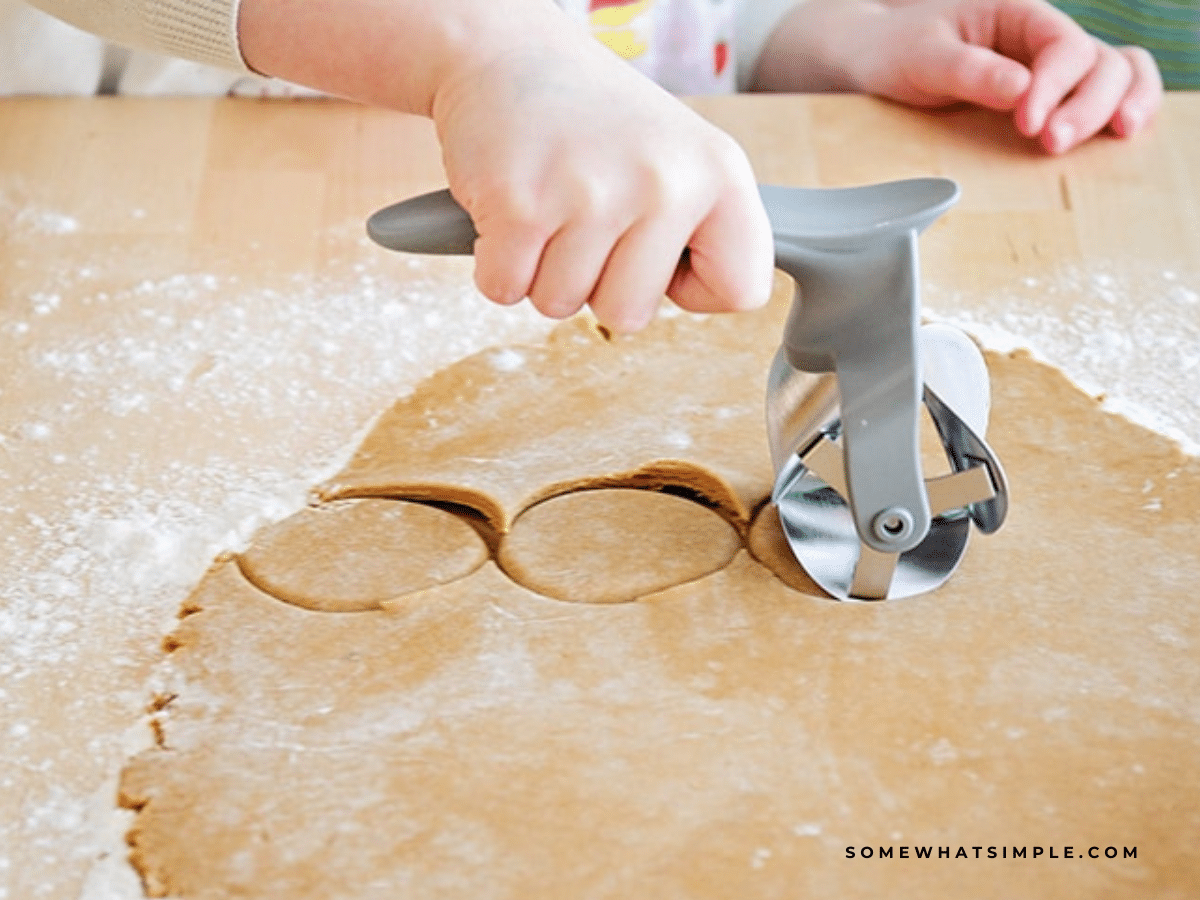
- Rolling Cookie Cutter: Cuts perfect shapes with zero wasted dough. The interchangeable discs let you switch between circles, hearts, and squares.
- Christmas Cookie Cutters: These imprint adorable designs right onto your dough — instant “wow” factor with no extra effort.
- Decorating Bag Set: Comes with multiple tips, so even kids can pipe designs without squeezing frosting all over the counter.
Bonus tip: Snap a quick photo of your baking station before everyone starts. It’ll never look that clean again.
Step 3: Make the Icing (and Keep It Simple)
Skip the fancy royal icing that takes hours to set — this is not a Great British Bake Off audition.
All you need is:
- 2 cups powdered sugar
- 2–3 tablespoons milk
- ½ teaspoon vanilla extract
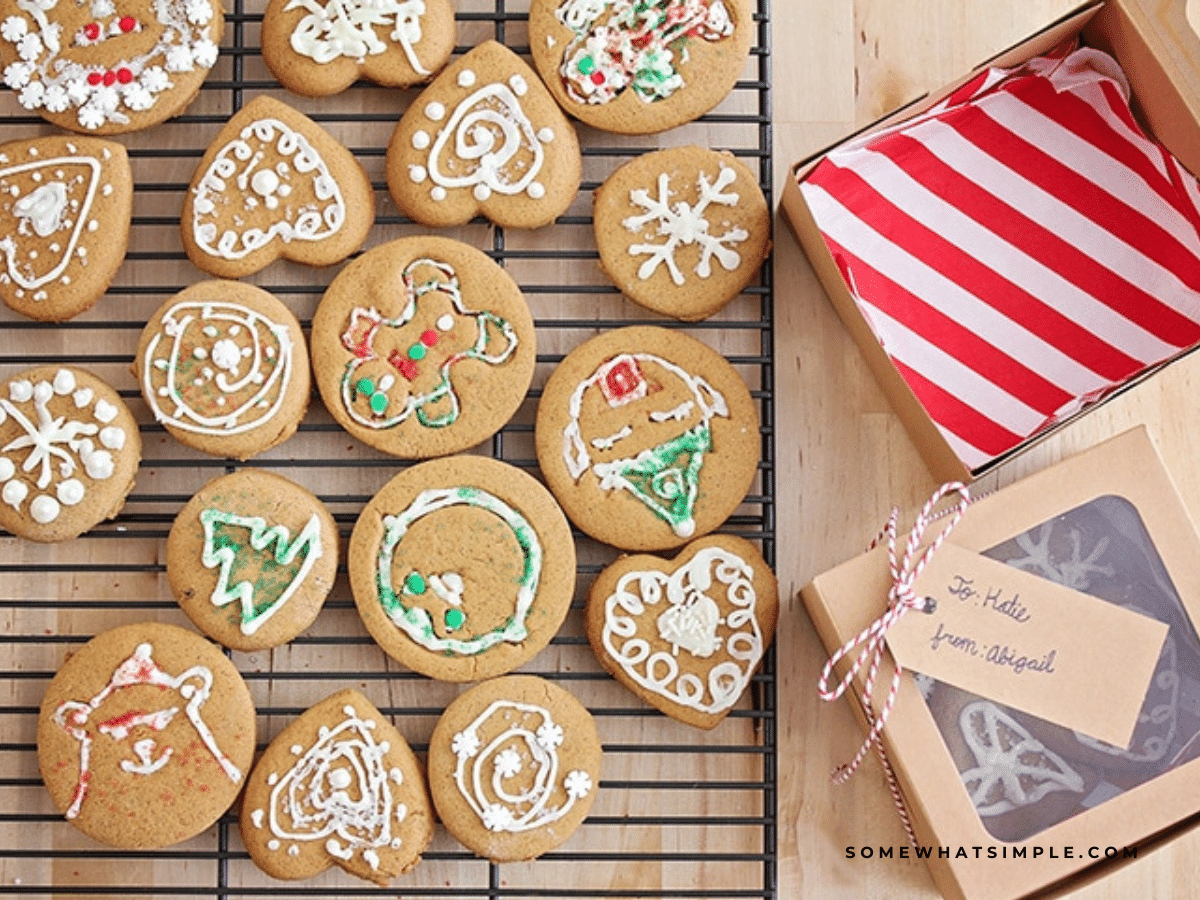
Mix until smooth, then divide into bowls and tint with food coloring. Set out plastic spoons or squeeze bottles for easy decorating.
Pro tip: Add a splash of corn syrup for glossy, shiny icing that looks store-bought but isn’t.
Step 4: Sprinkle Station = Party Central
Kids (and let’s be honest, adults) will spend 80% of their time here. Create a sprinkle bar with small bowls of:
- Colored sugars
- Mini chocolate chips
- Crushed candy canes
- Holiday-themed sprinkles
- Shredded coconut (for “snow”)
Encourage creativity! Award fun superlatives like Most Festive Cookie, Best Use of Sprinkles, and Most Likely to Fall Apart But Still Delicious.
Step 5: Package the Cookies Like a Pro
Once the cookies are decorated and dried, it’s time for the best part — sharing them!
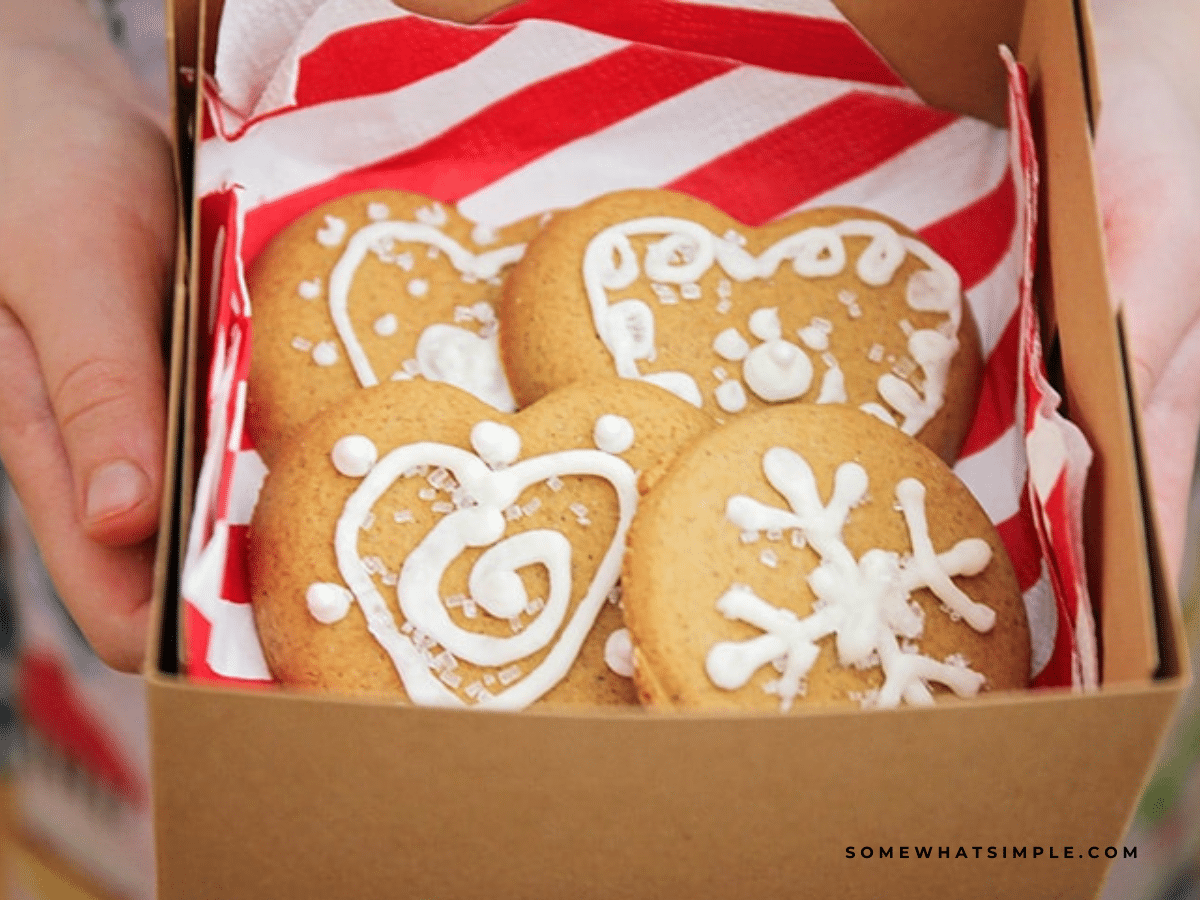
We used the Pampered Chef Cookie Gift-Making Set for packaging, and it couldn’t have been easier. I lined each box with a cute napkin, tucked in a few cookies, tied on some twine, and added a gift tag. They looked like something straight out of a holiday market — but took all of five minutes.
Step 6: Keep It Chill
The goal isn’t perfection — it’s fun. Cookies will break. Someone will eat more frosting than they use. Your kitchen will look like a sugar bomb went off. And that’s exactly how it should be.
So pour some hot cocoa, put on your coziest sweater, and enjoy the mess. Because long after the sprinkles are swept up, these are the moments your kids will remember.
Quick Tips for Hosting a Stress-Free Cookie Decorating Party
- Bake cookies the day before so you can jump straight into decorating.
- Use squeeze bottles for kids — less mess, more control.
- Offer a few snacky things (like pretzels or popcorn) so guests don’t fill up on frosting.
- Have take-home boxes ready so everyone leaves with treats — and not a sugar crash.
- Take a group photo at the end — messy hands, frosting smudges, and all.
Sweet Memories Start Here
Our holiday cookie decorating party was one of those perfectly imperfect days — the kind where the kitchen smells like cinnamon, everyone’s giggling, and somehow there’s flour on the ceiling. It’s become a tradition we look forward to every December, and I can’t recommend it enough.
So grab your mixing bowls, cue up the Christmas music, and host a cookie decorating party of your own. The cookies might not last long — but the memories definitely will.