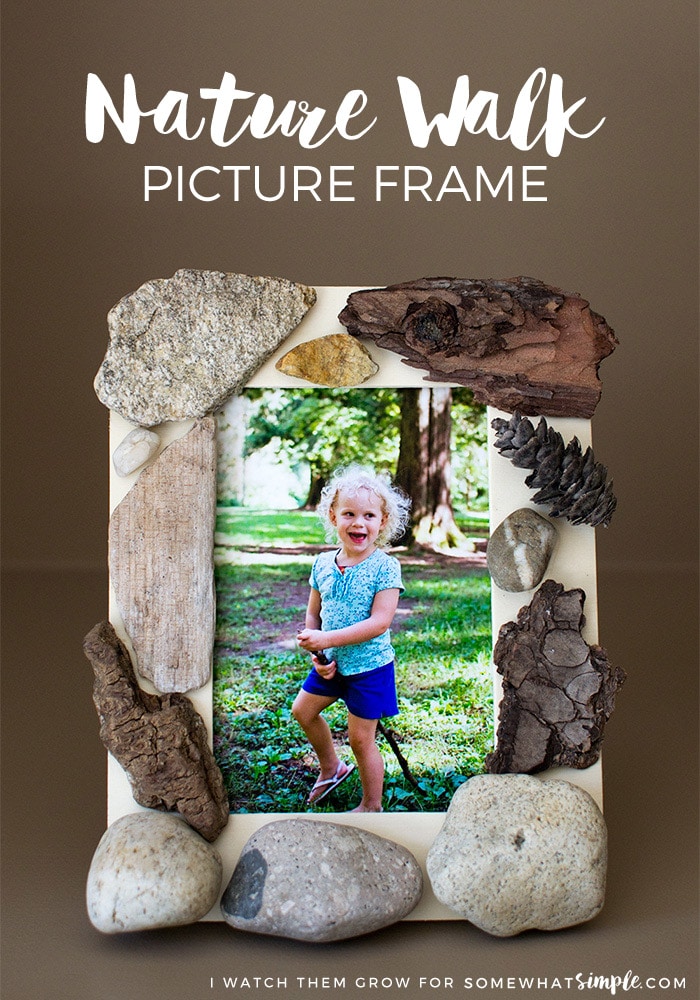
What do you get when you combine exploring nature, memory keeping and crafting? A nature walk picture frame! This frame is fun and simple to make, and it becomes a beautiful memory and piece of decor for your home!
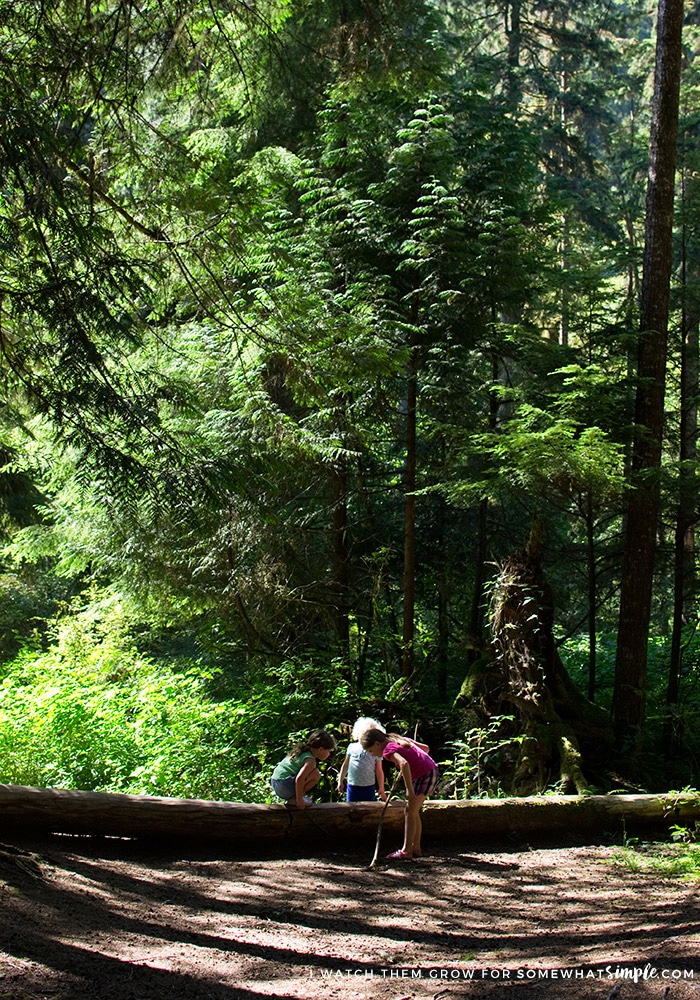
Do your kids stuff their pockets with rocks, twigs, flowers and a bunch of other outdoor treasures each time you’re out in nature? This activity and craft is the perfect way to insure those little “treasures” don’t end up all over your house!
PART 1: THE NATURE WALK
MATERIALS:
- a bucket or bag to hold the treasures
- your camera
DIRECTIONS:
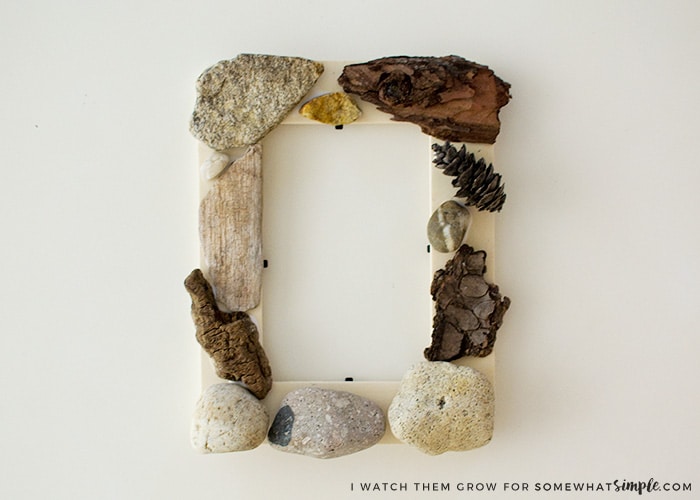
- Head outdoors to get some fresh air! Explore and collect pieces of nature and put these small items in your bucket. The things your kids collect will depend on where you go, of course, but look for things that are small enough and light enough to stay on the frame. It’s also smart to use things things that won’t decompose or become really fragile over time – like leaves, don’t use leaves. We used rocks, twigs, driftwood and dried pine cones.
- Snap a picture to include inside the frame.
- … and that’s it! Have fun making memories!
* It’s very important to make sure, before collecting or removing any natural items from a park, that you are legally allowed to do so. I don’t want to turn your family into criminals over this craft, so please double check! 😉
PART 2: NATURE WALK PICTURE FRAME CRAFT
The picture frame craft involves gluing the collected items from the nature walk onto a picture frame, letting it dry, and adding a picture. It’s pretty simple!
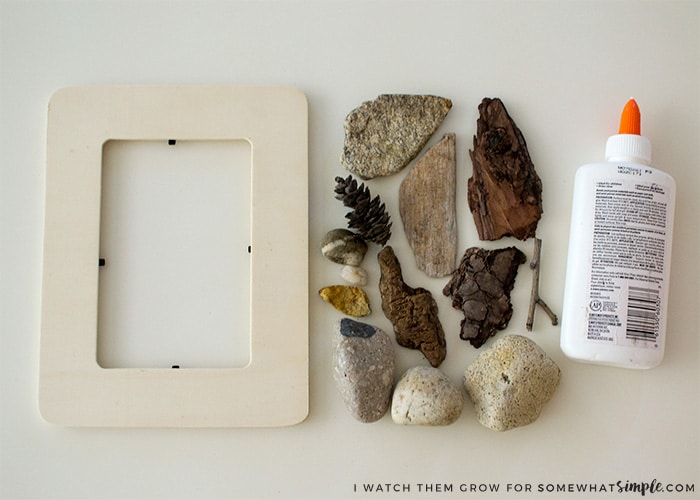
MATERIALS:
- items from your walk*
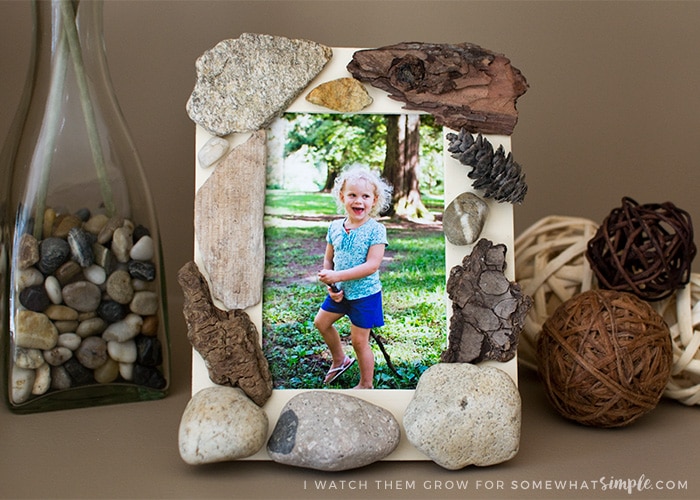
- a wood picture frame with a wide, flat edge (We used a 4×6 craft frame from Michael’s)
- liquid white glue
- printed picture for inside the frame.
*You may need to let your items dry out before gluing them to the frame.
DIRECTIONS:
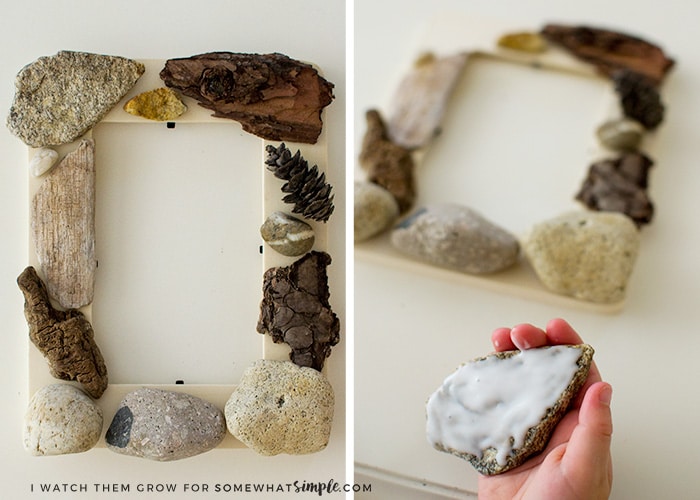
- Arrange your nature walk items on the frame to fill it in. It is easiest to start with the biggest pieces and then fill in the spaces with the smaller pieces. Fit the different shapes together like a puzzle, and arrange the different colors and textures how you like. Younger kids may need some help with this part.
- One at a time, lift a piece off the frame and squirt a generous amount of glue all over the back of it, wherever it contacts with the picture frame. It is best to find the flattest side of each piece to place down on the frame so it sticks better.
- Place it back on the frame and press down.
- Repeat until all items are glued down.
- Keep the frame flat and let it dry for at least 24 hours.
- Once dry, place the photo of your child inside the picture frame.
And there you have it: a unique and special picture frame, for you and the kids!
Here are the 3 frames we made on our last walk:
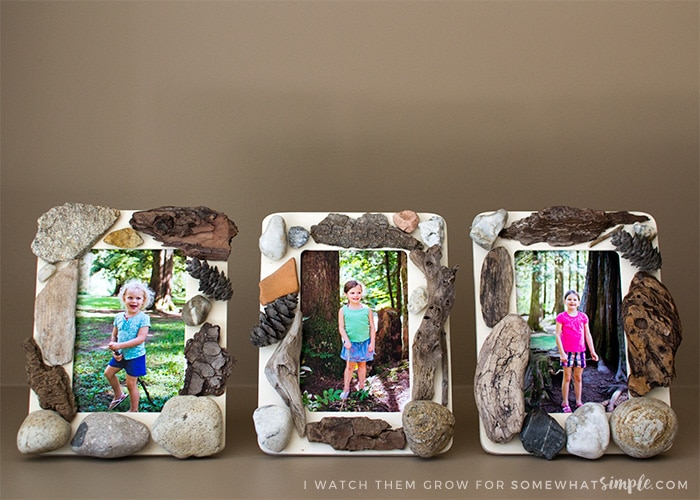
So simple and so fun!


