
Learn how to make colorful popsicle soap with grated bar soap, coconut oil, and mica powder. An easy DIY perfect for gifts or bathroom decor.
I’m going to be honest — when my friend told me she was making soap in the shape of colorful popsicles, I had questions.
Mainly: Why?
Followed closely by: Is this about to be one more craft that looks cute on Pinterest but requires a chemistry degree and 47 ingredients?
Good news: it’s neither.
This is one of those rare DIY projects that is actually easy, surprisingly affordable, great for gifts, fun to do with kids, and cute enough that people will ask where you bought them.
Even better? No complicated soap formulas. No stress.
If you can grate cheese, you can make this soap.
Let me show you exactly how it’s done.
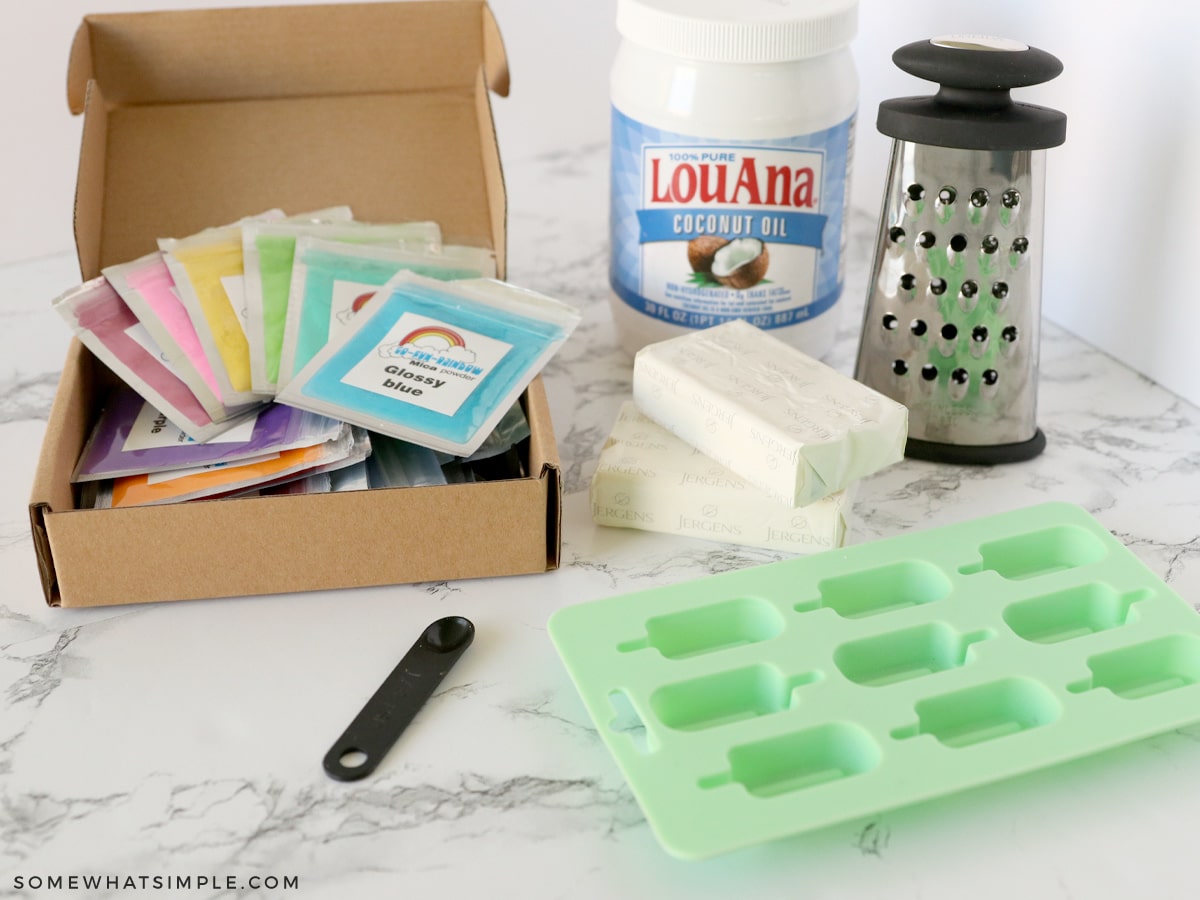
What You’ll Need
- Silicone popsicle mold (the one I have isn’t on Amazon anymore, but there are other options!)
- 1 bar of soap
- 1 teaspoon coconut oil (or more, as needed)
- Cosmetic mica powder (skin-safe)
- Small saucepan
- Metal cheese grater
- Measuring spoon
- Spoon or silicone spatula
Step-by-Step: How to Make Popsicle Soap
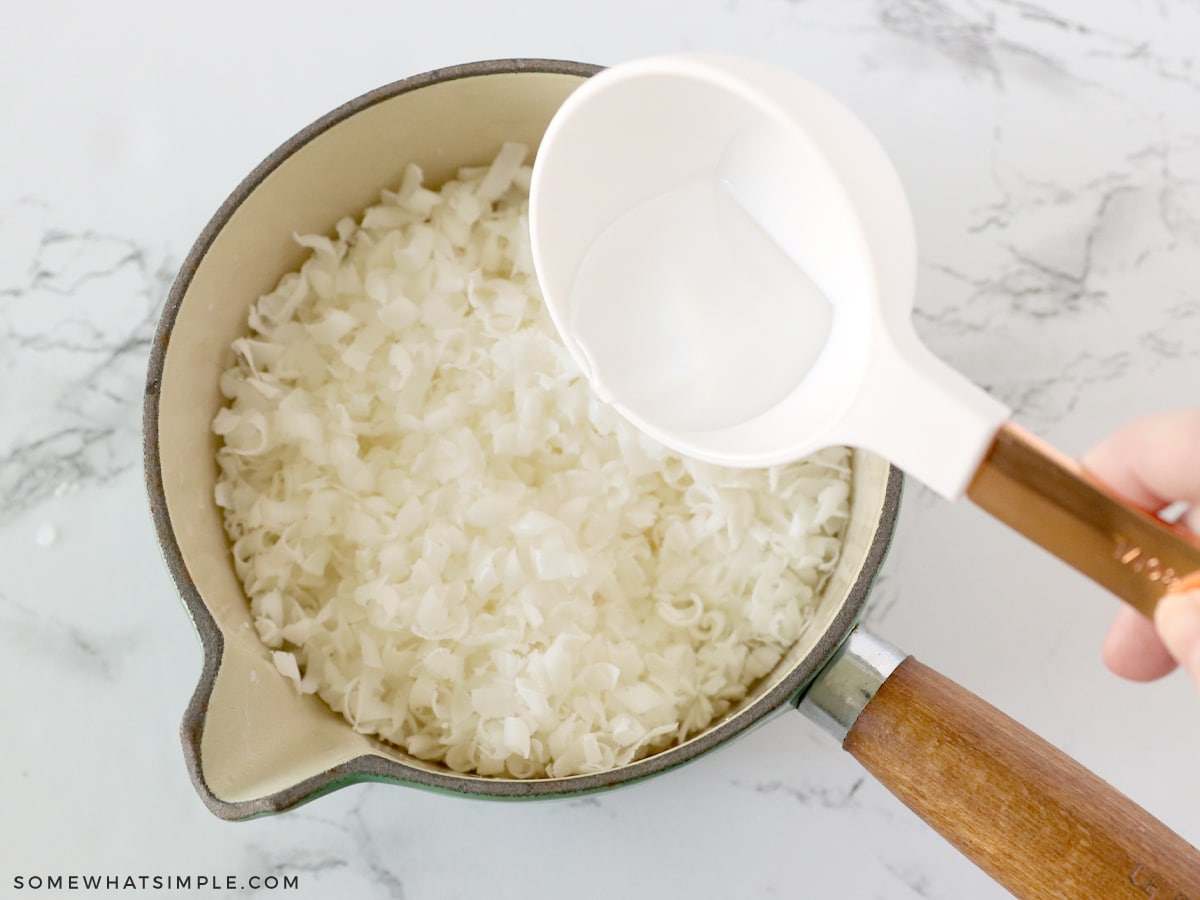
1. Grate the Soap
Using a metal cheese grater, shred the bar soap into small flakes. Smaller pieces melt more evenly and help prevent overheating.
2. Melt the Soap (Low Heat Method)
Place the grated soap directly into a small saucepan and turn the burner to very low heat.
Add about 1 teaspoon of coconut oil per bar of soap and mix until incorporated. This helps smooth the texture, reduce crumbling, add moisture, and make the soap easier to press into molds.
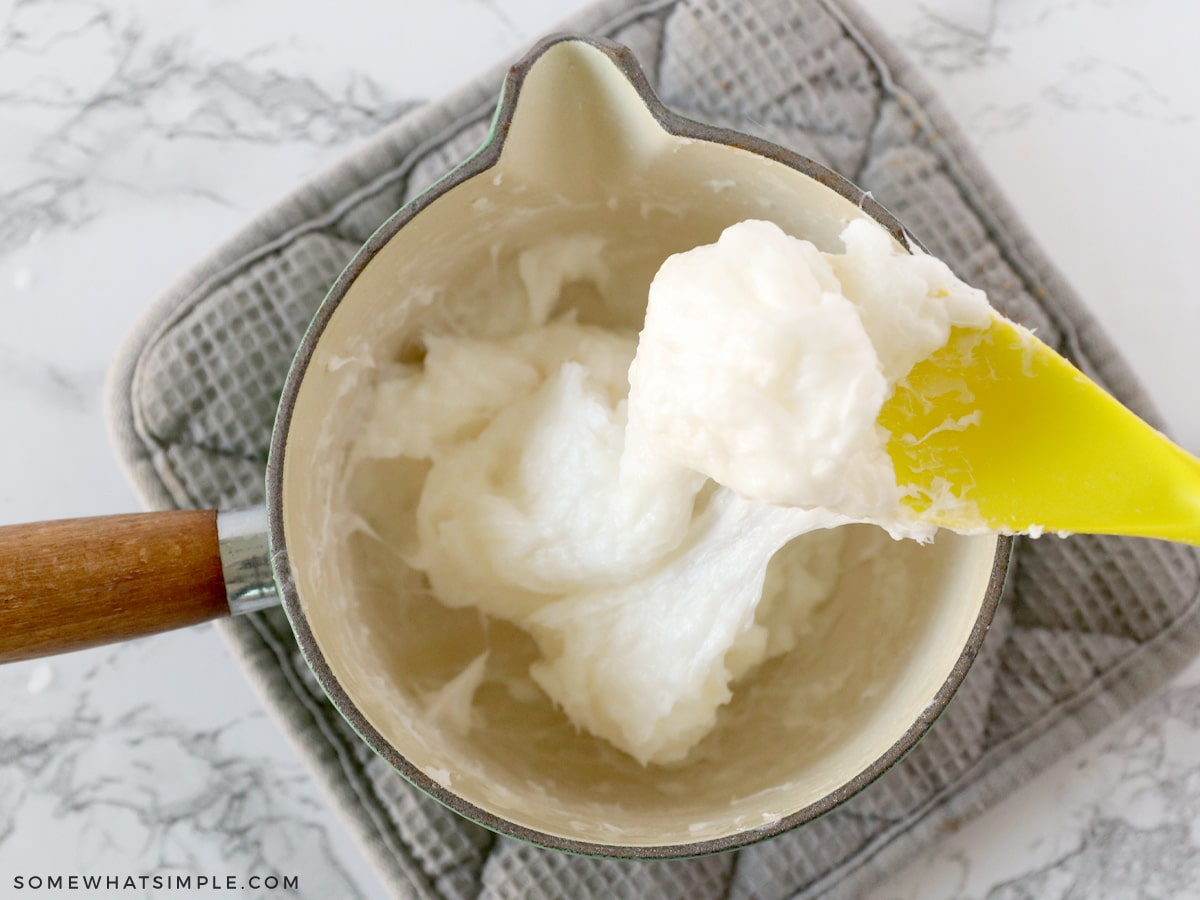
Important: this is not the time to multitask. Soap can scorch quickly if the heat is too high, so stir frequently as it warms.
- Instead of becoming fully liquid, the soap will soften into a thick, mashed-potato-like consistency. That texture is exactly what you want.
- If it seems too dry while melting, add a little more coconut oil and continue stirring.
- If you prefer a more controlled heat method, you can also melt the soap using a double boiler.
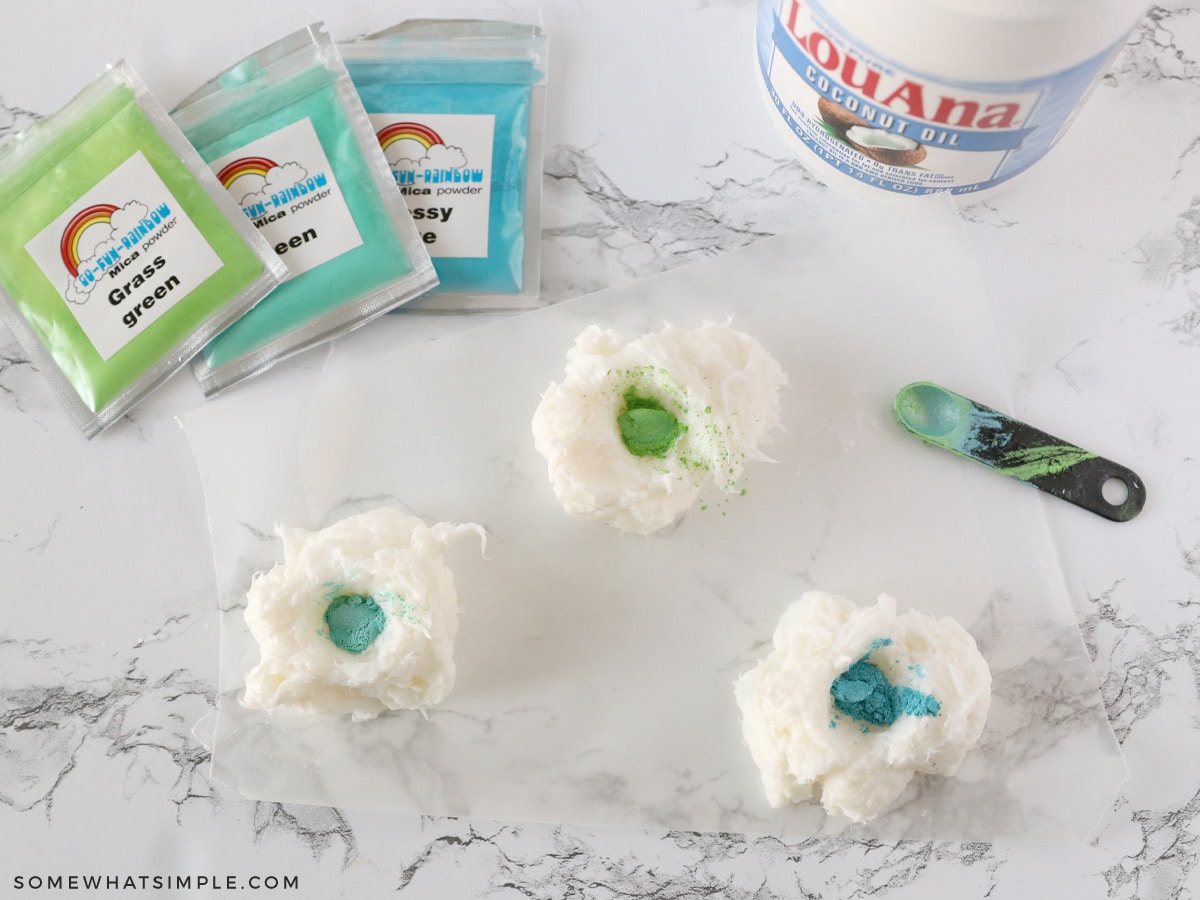
3. Add Color
Divide the softened soap into separate bowls depending on how many colors you want.
Mix in small amounts of cosmetic mica powder until you reach your desired shade. A little goes a long way, so start small.
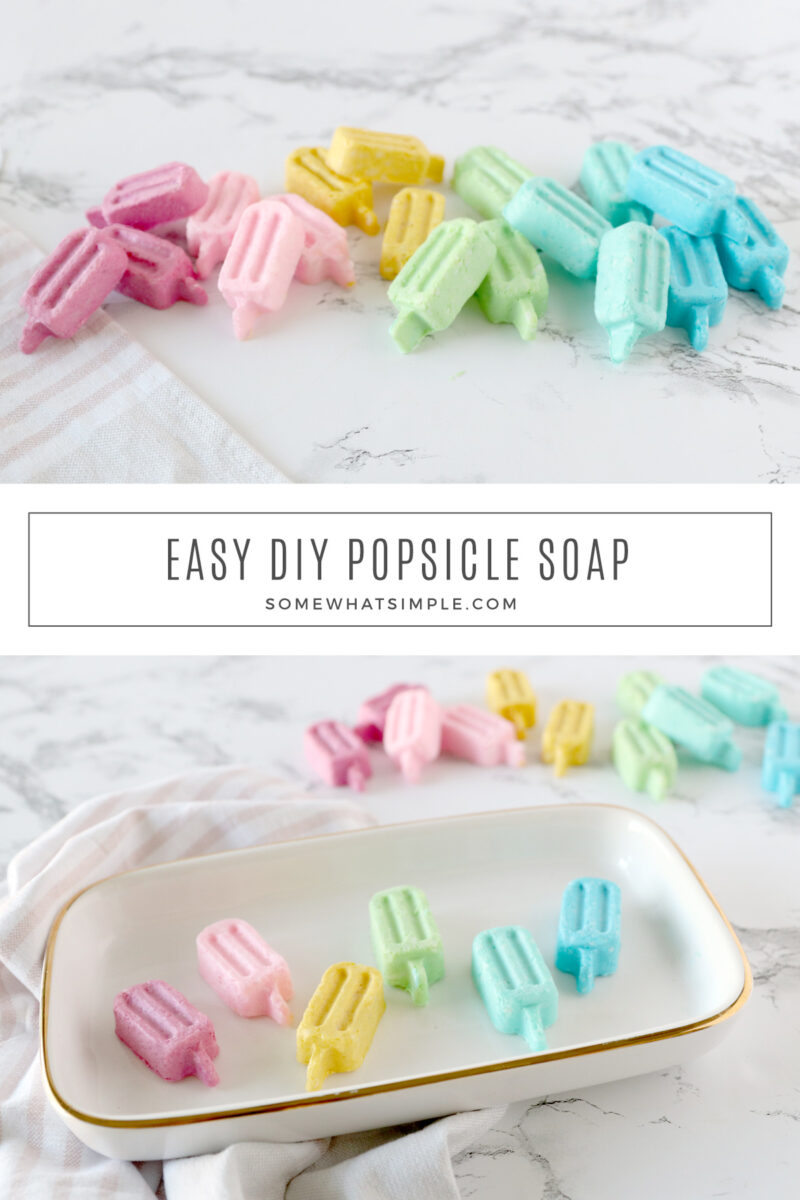
Want that classic popsicle look? Try bright pink, orange, aqua, lime green, or purple. Or go neutral if bold colors aren’t your thing.
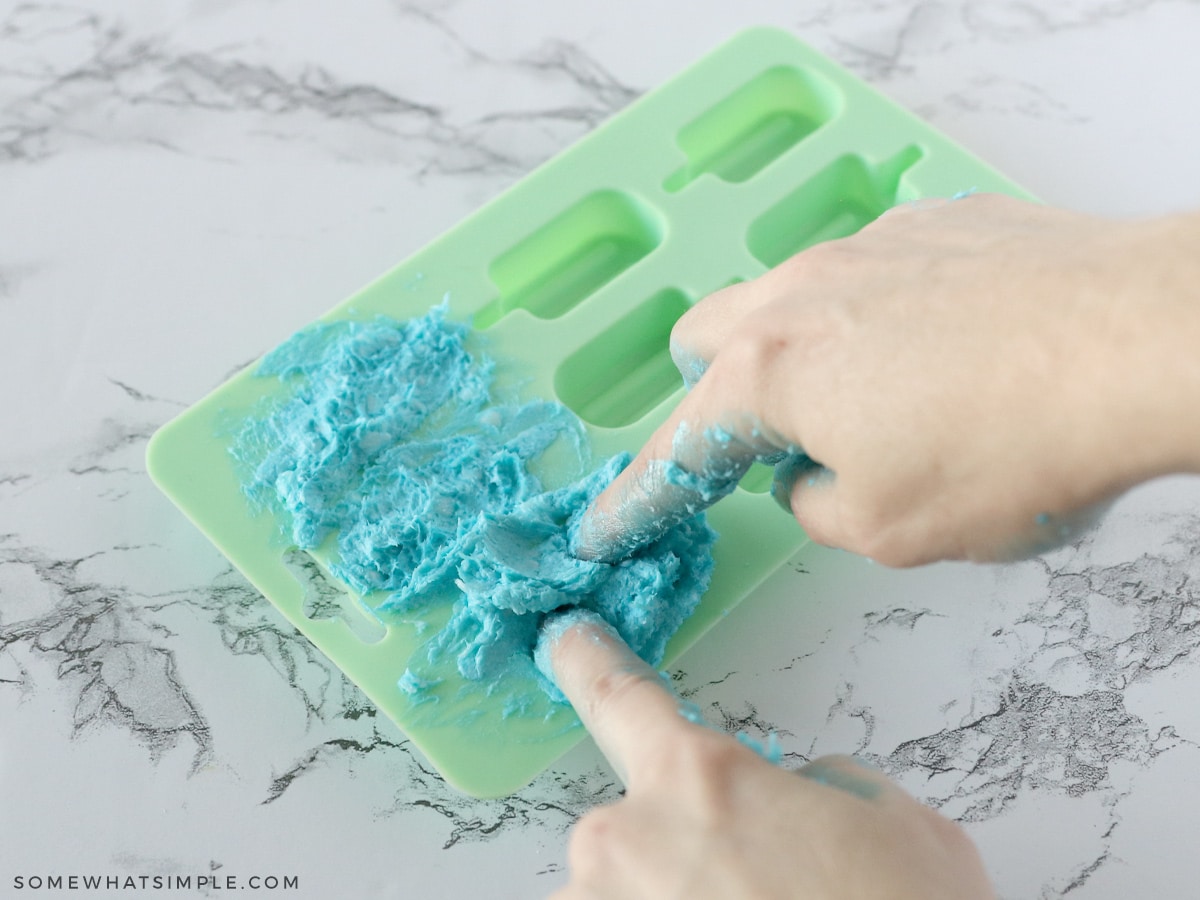
4. Press Into the Mold
Spoon the colored soap into the silicone popsicle molds and press it down firmly to remove air pockets. Think more “packing cookie dough” than “pouring batter.”
For layered popsicles, allow each color to cool slightly before adding the next so the colors stay distinct.
Insert popsicle sticks if your mold supports them.
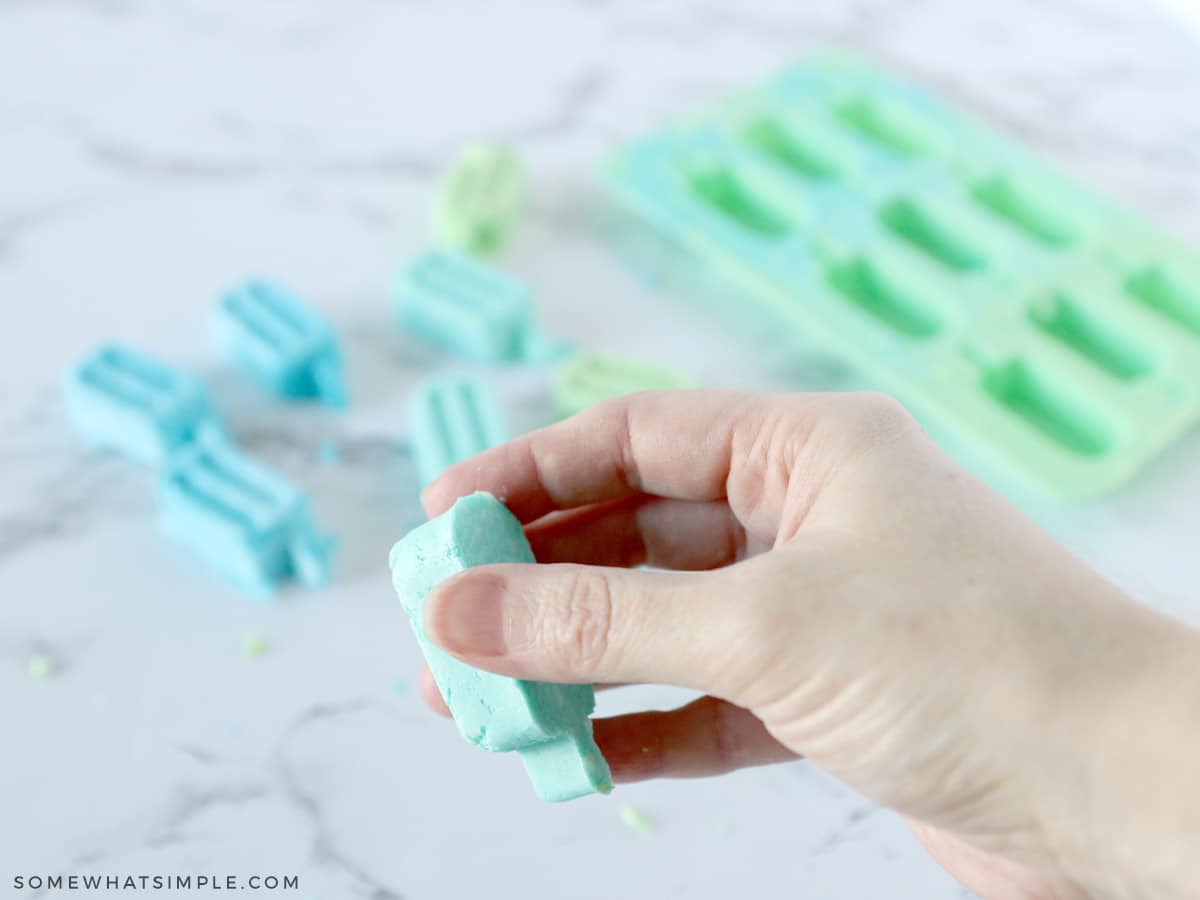
5. Let Them Harden
Allow the soaps to cool for several hours at room temperature, or place the mold in the fridge to speed things up.

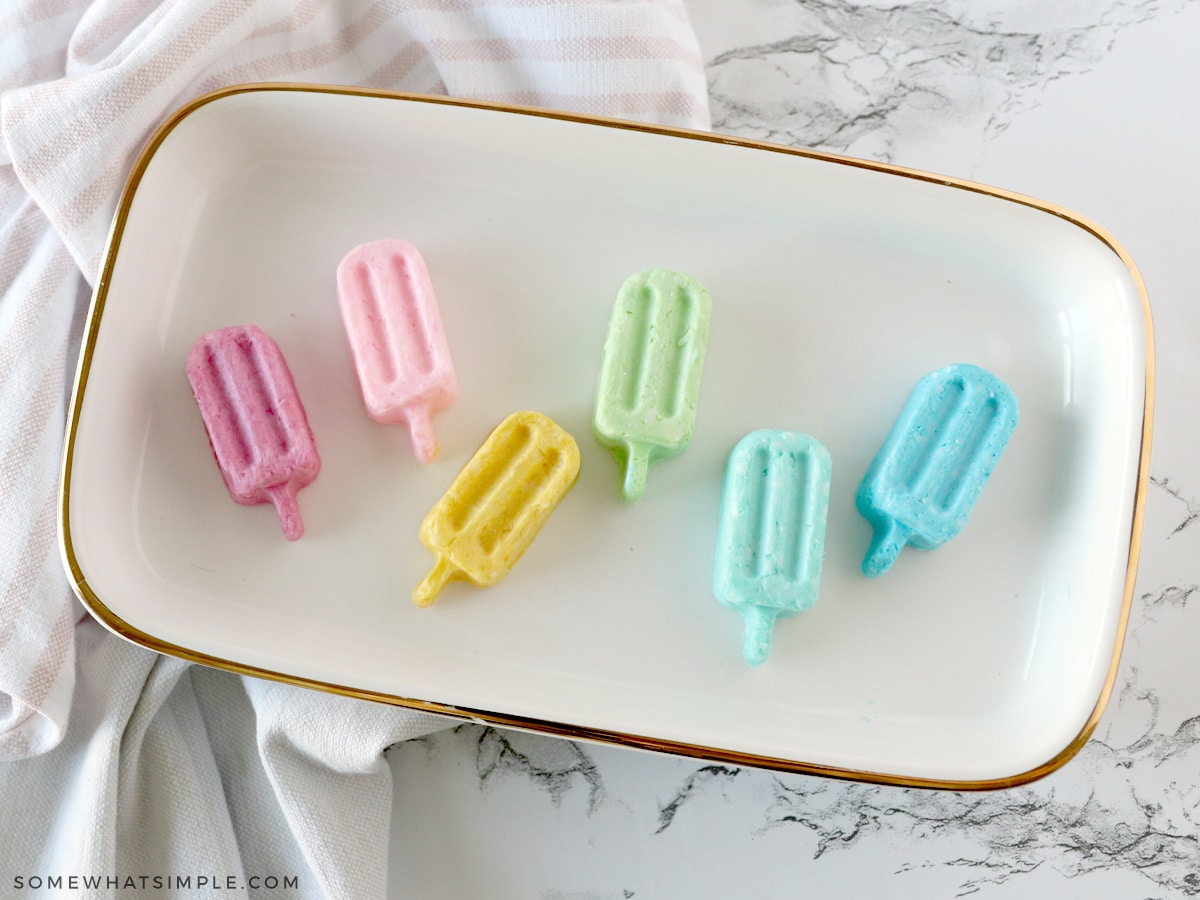
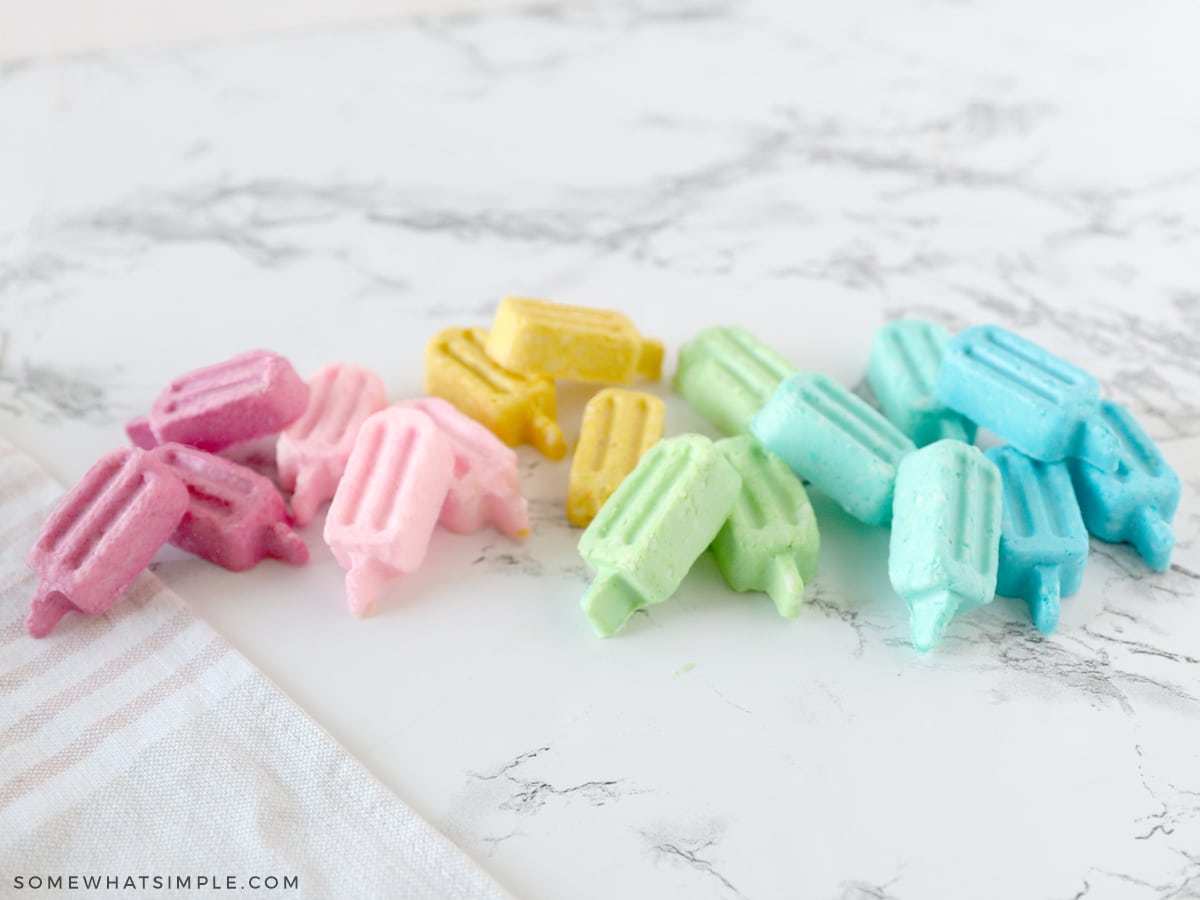
Once fully firm, gently pop them out and admire your work. Try not to mistake them for actual popsicles — someone in your house will.
A Quick Expectation Check
Because this method uses grated bar soap instead of a melt-and-pour base, the finish can look slightly more rustic.
Personally, I think it adds charm. They look handmade — because they are.
A Few Tips for Success
- Use skin-safe mica only — craft pigments are not the same thing.
- Don’t overheat the soap. Low and slow prevents scorching.
- Press firmly into the mold to avoid air pockets.
- Use a saucepan you don’t mind dedicating to DIY projects, or wash it very thoroughly before using it for food again.
- Keep expectations realistic. Handmade is supposed to look handmade.

The Best Kind of DIY
I will forever love a project that is simple to make, useful in your home, giftable, and doesn’t leave my house looking like a craft store exploded.
These popsicle soaps check every box.
Small project. Big payoff. Zero overwhelm. Exactly how we like things around here.


What a super sweet, fun idea!! They would make fantastic party favors. Love this idea.
🙂 Sue
This is too cute!
~Makalani
http://www.MakazHome.com
love it! great tutorial too 🙂
meagan
LOVE this! They're so pretty!
These are wonderful! and perfect for tricky pre-schoolers who don't like taking baths! I babysit one of those oddly enough. lol thanks for this!
I LOVE THESE! Would it be wrong to make them for myself?
Really cute!
those are so, so cute!! 🙂
thanks everyone!…and thank you so much for the feature!…
such a fun idea!
these are SO cute!!! Makes me want to punish my kids a whole new way!! 🙂
SO cute! 🙂
Adorable idea!