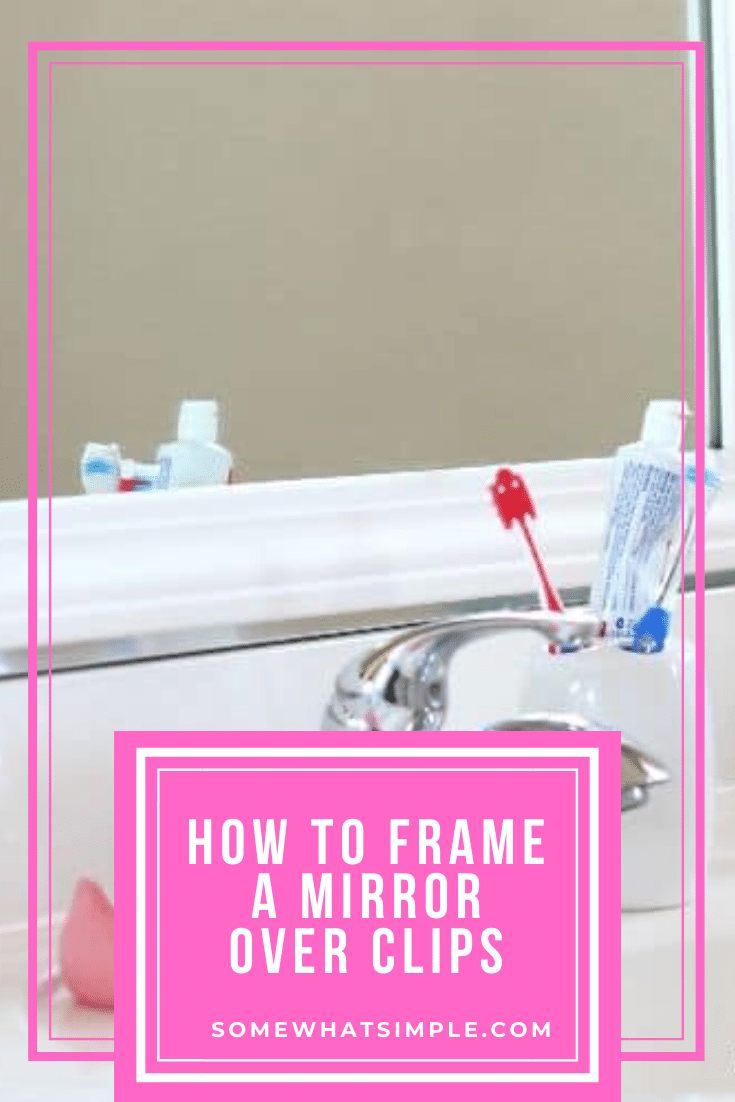
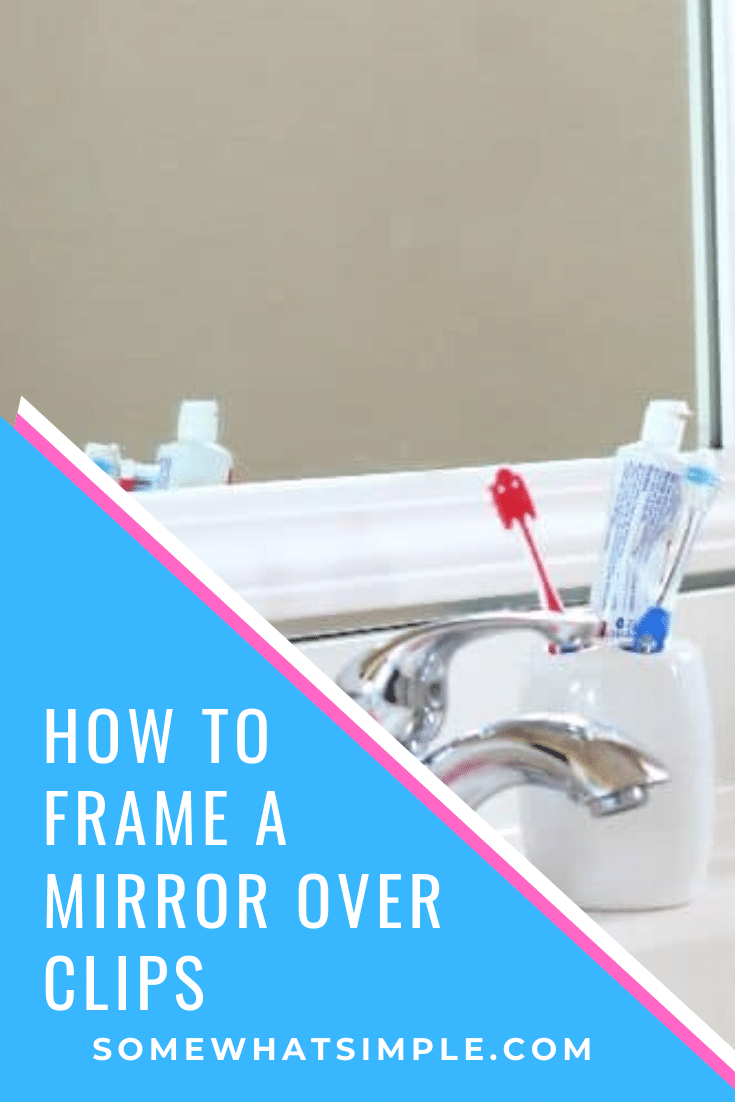
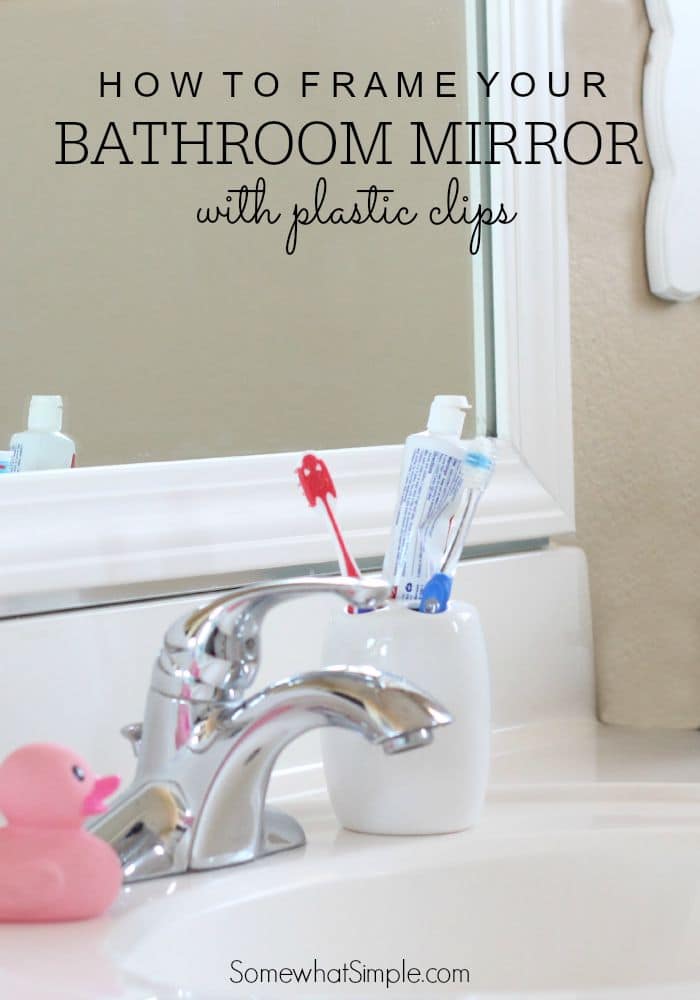
Have you ever tried to figure out how to frame a bathroom mirror over plastic clips? I always wanted to frame my bathroom mirror but didn’t know how to do it because it had plastic clips over the mirror. This easy tutorial will show you how to frame your bathroom mirror even though it has plastic clips.
Framing this mirror is one of the easier home improvement projects I’ve done. Some of my other favorite easy DIY projects is this easy Cinder Block Bench, a DIY Upholstered Headboard and learning How To Whitewash Wood.
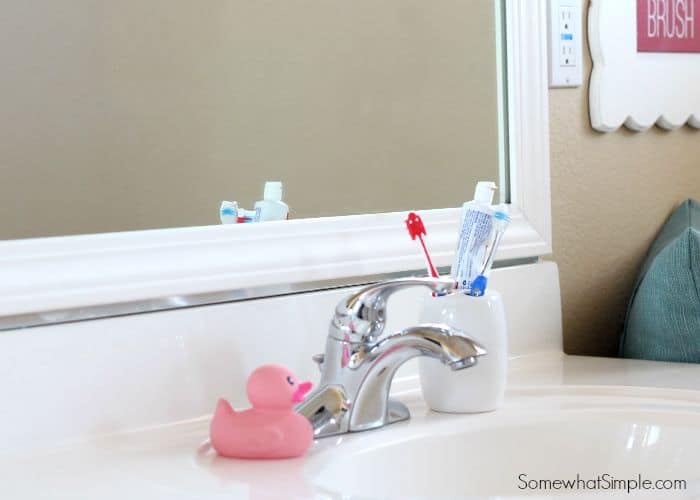
Do you want to know how to frame your bathroom mirror that has plastic clips like these? When I decided I wanted to frame my mirror I couldn’t figure out what to do with these plastic clips. They were way to big to just frame over them but if I took them off I’d risk having the mirror fall down. I looked everywhere for a tutorial that would show me how to solve this issue but didn’t have any luck.

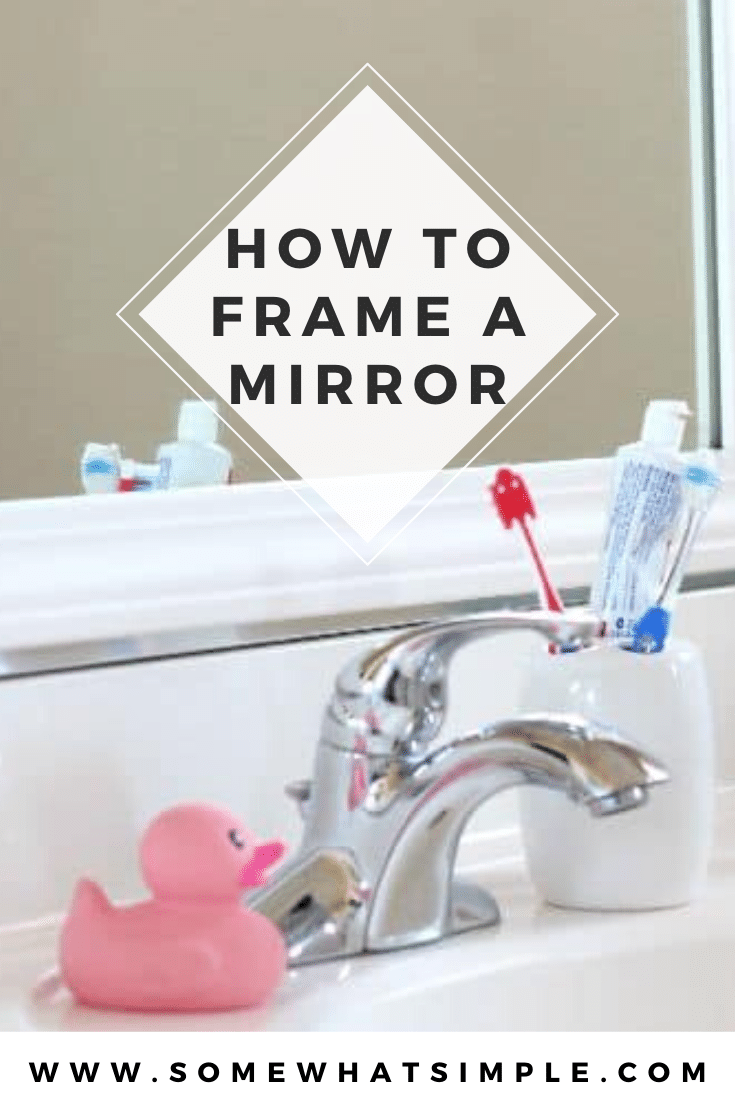
Framing A Bathroom Mirror
I’ve seen probably a half-dozen tutorials all over blog land showing you how to frame a bathroom mirror featuring amazing transformations simply by adding some molding around the edges.
And everyone says something to the effect of:
“THIS IS THE EASIEST UPDATE EVER! I WISH I WOULD’VE DONE IT A LONG TIME AGO! I’M GOING TO DO ALL MY MIRRORS NOW!”
This project is one that has been on my to do list for a while now. because if it really is that easy, maybe I could do it? Except I had something standing in my way. Two things, actually. Two little, {ugly} plastic clips that were holding my mirror to the wall and holding me back from completing this project.

I searched high and low on how to frame a bathroom mirror when your mirror has little {ugly} plastic clips and I couldn’t find any solution.
And so my mirrors sat there. No frames, no pizazz, no nothing.

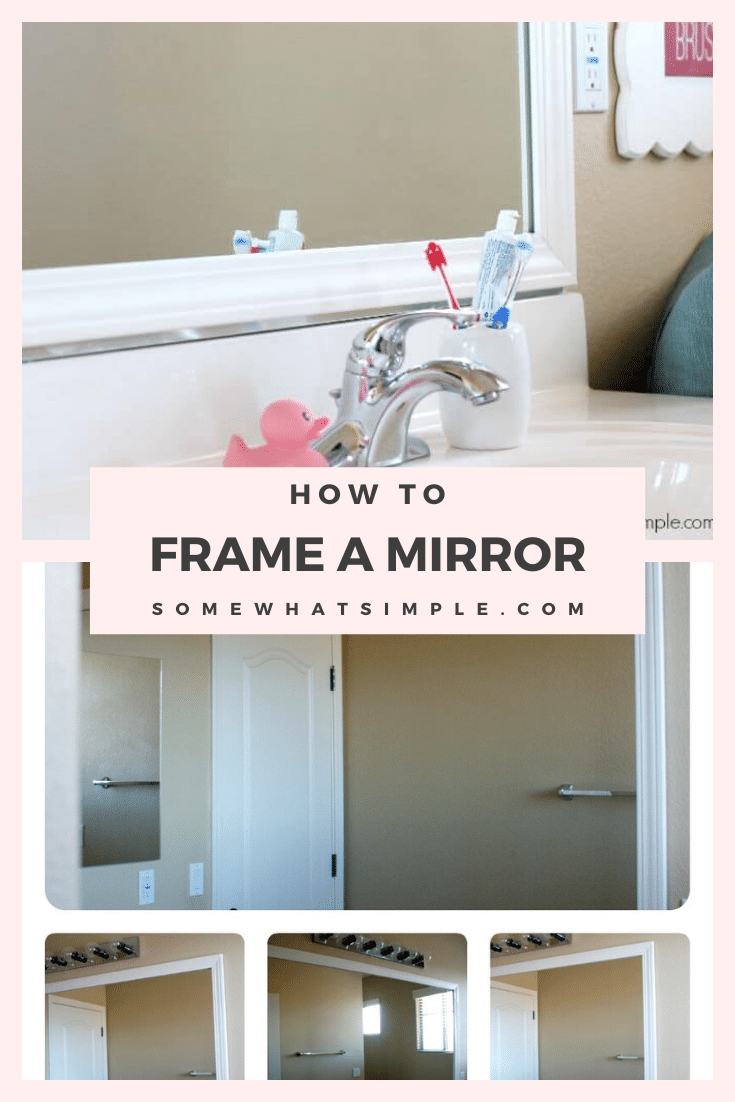
My house is only 7 years old and not outdated. I like my fixtures, hardware and flooring. I like it all… except I really don’t like my builder-grade mirrors.
So I set off to find a solution to rid those clips and make my mirror pretty.
And guess what? I found one. {Insert happy dance here!}
The best part is, the solution is literally 1 more step than all the tutorials I’ve seen to frame out your mirror, so this project is still super easy. {YAY!}
Here is the secret:
 Yep, washers!
How To Frame Your Bathroom Mirrors
Look for the thinnest washer you can find- you might want to buy a few sizes and see which one lays flattest against your mirror. (You can purchase washers individually for 10-20 cents each.)
When you find which one fits best, unscrew the screw holding the plastic clip and then replace it with the washer, using the same screw and hole already in your wall.
Do one at a time, obviously.
 The washers will hold the mirror to the wall as securely as the plastic clip does, but it lays {almost} flat, so you can glue molding right over the top of it.
HOW EASY IS THAT?!?!?!?
And now you are ready to frame your mirror!
I followed the simple tutorial on framing your mirror from Blue Cricket Design. Her post was the first one I saw featuring this project and I’ve also seen this mirror in real life, so I can attest to how good it looks and rest assured there were no “hidden” ugly spots.
Tips For Framing Your Bathroom Mirror
Because I followed Becca’s tutorial step-by-step, I won’t repost the entire thing here. but I do want to tell you a few TIPS I had. Some of you will thank me for sharing these, and others will think I am lame for needing to spell it out. But that is how I am, and I need things spelled out.
TIP: First, when you buy your molding, you might want to pick up one of these:

I had heard of them before, I just didn’t know what they were and how to use it.
A Miter Box is a plastic tool used to cut perfect 45 degree angles- something you need to do for molding projects. I bought mine at Lowes on the same aisle as the molding and it came with its own miter saw. With my new miter box I was able to take my molding home and cut it myself.
 Tip: Look at the molding around one of the doorways in your house to get a visual and to be sure you are cutting it right. I almost made some cuts upside down, but luckily I had something to go off of.
Tip: Get a caulking gun to apply your liquid nails. Save yourself the hassle of trying to apply it without a gun (or a 2nd trip to the store!) and make sure you pick one up.
Tip: Also, be generous with the amount of Liquid Nails you use. Put the liquid nails in the center of the molding. Be sure to avoid the edges so it doesn’t seep onto your mirror when you press it. This scared me a bit, so I went too light on the liquid nails so as not to have a seeping mess. The next day when it was supposed to be dry, my molding was bowed in the corners of my mirror and not stuck to the glass because I didn’t have enough liquid nails holding it down.
Tip: If you find your molding bowed in the morning, don’t get discouraged and walk away. Don’t vow not to ever attempt another home improvement project again. Don’t let this project sit for a week and contemplate hiring someone to fix it for you. Just add some more liquid nails and let it dry again overnight. I may have done the above dramatics and when I realized how easy the fix was, I felt silly.
So there you have it. My pretty mirror.

 And this tutorial wouldn’t be complete without saying,
“THIS IS THE EASIEST UPDATE EVER! I WISH I WOULD’VE DONE IT A LONG TIME AGO! I’M GOING TO DO ALL MY MIRRORS NOW!
And I am serious. I totally am.


Great option. When I did mine I chiseled out the wood where the clips were. The wood slid right over the top snug as a bug.
Thank you Thank you !! I was all over the internet trying to find a solution for the
plastic clips.
You’re welcome! Good luck!
You are a life saver!! I have exactly same plastic clip with builder-grade mirror in our bedrooms, I hated seeing them without any frame. So I started to search what I can do, and here, “washers” was the answer for me!! Thank you soooo much!
I’m so glad you stopped by! Good luck!
Did you have a metal track along the bottom of the mirror? Do I go above that or do I need to remove the mirror to remove it?
I have a metal track and I just went right over it!
I did use your suggestion of washers and I used command strips. My project turned out fabulous. Thank you for the washer idea, I almost gave in to a wire hanging option. (Ugh) Nonetheless perfect option.
Yay! So glad it worked well for you!
WHAT IN THE ACTUAL WORLD!!!! I have been wanting to frame our mirrors for FOUR YEARS – never would have thought about this trick! THANK YOU!!!!
Yay! Good luck!!!
I wouldn’t recommend this method. I tried it and the way the washer distributed the pressure caused my mirror to crack. I now have to replace a 4’ x 3’ mirror and an easy and inexpensive project just became burdensome and expensive.
Oh my gosh, I haven’t heard of this happening before, but thanks for the heads up! I hate when projects turn out to be a bigger mess than they need to. What a huge disappointment!!
This was exactly what I needed and was looking for, best diy blog I have ever come across for simple affordable and flawless job to be accomplished by a rookies. Thank you!
Thanks for the compliment!!! I’m glad you found this helpful!!!
Genius!! In the middle of doing this very project and came across this pin. Was scared to notch out the wood where the clips are. Thinking that the depth of washers is so minimal no notching should be required… TBD.
Thanks Denise, good luck!
Well if you want the molding to cover the part of the entire washer then you need to add in the distance of the washer above and below the mirror. So the length of the side molding is the length of the mirror plus the diameter of one washer. I made the mistake of just measuring the mirror and found my side moldings too short! I had to go back to the store and get new wood.
I know you measure the mirror but how do you know how long the pieces of framing should be.
I cut my wood to fit the length of the mirror. Since the wood sits on top of it, it should be the same length.
My concern is with the weight of the mirror with all the wood attached. Are the washers and base metal strip enough to hold everything up?
It’s worked great for me and I’ve never had an issue.
When I screw the washers into the 2 clip holes at the bottom of my mirror, they tilt out from wall onto mirror so do not lay flat. If I make washers flat to mirror, the mirror is only held up by the screw. What am I doing wrong?
My washers weren’t totally flush either, they were slanted – but you can still put the molding right over it. Good luck!
I used a chisel to make space for the washer on the back of the molding. Worked great! It sits flat.
The mirror I want to jazz up does not rest on the backsplash edge. It is supported about 4 inches above. using 2 clips bottom and top which are completely supporting the mirror.
Another option would be to use thick and wide enough casing that you can make an invisible trench on the back of the casing to cover the clips and still allow for the surface of the casing to remain intact and appear as an uninterrupted frame.
Great idea, thanks for sharing!
Yay!!!! I’ve been trying to figure out how to get past those dumb clips for months. You have saved me. Thank you!!!!!
You’re so welcome! I’m sure it’ll turn out amazing!
I was planning on making my frame fit exactly to the size of the mirror (36×60) but I am guessing that I will need to increase the size to cover the part of the washer that extends beyond the edge of the mirror. Is that correct? How much extra length should I account for?
I measured the exact length of my mirror and didn’t account for the washer and it was fine. I just placed the frame to make sure it covered the washer, so it may have been slightly taller than the mirror, not exactly flush with the edge of the mirror.
I have tried to replace the clips with washers and they don’t hold the mirror down using same screw and hole. Screws in tight to the wall but not tight on the mirror. What am i doing wrong?
Gosh, I am not sure! Mine worked just fine! Maybe try a couple different sized washers? Sorry I am not much help!
Awesome! Thanks for the tip. I got my washers today! What did you do about the bottom clips? My mirror has two v-shaped clips at the bottom.
Hmmm…. my mirror didn’t have the clips at the bottom! I’m not sure how to solve that – darn it! I’m so sorry!!!!
Love this! Just one question, what about the metal bracket on the bottom of the mirror, do you just put the mounding right over it? If so, wouldn’t that make the bottom piece stick out farther than the rest?
I just put it right over the metal on the bottom too! Mine didn’t stick out much further at all – it wasn’t even noticeable! 🙂
Hi,
Where did you find your frame? I have a very large mirror like yours and am trying to find where I can purchase the framing.
Thank you!
Hi Dee- I actually made the frame with some molding from Lowes. 🙂 Good luck!
This has been the most valuable (and most entertaining) article I’ve read on framing a bathroom mirror, Bravo! Thanks for sharing these tips!!
Thanks for stopping by Jay! Glad you found this helpful!
Thanks for sharing your solution. Your mirror seems to ‘sit’ inside a silver tray at the base, as does mine. Did you just frame on top of the glass, right up to the tray/holder?
Yep! Go right over the top! 🙂
God bless you for posting this. Seriously – so happy I found it!
SO happy to help! 🙂 Thanks for stopping by Tracy!
love this idea. Quick question, how do you get the mirror off in the future if the trim is glued over the washers holding the mirror up.
Hi Holly,
I am not planning to remove my mirror, so I honestly never thought of that! Sorry I am not any help! 🙁 I appreciate you stopping by!
I have been looking for a site that told how to deal with the clips.
So glad I found yours.Thanks so much !
That is a seriously awesome tutorial. Thanks!!! I never even considered that option. I hate those ugly, plastic clips, but love the big huge mirror in the bathroom. Question: One person job? or did you need an assistant?
Thanks for the great post!
I have the same problem. Question though. What did you about the fact that the bottom of the mirror sits behind a track of metal that would cause your frame to jut out slightly more on the bottom edge? To take the track off you have to lift the mirror off and up. Am I splitting hairs and that piece of metal doesn’t matter so much? TIA!
Just go right over the top of it! It works just fine!
Thanks for sharing! I e been thinking of this idea for a while now and it is next on my list 🙂 The thick trim doesn’t need the extra glue because it doesn’t bow as easily (learned about trims once!)
I’m so glad you like it! Thanks for stopping by 🙂
I just remodeled my bathroom and had to have the large mirror taken down to make room for the new backsplash. the mirror had been calked to the wall. I had the mirror cut down to size and rehung. the installer used 2 of those lovely hooks. I said that I planned on framing the mirror so what should I do? He said to simply take then off in a couple of days-after the new caulk dries. Your mirror was probably hung the same way.
This looks way too hard for me to do, plus this place is a rental. Also, our mirror isn’t mounted on the wall, but on a medicine storage cabinet.
One thing that struck me though, is how you describe the plastic clips as ugly. I like them, because you can hardly see them. They’re functional but discrete.
I prefer a bathroom that has a medicine (storage) cabinet behind the mirror, for space reasons. But for simple beauty, I really prefer the clips. Classic elegance.
Everyone loves what you guys tend to be up too. Such clever work and exposure!
Keep up the very good works guys I’ve included you guys to our
blogroll.
Interesting Read
Hello, and forgive me for asking this (somewhat) stupid question, but I would love to do this on a mirror similiar in size to your bathroom mirror, that hangs on the wall in my front room above my loveseat. The molding will still be adhered to the mirror, correct, NOT the wall?
This is not a stupid question, Jamie, thanks for asking! Yes, the molding will be adhered to the mirror, NOT the wall! 🙂
This looks so promising and helpful for what I want to do in my bathroom. Thank you. I have a question though. The mirror in the picture looks like mine. Two clips at the top, but at the bottom a silver trim that holds the bottom of the mirror. Did you cover that with your framing or set the bottom edge of the framing on above it to where the silver trim still shows?
I put my molding right on top of the silver trim to cover it. Hope that helps!
Any suggestions for doing this with a mirror that has a plug smack in the middle (bottom) of it? I have tried to come up with a way, but so far I don’t have a clue.
Go with SUPER wide molding to completely cover it- as shown on this tutorial: http://www.sweetpickinsfurniture.com/2010/05/framed-mirror-tutorial.html
Thank you!
You’re welcome! 🙂
Hi,
Did you have the ugly mirror medicine cabinet on the wall next to the big mirror? If so, how does the frame affect it opening?
I do, and it doesn’t affect it at all! If the molding stood taller on the mirror or if the medicine cabinet butted up against the mirror it would be a problem, but the spacing on my wall, even though it looks close, gave me enough room.
I love this tutorial! I saw a million on pinterest and I kept thinking about my darn plastic clips! We rent, so this is an inexpensive fix to the guest bathroom! Thank you, thank you, THANK YOU!!
Yay! I am glad you found this tutorial! Thanks for stopping by and thanks for leaving a comment! 🙂
Has anyone tried using velcro to hold the frame to the mirror? or would theedges look tacky? Just asking because I haven’t started the project yet. Any advise is most welcome… thank you!
Hi Stephanie,
I completed this project last weekend and it went great! Looks terrific. One helpful suggestion I have is that we purchased the Composite molding from Lowe’s (Not real wood). It is prestained in a variety of wood tones, or white, comes in a zillion widths and different trims and is very inexpensive. The backs are half stained too, so the reflection is great. The biggest plus is that it is flexible and will contour right around a flat washer or flat metal clip and adhere without any problems. And yes, the secret is to use enough glue- on my first piece, I was too conservative as well, and had to reglue! Liquid nails comes in clear as well!!!
Thanks!
I am so glad it worked out for you- and thanks for those helpful tips! I appreciate you stopping by!
Thank you for this fabulous tip! I am eager to try this with our builders grade mirrors in our master bathroom! I am curious, how was the molding held up? Any loose sections/recaulking needed since you installed?
Thank you!
No touch up needed thus far! 🙂 It still looks great and is holding up very well!
My mirror has the old metal clips. Has anyone above answered that?
I’ve never done it over the metal clips, but if you can replace those with flat washers, it should work just fine.
To cover the top of the washer did you just mount the moulding slightly above the top of the mirror edge?
Yep!
Stephanie I see you’ve commented about covering the top part of the washer with the molding but when that’s done is there not a fairly significant space of molding from wall and then top of mirror that will collect dust and whatnot?
Hi Rachael, it actually isn’t too big of a space- I’ve never had issues with it. 🙂
This idea is great and genius, I have two bathroom large mirrors with these clips and had been searching for an online article to help me find a way to frame these mirrors without removing them from wall with the clips. This idea is great I would’ve never thought of this way to do a project..I plan to do this project on one bathroom and I am excited to do this project and now that I have an idea on how to do it.
Good luck!!
Love this hint. I to wanted to frame my mirrors and now I can do it easily. Thank you so much.
You’re very welcome!
Hi there! The original tutorial you used is no longer active 🙁 I want to try this but I am worried I may miss something crucial. Cut it, liquid nail it down, and I am guessing caulk to crevices? Any more to it?
What isn’t active? I still see the pictures and directions- are you not seeing it?
The Blue Cricket link? How odd- when I click it I get a ‘site unavailable’
”
Site Unavailable
This site is currently unavailable due to maintenance. It should be available again shortly.”
But it’s said that for a few days now…
:
Oh, I thought you meant the pictures and text on this site wasn’t showing, but you’re right, the Blue Cricket site is unavailable. I know RFE hosting (which is what she uses) is making some changes, so hopefully it is up soon!
How does the moulding sit flush against the mirror when the washer doesn’t sit flush? I’m attempting this now, and I can’t figure out how to make it look flat like in your picture!
It probably isn’t completely flush against the mirror, but the washer is so thin that you don’t even notice.
You’re post and tips were valuable to me!! Thank you for sharing so much information 🙂 You’re the Best!
thanks Shelly, I am glad you found these tips useful! 🙂
Thank you!!! I have those plastic clips too. I tried this project before I read your post in my powder room where it is a tiny mirror. I tried to make notches in the moulding and went all the way through it and they didn’t fit the clips anyways. I almost gave up. I ended up taking the clips out of the wall all together because the mirror is glued to the wall and seems pretty stable. I want to do the bigger bathroom mirrors too but figured I couldn’t count on those heavy things being secure with just glue. VOILA’ my problem is solved. You are so clever! Thanks again.
I’m so glad you found the solution! 🙂 Thanks for stopping by and best of luck on your next bathroom!
Wow, thanks for the tip as I am in the middle of the project and already bought the wood for the frame before realizing the clips are too thick! You saved me!!!!
Eileen
That is great Eileen- I am glad this helped! 🙂
My brother recommended I might like this blog.
He was totally right. This post truly made my day.
You cann’t imagine simply how much time I had spent for this info!
Thanks!
I’m so glad this has helped you! 🙂
Thank you for this! Might just do this this weekend!
Have fun! 🙂
I’ve been wanting to do this for awhile and found some molding with a deep groove but your WASHER IDEA is great! No need for special molding or routering a groove… thank you for sharing! Great little blog you have here.
Thanks for posting how to do this! I finally got up enough nerve to try it. I found the molding at Home Depot for 8.50 an 8′ piece, and bought Loctite Clear Powergrab instead of liquid nails. I had the help of a neighbor who is very handy and has a shop. We had to make the corner blocks since no one carries plain 2″ blocks.
When we went to replace the clips with the washers, I discovered the mirror was indeed glued on across the bottom, and the clips were screwed into the drywall, basically doing nothing! We put them on anyway.
Here are the pictures, although the “before” isn’t a true before shot. All the fixtures were the bright polished brass before I started (light, medicine cabinet, everything)
http://s1281.photobucket.com/user/mmansker/library/Bathroom%20Project
Your mirror looks great! I love the thick molding- nice job! Thanks for stopping by!
I was so excited to find this solution to those awful clips!! BUT I tried the washers, and they don’t lie flat when the screw is screwed in tight. My mirror is pretty thick, and it actually seems to be glued to the wall. Does any one know how to tell? Could I just take the clips off?
Thank you! We rent, so gluing the mirror to the wall wasn’t something I was willing to do, but that was what every other site suggested. This allows me to frame the mirror and the only “permanent” part will be the frame that is now glued to the mirror. Which I’m willing to gamble with, since it clearly is an improvement.
There are clips that slips flatly and neatly over the mirror, also.
Everything is very open with a precise explanation of the challenges.
It was truly informative. Your site is extremely helpful.
Many thanks for sharing!
Great idea! Thanks for sharing. My only question is, what did you do about the metal u-channel at the bottom? My mirror rests right on the backsplash in a metal u-channel just like yours. Did you remove it or cover right over? I feel like it might stick out a lot on the bottom. Thanks so much!
Wow! We have ugly mirrors and were going to remove them and buy oval mirrors but the mirrors are glued to the wall plus have the plastic clips. Way too pricey because it would have damaged the drywall underneath. Washers are an awesome idea. The angled ones will really be the answer. I have an accent wall and I am going to paint the frame the same color as the accent wall and then clear coat spray the frame to give it a glossy look. Some clear silicone across the bottom edge of the frame and the glass should prevent any water from getting behind the frame. Off to the home improvement store after church in the morning and should have this project done by the end of the day.
Thanks for the tips 🙂
Thanks so much for this. I too have been wondering what to do about those clips. You’ve solved that problem, and I can’t wait to get started. Unfortunately, I still have 2 more things holding me back that I’m hoping you can shed some light on. First, I’m wondering what happens if water or cleaning spray drips down between the wood and the mirror at the bottom. Does the glue hold the wood tight enough to the mirror to prevent this? I have even considered adding caulking there like the other tutorial you referenced does in the corners, and then painting using painter’s tape. But maybe that’s not necessary. What do you think?
And secondly, my mirror has a 1″ bevel around the edges. I know I can get trim wide enough to not glue over the bevel and still have enough surface area to glue to the mirror. But my mirror is exposed on the right side and the gap between the wood and the mirror would be very obvious, I think. I’ve thought of guying a little thin strip of wood to glue over the wood, air and mirror on that right side. But that would make the frame a touch wider on the right than on the left, unless I do it for all 4 sides. Maybe if I caulk the small gap that would be created all around on the outside of the front it might look okay. Ugh – now this is getting complicated!! Any other ideas or tips?
Thanks a lot! (hopefully my questions aren’t too confusing)
Heather
Thanks so much for the share! I’ve also been wanting to frame our builder grade mirror, but didn’t think it could be done with those putrid plastic placeholders (clips)! Now I just have to contend with what type of moulding I want to use!
FYI they do make these: which have that slight curve so they will sit flat on your wall & mirror 🙂
Love all of the info. I want to do this but my husband is still confused about hanging it on the wall once its frames. Is there a way to get it off the wall if you want to or once its framed is it there forever?
This is probably a permanent project. If you didn’t have the molding touching the wall at all, you could take the mirror off the wall with the molding attached and install a whole new mirror, but the molding will be stuck to the mirror for sure.
I have clips at the bottom of my mirror as well ( not the clips you have pictured , just a little metal bracket). They don’t have a screw either and I am not at home right now to see if they are flush to the mirror ( probably not !) I was just going to whittle out a bit of the molding unless you have a better suggestion ??! Thanks !
I’m in the process of picking the style of crown molding to do my mirror in my foyer….. Instead of doing the washers, I’m going to cut notches into the wood but seeing as the molding you picked is so thin that isn’t really feasible, kudos for the washer idea. Nice post! 😀
Thanks Dori. Yes, the molding I got was one of the cheapest moldings available so it is very thin. Best of luck with your project!
Thanksss so much! Your issues were my exact issues with the plastic clips- I literally thought I’d have to shave out a hole or somethng in the framing…lol. Thanks so very much! Your warning on the caulking gun will be followed too! lol Thanks for the inspiration!
You’re so welcome! Thanks for stopping by!
Thank you so much for showing how to update my mirror WITHOUT gluing it to the wall. This is the 1st site that shows how to avoid the glue by using flat washers. THANK YOU!! 🙂
omg! why did i just find this? those stupid, stupid, stupid plastic clips is what has been holding me back for years…thank you, thank you, thank you!!!!
YAY! I am glad you found this tutorial! Those clips held me back for years too! 🙂
Did a quick search on “framing bathroom mirrors diy” and found this post… You have no idea how thankful I am to have found it! Thank you! Thank you! Thank you! I will come back to post pictures of my mirrors when we are done! :o)
I am so glad you found this post! 🙂 Thanks for visiting!
Hi! I am delighted you wrote about your mirror experience! I have been searching for a way to do mine and your descriptions were so accurate and easy to follow. You answered and solved all my questions! THANKS! 🙂
Thanks Paula! good luck with your own mirrors!
When you framed in your master bathroom’s mirror, did the stock silver medicine cabinet by the door seem out of place after the molding/frame went up? I have a similar bathroom set up and have been itching to do this makeover for months but every time I visualize it in my head, it makes me not do it.
Nope, the medicine cabinet looks just fine! 🙂 Do it!!!! You’ll love the results! 🙂
Are you able to provide (or email me) a close up picture of where the frame goes over the washer. There still seems to be enough that would make it stick out and the trim not sit flush
Thanks!!
It isn’t completely flush, but it is flat enough to hold just fine and not stick out.
Thank you so much for this idea! I know I want to frame my mirrors, but couldn’t find the solution to work around the clear mirror “holders”. What a simple fix! It never would’ve dawned on me to do this. 😀
Your mirrors look so nice finished off with the frame. 🙂
Thanks Cheryl! Good luck with your mirrors!
I. LOVE. YOU. Thank you so much for sharng this tip, am SO excited, I have already started the process, I have wanted to do this for years!!! THANK YOU THANK YOU THANK YOU!!!
How did your mirrors turn out? 🙂
Thank you so much for spelling out your tips regarding the caulking gun, and the miter box kit. I have ALWAYS wanted to do this, but kept putting it off. Here’s a tip/suggestion I encountered after doing this project. Be sure to use CLEAR adhesive/glue. My Lowe’s store only sold Liquid Nails Construction Adhesive, but not the “mirror adhesive” as suggested in tutorial. I didn’t think bout the consequences, as I thought, I HAD to stick to buying Liquid Nails brand. With so many brands of adhesive glues out there, I was almost tempted to try or buy another brand….but I stuck with LIQUID NAILS. The Liquid Nails I bought is white in color, and it reflected off the mirror. Bad mistake I made, so even though I painted the backsides of moulding, the white colored adhesive reflected off the mirror. I think I will touchup this part of mirror with a black paint pen to hide the white.
I’m a newbie to DIY, and have no experience/knowledge regarding the holding power of adhesives/glues and the brands out there. Sometimes we may be limited to whatever brands our stores in our areas sell….Lowe’s sold Loctite, but not mirror adhesive. I’m assuming this Loctite isn’t clear either. There was also GOOP, which which is clear, and I have heard is a very strong adhesive. Have any of you tried different brands of adhesives? I have a 2nd mirror I’ll be doing next. This time, I will make sure I use a CLEAR adhesive. I like flexibility, so I’d appreciate anyone’s suggestions for other brands of clear adhesives.
Thank you once again for helping me get started. You got my mind brainstorming of other projects that need to be done…….and you have given me the confidence and motivation to do them 🙂 .
My liquid nails wasn’t clear, but it didn’t show from behind the molding-only the very edge of the backside of the molding was reflected, so that is why I made sure I painted both sides white. Good luck finding a clear adhesive that works for you- I wish I was more help or had some suggestions. 🙂
Just wanted to say THANK YOU for your very details instructions on how to frame the bathroom mirrors. I’ve seen other tutorials but the “what to do with the brackets” step was never mentioned so that left me wondering what to do with them. Love your decor. Thanks again.
Thank you for your kind comment! I’m glad you stopped by! 🙂
So our master bathroom mirror has clips on the top and bottom (it’s elevated about 6 inches from the vanity backsplash). Would washers on the bottom and top hold the mirror up?
The washers on the top hold my mirror as good as the clips did, so I assume this would be the case for the bottom too. Good luck! 🙂
Did you end up trying this? I have the plastic clips on the top and the bottom too.
I really want to do this in our guest bath when we redo it soon. But I’m wondering if you glue the molding down directly onto the mirror, how do you finish the sides where it’s exposed? I’m worried it would look weird with the exposed mirror layer and then the layer of molding… does that make sense?
I never even thought about that! My mirror is thin enough that it really doesn’t look bad at all. Good luck with your guest bathroom!
Can the frame be done if the mirror butts up to the walls on both sides? Do I just glue the molding on to the mirror?
Yep, just glue it right on top of the mirror! Good luck!
OK, since you are making this so easy, can you answer ONE stupid question — do you glue to the mirror or the wall? I have asked several men — 2 are professional carpenters — and they said you can’t frame the mirror because of the clips. Leave it to a woman to figure out 🙂 THANKS for the blog!!!!
Ha ha! You glue it right on top of the mirror. You can let the top piece of the frame hang off the mirror just a bit to make sure the washers are covered, but every other side can be glued right on top to the edge of the mirror. Hope that helps!
I am soooo excited!!!! I too have those gross plastic pieces holding the giant mirrors in my bathrooms, but…….not for long now!!!! Thank you, thank you, thank you!!!!
Hello, I am getting ready to do this in my bathroom and I was wondering what size of trim you used or what is best?
Thank You
Shannon
Any size should work since you’ll be putting this directly onto the glass, it just depends on how much glass you want to cover. I personally love the look of a really thick molding, but for this project I just bought some cheap molding- it matched my doorway trim- because I wasnt sure this was going to turn out and I didnt want to spend a lot of money on it ’til I knew what I was doing. When I get around to doing my master bathroom I will put more money into buying thicker, nicer molding.
Okay totally weird question for you. Our medicine cabinet is butted up against the mirror and I’ve been trying to come up with a solution to frame the mirror, but it’s in the way. Is yours like that and could you possibly send me a picture of what it looks like if it is. Thanks for your help. 🙂
Our medicine cabinet is about an inch or two away from the mirror, so it wasnt in the way. How much room do you have when your cabinet door is open? As long as you have an inch of space, it shouldnt be a problem.
It looks so much better with a frame. Great job!
YES!! A solution to the plastic clips!! I had seen the moulding done over them, and the huge gaps, and really thought it looked worse than the plain mirror. I know what I am doing next weekend now!! We spent big bucks on the master bath to buy a mirror with moulding….OUCH. Now I can redo the others in the house and not feel the least bit bad about it! Thank you!!!!!!
I’ve been trying to figure out how to do this around the plastic clips that we have too. I can’t wait to try this out!
I have been wanting to do this for quite awhile and I LOVE your tutorial!!! The only thing I will have to do different is change the light fixtures to something that has the light bulb going straight out or pointing up otherwise there is not enough room. And thanks for the info on a miter box. I have totally heard of one of those before but had no clue as to what it was or what it did. Now I know and will be going to get one. Thank you! The frame looks fantastic!! Great blog too! 🙂
xoxo,
Lindsey
Great job on your mirror! I have been trying to decide whether to take mine down or frame them out. I have 2 HUGE mirrors that meet each other in the corner in my master bath. I mean reeeaally big. I think I may try framing them out first before taking them down. You made it look NOT so daunting, so what do I have to lose, right? Thanks for inspiring me to go ahead and give it a try.
Found you on skip to my lou. Hope you can stop by my blog sometime. Maybe check my Master Bath post, and tell me if I am crazy for trying or not! 😉
Great blog you have here! I’m off to read some more of your posts!
xo-Lisa @budgetdesigngirl.blogspot.com
Wow– yes! It has been those silly little clips that have been holding me back. I’ve been wanting to tackle some of our builder-grade mirrors and now you’ve given me the directions and confidence to give it a try! I hope I can post back here in a few weeks with my success. Wish me luck!
I found your blog through Skip to My Lou, thanks for sharing your ideas!
I am inviting you come and be part of my blog hop:
Amazing what a bit of crown molding can do to a bathroom mirror!
What a beautiful job you did. I love the tutorial. My sister in law has been thinking about completing this project and I’m definitely sharing this with her. Thanks for sharing. ~ Megan
Love it! And I love all the little details and help. I totally liked things spelled out for me too!. I am happy to learn from other people. What is better then that? And why do you think I love blogging (haha). Awesome job. You might even get me to try it!!
Thank you, thank you, thank you!!! Searched everywhere to find out how to frame a mirror with clips. I re-modeled my bathroom and took the wall to wall mirror down. I then cut it a am putting it in the master bath as a full length mirror and wanted to frame it. Home Depot said to put a rail on the bottom and those silly troublesome clips on the sides and top. This is all fine until I want to frame it. Love your suggestion it be easier if I could just glue the mirror to the wall and frame it then but he said not too. Not sure why? It wasn’t glued to begin with. So here’s to framing and hanging the mirror that’s been waiting patiently for 4 months. Thank you again and if you know if I can glue the mirror to the wall that would be helpful too. It’s about 6 ft in height and 3 ft wide.
I’ve been wanting to just rip my mirrors off but you’ve just made this look so easy i might reconsider! Thanks for showing us it is as easy as it seems. Great post. And thanks for giving credit for the other tutorial you used that was really nice of you. Lesley
THANK YOU!!! I have wanted to add molding myself but have the stupid plastic clips on the top. I contemplated removing those and using the flush-mount mirror clips, but the washer trick sounds way easier and cheaper! I’m so excited to get started on my own now!
This is fantastic information! We removed all but one of the giant mirrors in our house and I keep looking at that last one (with its plastic clips) wondering what to do. Now I know!
I have the same problem and didn’t know what to do about it. Thanks so much for sharing this tip!
i’ve thought the exact same thing about those dumb clips! Thank you, thank you, thank you!!!! Now, I just have to do it!!!
YOU are stinking brilliant! I’ve spent the past three of four years or powder room visits staring at those horrid little clips and wondering how to frame around them. THANK YOU!
Hey! I just found your blog and I am so glad I did! I am your newest follower. I have been planning on framing my mirrors for quite a while now, and I love your technique! I might just have to try it. You did a great job!
Great job Steph!! Check out my bathroom makeover! http://polkadotsonparade.blogspot.com/2012/02/bathroom-reveal-aqua-yellow-wonderland.html
Thanks so much for sharing this! I didn’t want to pay the extra cost to have builder install the frames and it would prolong our closing date. Didn’t know how to get around the plastic clips!