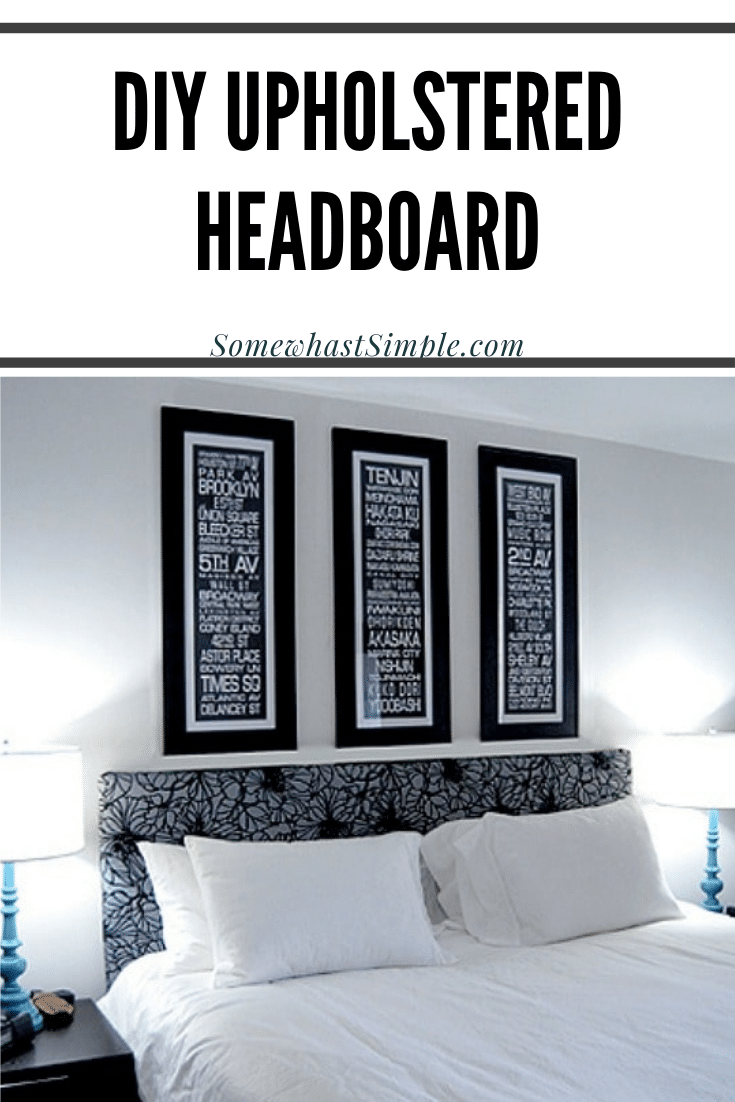
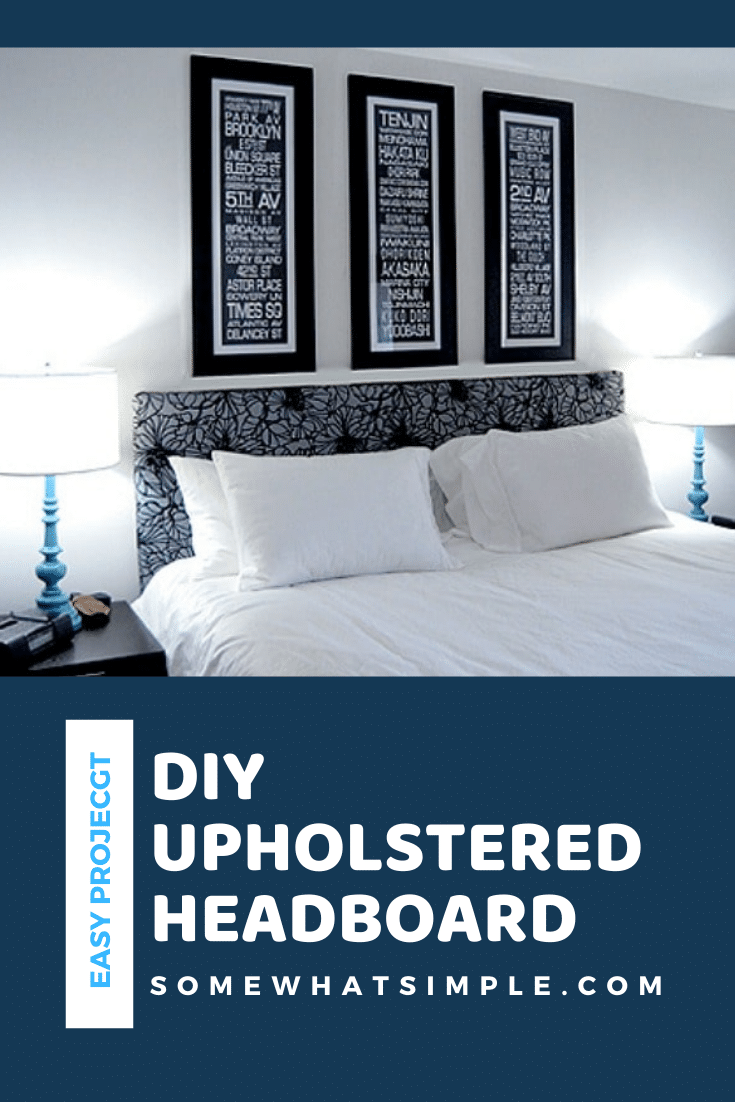
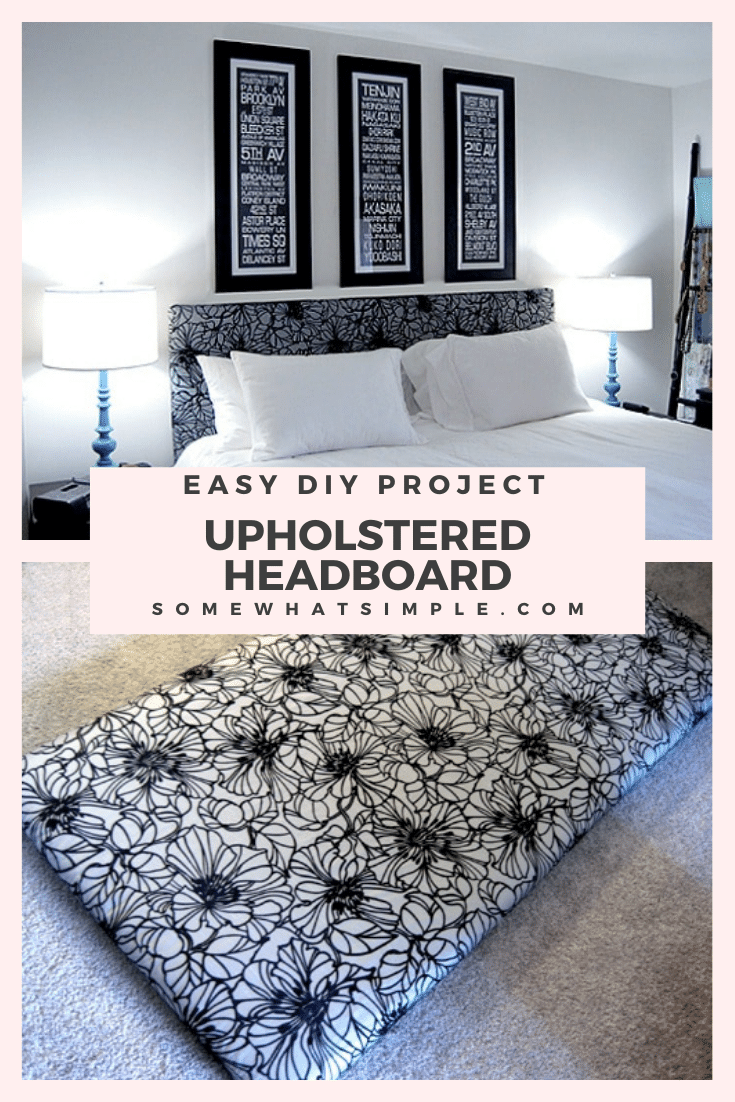
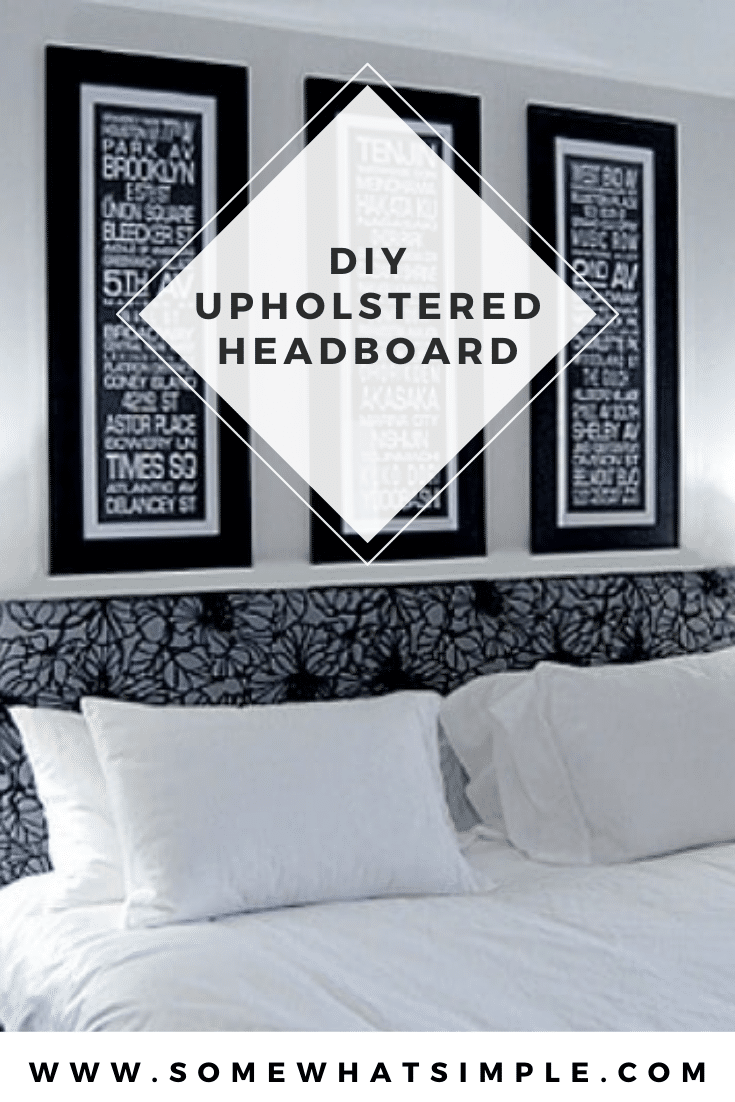
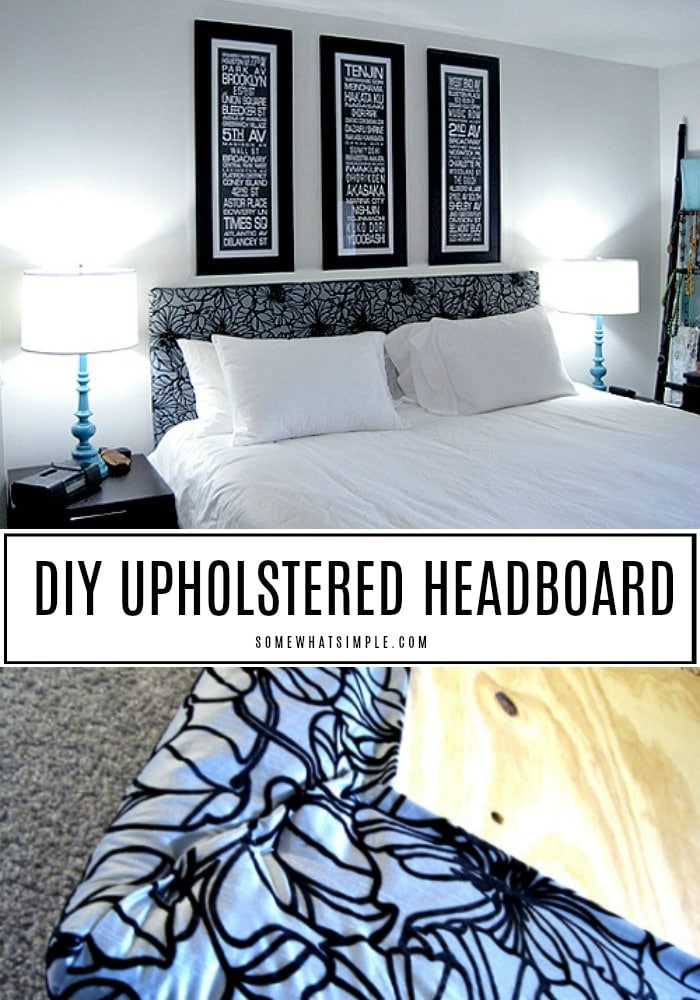
This DIY upholstered headboard tutorial is so easy anyone can do it. Best of all you can customize it to fit any size bed and there is no sewing required!
DIY Upholstered Headboard
I’ve been lusting after upholstered headboards for a good long while now and have fallen in love with so many different kinds, whether they’re plain Jane, trimmed in nail heads, or tufted.
Which brings me to this project: a DIY upholstered headboard. That way, I can choose my own fabric, silhouette, and plain/tufting/nail head details. Google is your friend, folks and it hasn’t let me down yet, so that was the natural course of action. It’s staggering the amount of information available on how to make a DIY upholstered headboard!
Inexpensive DIY Upholstered Headboard
It doesn’t matter what size bed you have, this project can work for a king, queen, full or twin sized bed. First, I measured the width of our bed, allowing for a few inches of overhang on each side. Then I had to decide how far down I wanted the headboard to go. Should it rest on the floor, be bolted to the bed frame, or hang on the wall?
I decided that nailing the headboard to the wall would be the most economical choice. This way the board wouldn’t have to reach all the way down to the floor. The bottom part of the headboard would be hidden by the bed anyway, so it would take less materials all the way around. Less materials = less cost. Sign me up (I know, I’m cheap)!
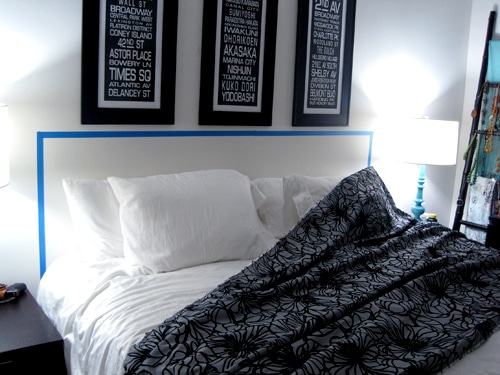
And because I’m the kind of person who needs to physically visualize things, I just slapped some painter’s tape up on the wall to outline my measurements (don’t look too closely; I was too lazy to use a level):
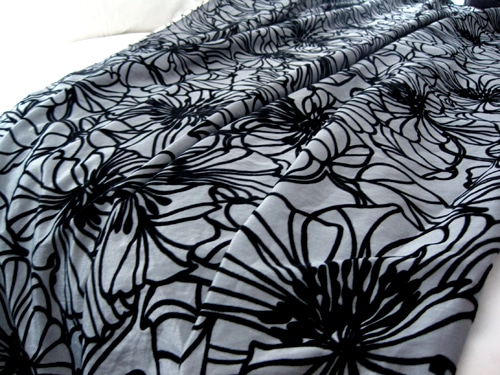
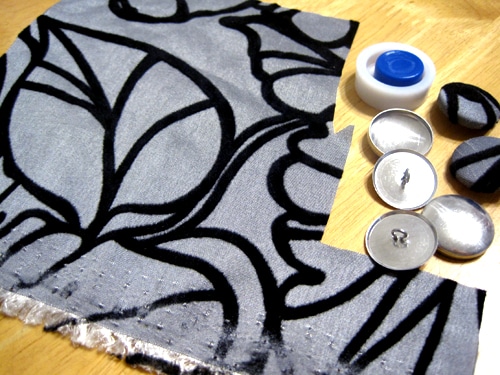
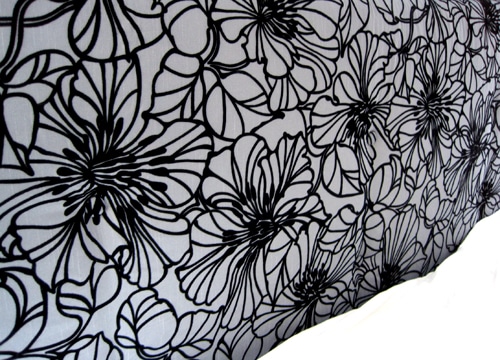
After borrowing a few swatches from the fabric store, it was decision-making time. I’ve long had a love affair with the color grey, and here are the final contenders: a soft, plushy charcoal microsuede, a silk Dupioni-like fabric in steely grey with a black velvet floral design, and a sturdy, slate grey canvas:
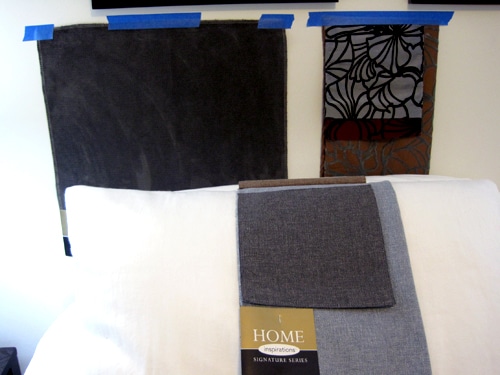
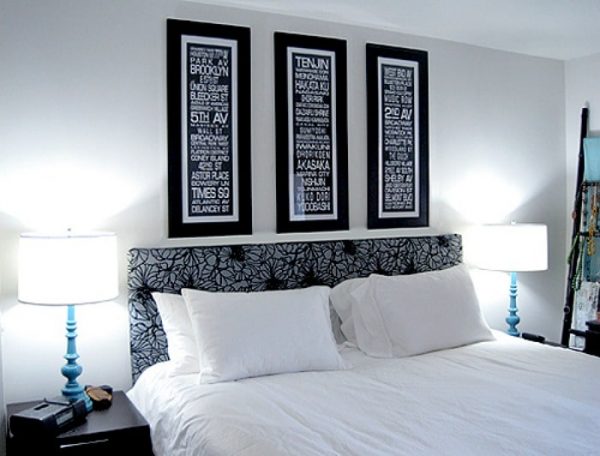
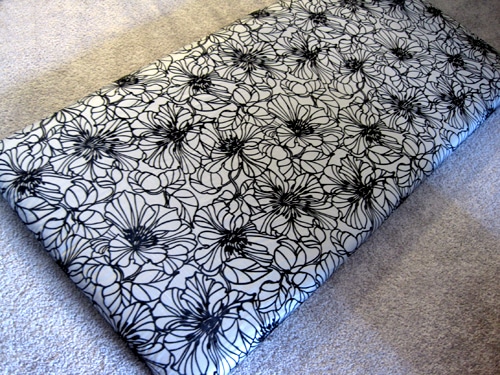
Surprisingly, my husband and I came to a unanimous decision. We went for the ‘wow’ factor with the floral fabric for our headboard, called Alexa Peacock. Unfortunately, the store didn’t carry the fabric in stock, so I had to special order it. It was regularly priced at $39.99/yard, but I happened to catch it on sale for $19.99/yard. Yes, please! And after a few days of impatiently waiting, it has arrived!
Will you just look at those yards and yards of shimmery, gorgeous fabric? I love it so much, it makes me want to roll around naked in it (but we’ll save that for another post).
How To Make DIY Upholstered Headboard
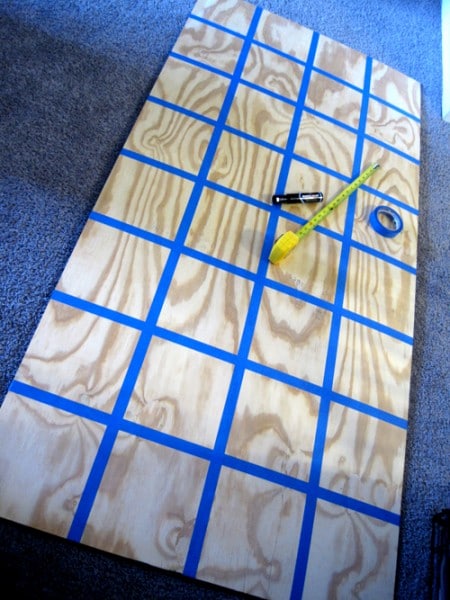
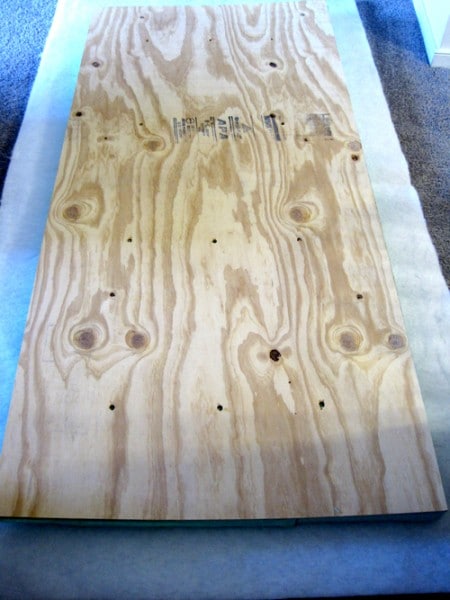
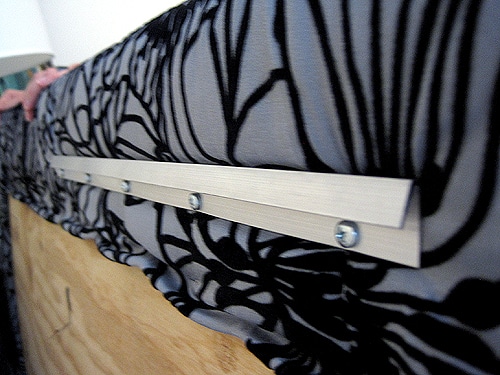
We had a 1/4″ sheet of 4×8 plywood cut down to 77″ x 36″ to accommodate our king-sized bed (Home Depot and Lowes will both make cuts for free). I measured the plywood and used painter’s tape to divide the sections evenly, then drilled a hole at each cross section, where the buttons would be for the tufting part later on.
By the way, I felt very clever for dreaming up the painter’s tape idea instead of drawing a mess all over the board with my sharpie. If any lines looked ‘off,’ I simply lifted the tape and moved it around.
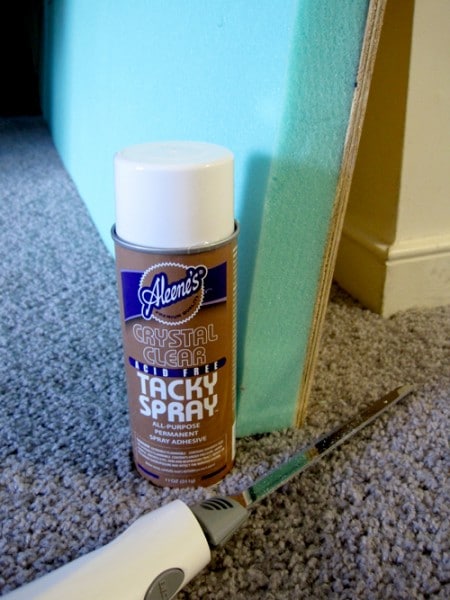
I had to purchase 5 yards of the 2″ high density foam because they’re only available in 24″ widths and I had to piece it together to fill the entire headboard. Then, I adhered the foam to the plywood by way of spray adhesive, then cut any excess off with an electric knife so that the edge of the foam and the plywood would be flush.
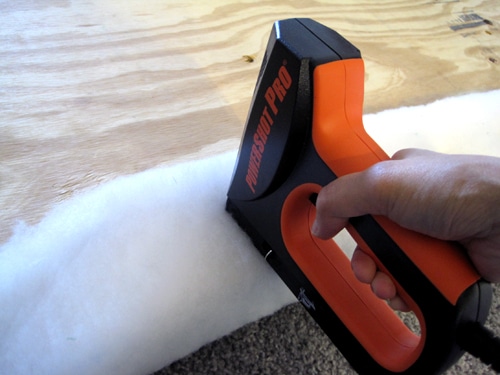
I laid the batting down on the floor, then laid the plywood on top of that (foam side down). Then, pulling the batting taut, I stapled it to the back of the plywood, starting from the center of each side, working my way out. By the way, the electric staple gun was my saving grace because I am a tiny weakling who is incapable of operating a manual one.

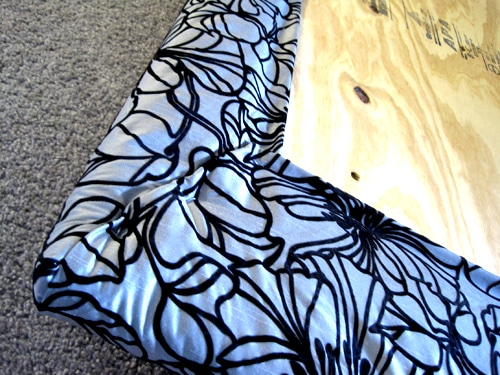
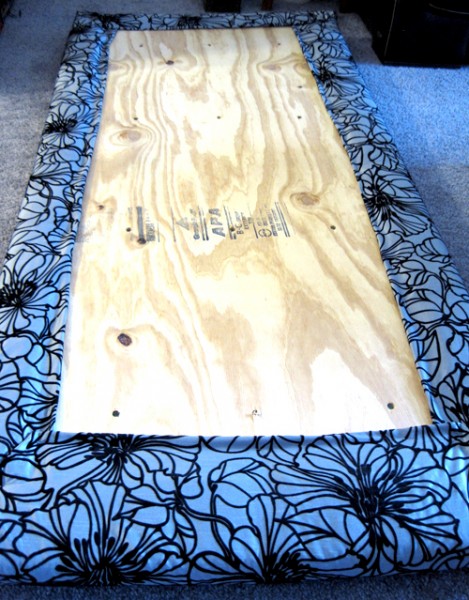
I quickly ran a warm iron over my fabric to remove any wrinkles and laid it out on the floor. I laid the plywood on top of that (batting side down), pulled the fabric taut and stapled it to the back, working from the center to the edges, just like I’d done with the layer of batting.
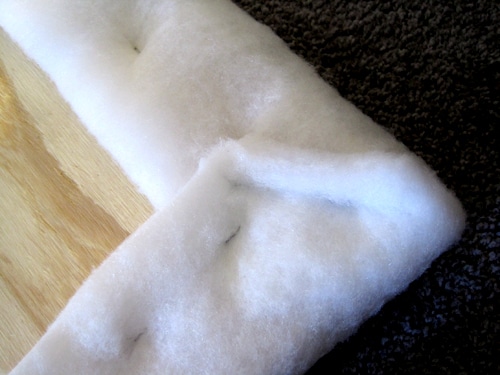
You could probably staple the batting and the fabric all in one go, but because I am overly-cautious, I stapled them separately. Then I spent way too much time folding each of the corners neatly before I stapled them down.
More Easy DIY Project Ideas

How To Add Button Tufting To A DIY Upholstered Headboard
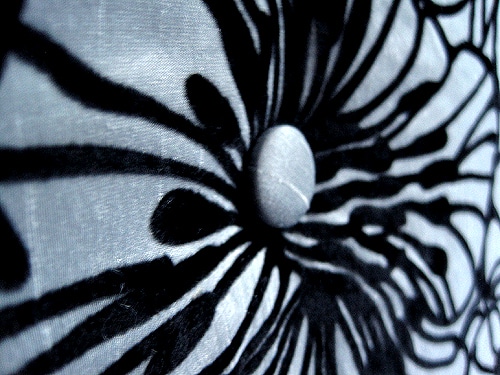
If you want to add button tufting to your upholstered headboard, here’s where you’d do it. It turns out that the buttons totally got lost in this pattern, but if you have a fabric that’s not as busy, button tufting would look really elegant. I’ll walk you through how to do that step.
First, you want to create your buttons. Pick up a button making kit from a craft or fabric store. Use remnants of your fabric to create fabric-covered buttons.

Before you begin the tufting part, do yourself a favor and get an upholstery needle. Trying to push a standard-sized needle through about 4 inches of fluffy stuff doesn’t work all too well. Ahem… not that I’m speaking from experience.
I threaded the (upholstery) needle with black upholstery thread and pushed it through a drill hole in the upholstered headboard, from the back to the front. Then slid the button onto the thread, and ran it back through from the front to the back. I gently pulled the thread taut to create a tufted look. Then I secured the loose ends to the back of the headboard with my staple gun. I repeated this until I had three rows of 4 buttons.

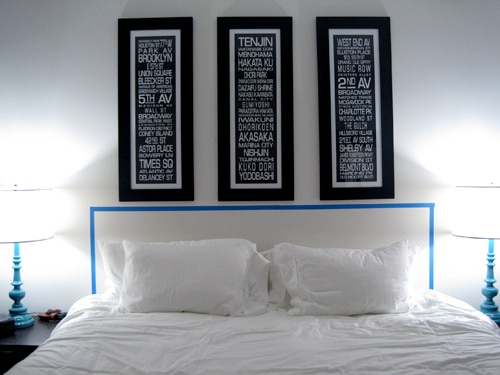
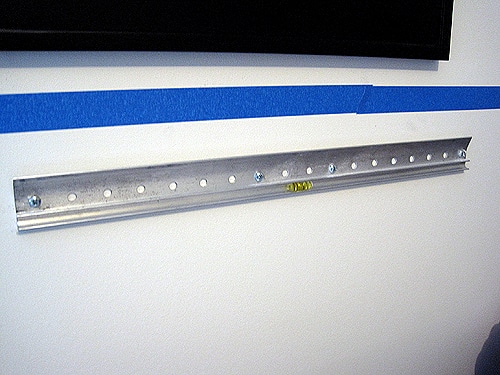
Now we hang our finished upholstered headboard! We chose to use a metal french cleat capable of holding 200 lbs. of weight (overkill anyone?). Basically, it comes in two parts: one that you screw into a stud in the wall, and the other that you screw into whatever it is you’re hanging. One part sits into the other for a secure fit. And look! I’m using a level this time!
Voila! And we’re done! You now have an elegant new fabric headboard that cost hardly anything to make.
Jen, from The House of Wood was previously on the Somewhat Simple contributing team sharing her fabulous DIY project ideas.


What a beautiful headboard you made . I love it. If you wanted to attach to your bed, how would you do it?
I love that headboard idea. The fabric It’s gorgeous. May I ask if you purchased it online and if you did which company? Can’t wait to try and make something like that.
Thanks Diane! The fabric is from a local fabric store – sorry about that!! 🙁
This looks like a wonderful project! Our headboard is quite dated and I want to try making a fabric one instead. Thanks for the tutorial!
Good luck Marysa! I hope your headboard turns out amazing!
Did you use two French cleats or just one? Great instructions!
Thanks! Unfortunately I’m not 100% sure. A contributor wrote this tutorial years ago for our site so I didn’t do this project myself. Sorry about that!
I had such a great time making this headboard; mine is queen-sized, so a bit easier to work with. I rounded my top corners which makes for a different look but also somewhat complicated stapling the fabric. I got the foam board at JoAnne fabrics– they figured out exactly how much I needed. The total cost of the headboard was about $215 (without fabric which I already had left over from window treatments) which is about
$1000 less than the estimate I got. And it was fun.
So glad your headboard project was successful! A fun project that looks great and saves you money is the best!!! Thanks for stopping by and leaving a comment !
Hi, this is a great idea! Quick question… where do you recommend getting the foam from?
How much fabric will I need for a king size headboard?
3 yards
How much is the foam?
Great and amusing! I want to try this! Where did you get the thick foam?
That was awesome! Nailing the headboard against the wall was practical idea. Kept your costs down and made cleaning under the bed a lot easier. Great job!
Love the idea, I will totally do this once the hubby and I get our own apartment!!
Nissa
Hi Aja,
Thanks for the kind words! I actually sell those city prints in my Etsy shop here: http://etsy.com/shop/jenwoodhouse I purchased the frames from Michaels. Hope that helps!
Love this idea. But where did you get the posters for the city sites that are in the frames?
I LOVE LOVE LOVE this idea- and you make it look so easy!!! Thanks Jen!