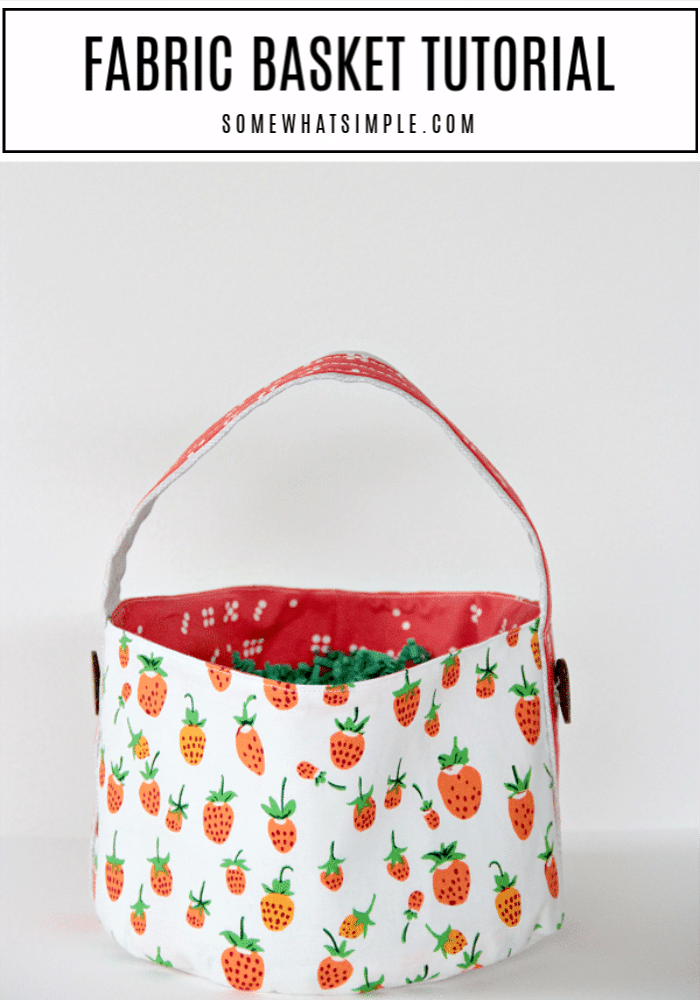
This DIY fabric basket tutorial is a simple project that can be used as storage solutions, gift wrapping, Easter egg hunts and more! These round fabric baskets are easy to make and they look fantastic!
Looking for more creative basket ideas? Here are a few of our favorites – Stairway Organization Basket, and The Snack Bin.
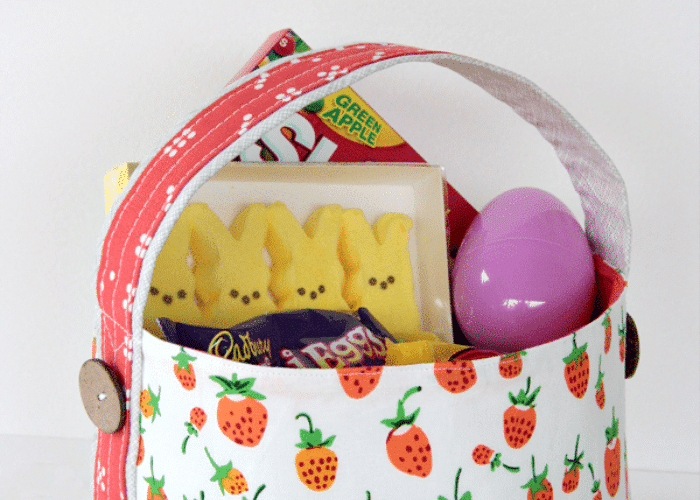
Since Easter is just around the corner, I thought it would be fun to share an easy tutorial to make a custom Easter basket. These soft fabric baskets can be made in one evening, and they can be used year after year! I’ve also made these to match my office, and I use them to organize small items in my home.
In this tutorial, the basket I am making is approximately 5″ high and 8″ in diameter. Let’s get started!
How to Make a Round Fabric Basket
To make a fabric basket, you’ll need few basic sewing supplies and no more than a couple hours of your time!
SUPPLIES –
- (2) – 27″ x 6″ pieces of quilting cotton for the lining and exterior part of the bag
- (1) 23″ x 3 3/4″ piece of cotton for the handle. This piece will be the underside of the handle (Fabric A).
- (1) 23″ x 2 3/4″ piece of cotton for the handle. This will be the accent piece (Fabric B).
- (1) 26″ x 5″ piece of canvas or heavier weight fabric This will be used as interfacing.
- (1) 23″ x 1 1/2″ piece of canvas for the handle.
- Elmer’s Glue
- sewing supplies
- (3) 8 3/4″ circles – one canvas and the other two cotton.
DIRECTIONS –
To Make the Handle:
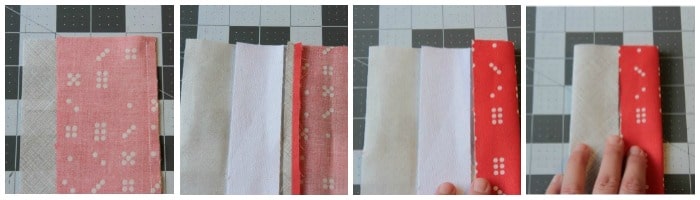
- This is neat little trick makes perfect handles for totes, etc. With right sides together, sew a 1/4″ seam along the longest side of the handle fabrics.
- Press the seam open. Place the canvas strip onto fabric A.
- Fold over fabric B towards the seam.
- Fold fabric A towards the seam. Press.

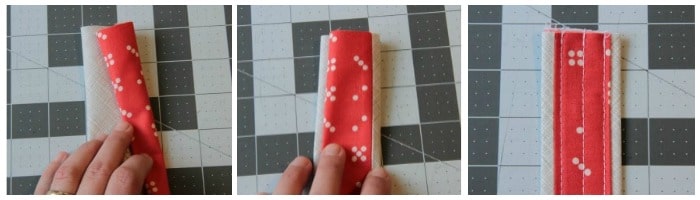
- Fold fabric B again over fabric A until there’s a nice accent trim on both sides. Press.
- Pin into place and topstitch.
To Make the Basket Lining:
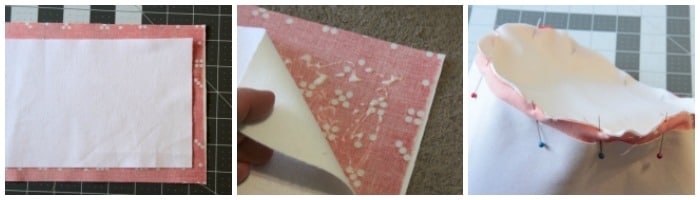
- Take your lining fabric and place face down. Place the canvas strip on top. Leave a 1/2″ on the bottom and sides, and 1″ at the top.
- Apply a little Elmer’s Washable School glue along the edges in between the two pieces. Press with a hot iron. This will heat set the glue and keep the fabric in place while we construct the basket. No worries. It will not break or gum up your needle or machine or damage your fabric. *You can also use fusible webbing, if you did not want to use the glue. Apply according to directions.
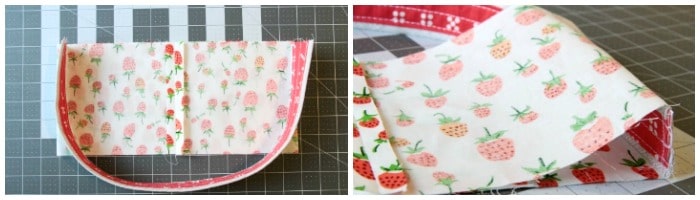
- Fold the lining fabric right sides together along the short side, and sew a 1/2″ seam. Press the seam open. (Not pictured)
- Lay the base (round circle) face down and place the canvas on top. Attach the base to the lining with right sides together. Attach this base to the side with the 1/2″ of no interfacing.
- Slowly, sew the base to the lining using a 1/2″ seam allowance. Make sure to avoid pucks and tucks.
- Leave your lining as pictured above and set aside.

To Make the Outer Basket:
- With right sides together on your outer fabric for the basket, sew a 1/2″ seam along the short side and press open. After sewing, if your fabric has a particular direction, place it upside down, as pictured. With the seam in the middle, flatten the fabric and press with your fingers on the outside to crease the fabric. This will let you know exactly where to place the handle.
- Insert the handle inside the fabric, pin, and stitch the handle into place. Attach your bottom like you did for the lining. Pull the basket right side out.
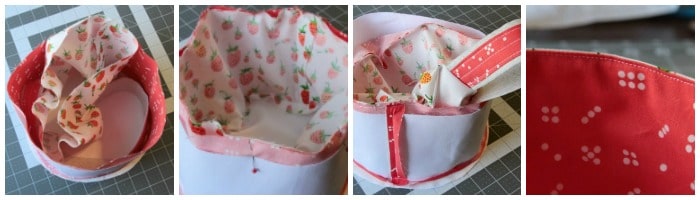
To Construct the Basket:
- Place the outer piece inside your lining that you had set aside making sure both pieces touch right sides together. Make sure the handle is resting at the bottom on the basket and out of the way.
- Lining the tops of both pieces, pin into place. Notice the handle is out of the way and at the bottom of the basket. Sew a 1/4″ seam along the top leaving about a 3″ opening.
- Pull the bag right side out through the opening you left.
- Push your basket down focusing on the bottom edges and making sure all edges are pushed out. You can place a few fingers in the hole, and move the fabric around. This next part takes a little time and patience, so don’t skip this! To achieve a better looking basket, you will need to press the top edge with a hot iron. It takes a little time working the fabric so it isn’t wonky, but all the extra effort is worth it in the end. Topstitch close to the edge. This will also close up the opening.
Finishing Touches:
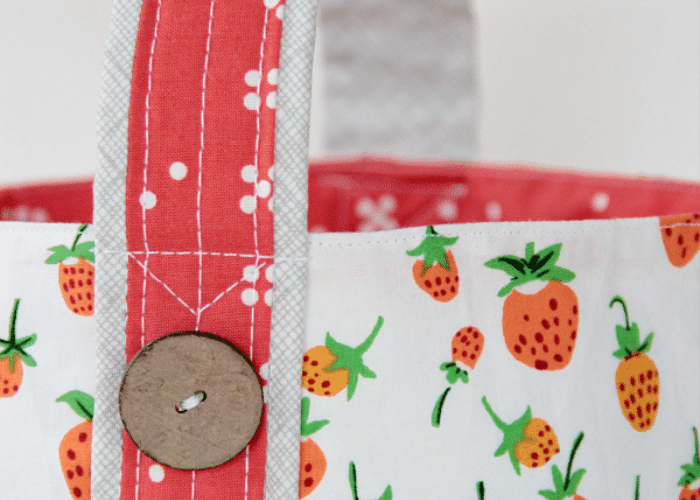
- Pin the handle into place, and topstitch in place along the length of the basket. You can get creative with your topstitching or keep it simple. I stitched in the ditch.
…and that’s it!!! Enjoy!
ABOUT THE AUTHOR – Nancy is the talented seamstress behind the blog Owen’s Olivia. Nancy was a monthly contributor on Somewhat Simple in 2013.


So cute! And easy to boot. Thanks so much for the tutorial.
This is so super cute Nancy! Love the special details on the handles and the buttons. Adorable!
Awe, thanks Nicole!! xx nancy
Nancy’s work is always so awesome and this is just the perfect little basket for my desk.
Looking forward to sewing this one up soon – great tutorial Nancy!!