This is a sponsored conversation written by me on behalf of Cricut. The opinions and text are all mine.
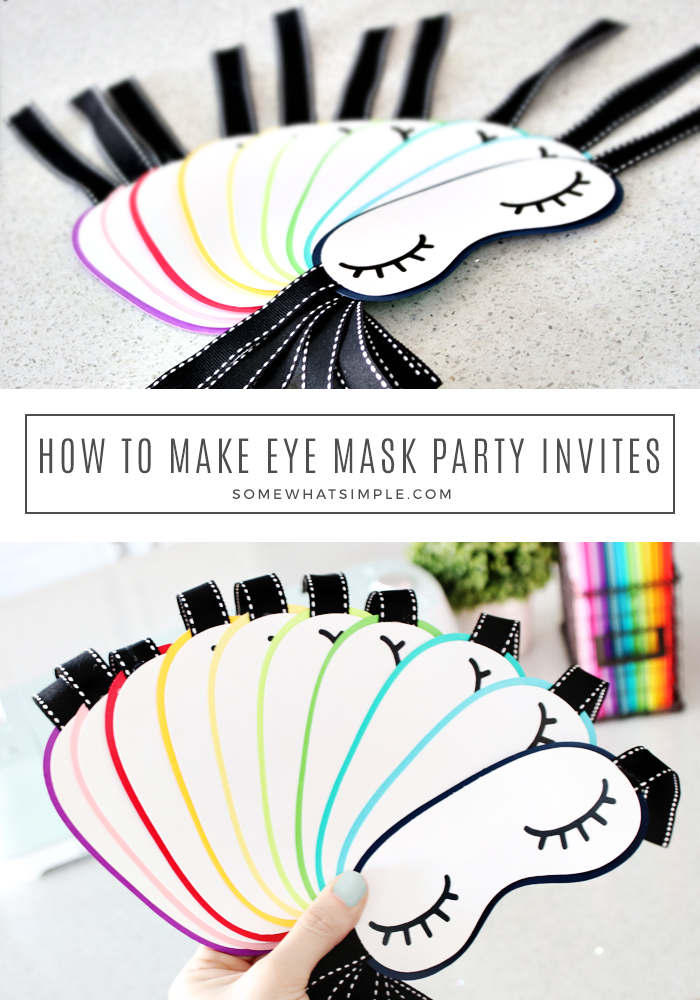
Start you pajama party off right with these darling Sleep Mask Party Invitations! These invites are so creative and cute, your guests will never guess that they take just minutes to make!
If you love creating with you Cricut as much as we do, be sure to check out our Christmas Tree Luminaries and our simple No-Sew Felt Banner.
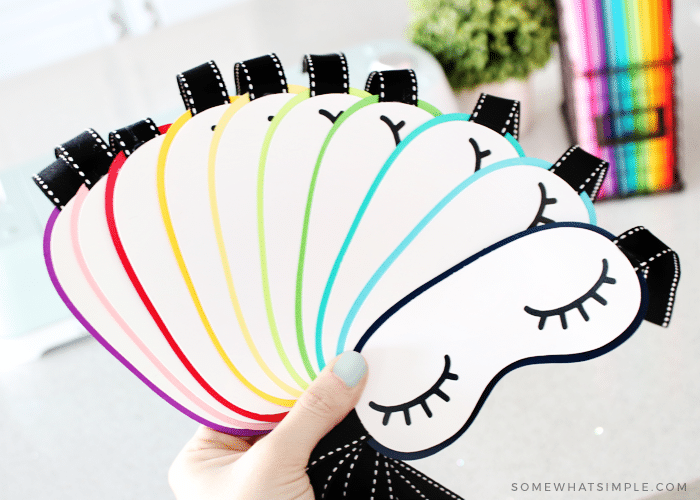
Last week I shared with you the details about Addie’s Pajama Party and I had quite a few requests to show exactly how we made the darling sleep mask invitations. (Aren’t they so cute???) Making these invites only calls for a few basic supplies, and if you’re using your Cricut, they can be made in just a few minutes! Here is how –
Sleep Mask Party Invitations
Click HERE for a link to the design elements I used for this project.
SUPPLIES –
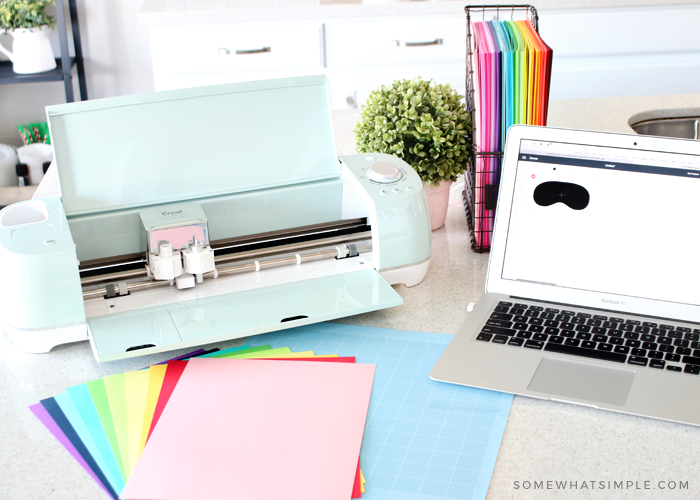
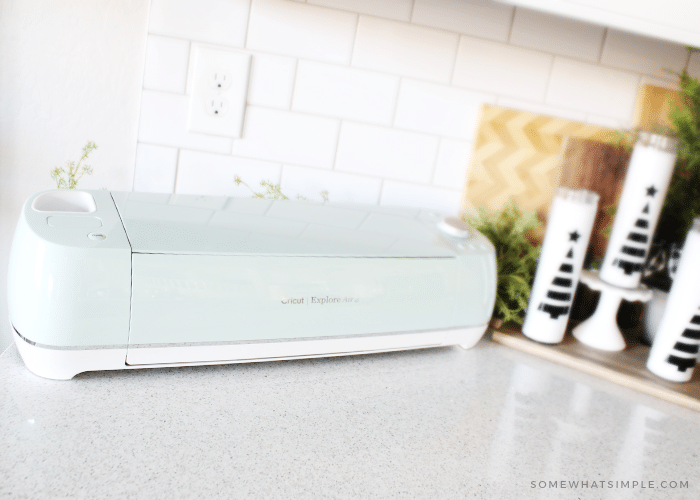
- Cricut Cutting Machine – I used my Explore Air 2
- Cricut Design Space
- standard cutting mat
- colorful cardstock
- white printer paper
- black vinyl
- transfer tape
- glue stick
- ribbon
- scissors
- hot glue gun
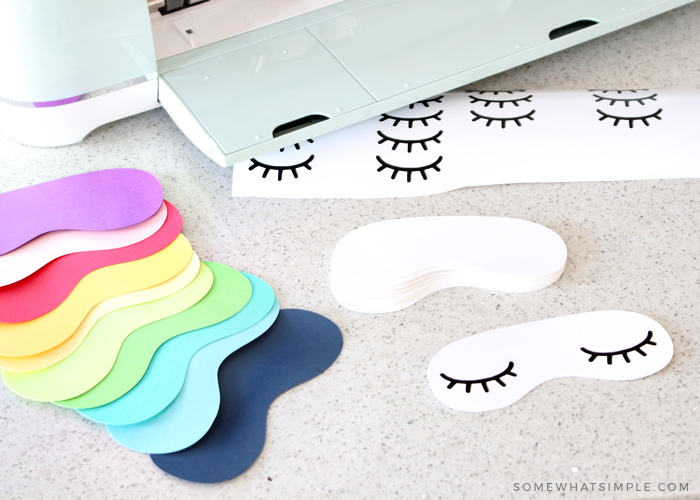
TO MAKE THE COLORFUL PART OF THE EYE MASK –
*You will need 1 colorful piece per invitation.
- Open Design Space and click “Images” on the left side. This will bring up the image library.
- Do a search for EYE MASK, and then scroll through the library until you find the shape you’re looking for. The image I used was a Mardi Gras Mask, (Item # #MB34FDFD) and it worked great! 🙂
- INSERT the image into your design canvas, then drag and stretch it to be the size you want.
- If you chose a mask that has the eye cut outs, like my Mardi Gras mask, you’ll want to tell Design Space to fill those cutouts and leave the mask to be 1 solid sheet. To do this, in the bottom right corner, click CONTOUR. This will pull up a box that will allow you to hide contours. Click on each eye piece, then X out of that box. Your design on your canvas should now be one solid color.
- Copy and paste this mask on your canvas as many times as you need, then do the following:
- Click “Make It”
- Follow the prompts –
- place your colored cardstock on the cutting mat.
- Load your mat into the machine
- Press start to cut it out.
- Weed the cardstock from your mat and set aside
TO MAKE THE WHITE SIDES OF THE EYE MASK –
*You will need TWO white mask pieces piece per invitation – one on each side of the colored cardstock. One side will have all the party details, the other will have the cute vinyl lashes.
- Resize the masks on your canvas – make them just slightly smaller than the colorful cardstock ones you just cut out.
- Do the following:
- Click “Make It”
- Follow the prompts –
- place your white printer paper on the cutting mat.
- Load your mat into the machine
- Press start to cut it out.
- Weed the paper from your mat.
- Write out or print and glue all your party details on one side of half the white masks, then set them aside.
TO MAKE YOUR VINLY LASHES –
- Open a new canvas in Design Space and click “Images” on the left side. This will bring up the image library.
- Do a search for EYE LASHES, and then scroll through the library until you find the one you’re looking for. I used #M90FD1E4 “Cute Closed Eye Silhouette”
- INSERT the image into your design canvas, then drag and stretch it to be the size you want.
- Copy and paste these lashes on your canvas as many times as you need, then do the following:
- Click “Make It”
- Follow the prompts –
- place your black vinyl on the cutting mat.
- Load your mat into the machine
- Press start to cut it out.
- Weed the vinyl from your mat and set aside
- Stick a set of vinyl lashes on one side of the remaining white masks, then set aside.
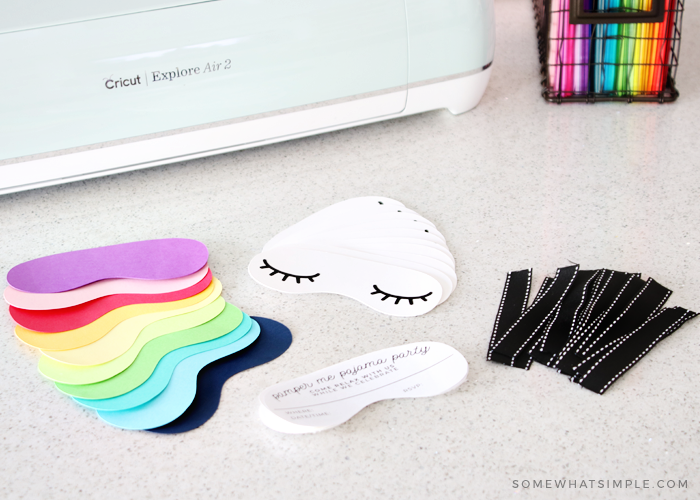
PUTTING IT ALL TOGETHER –
Once all pieces are ready to go, do the following –
-
- Cut your ribbon to be the length you want on each side. (Mine were about 3 inches long)
- Place a dab of hot glue on the left and right side of the colorful cardstock, then attach a ribbon to each dab of glue so the ribbon hangs off the edge.
- Secure one white mask with the party details on top of the cardstock with a glue stick.
- Secure one white mask with the eye lashes on the other side of the cardstock.
- … and you’re DONE!
Top FIVE Reasons Why I love Crafting and Creating with My Cricut Explore Air 2
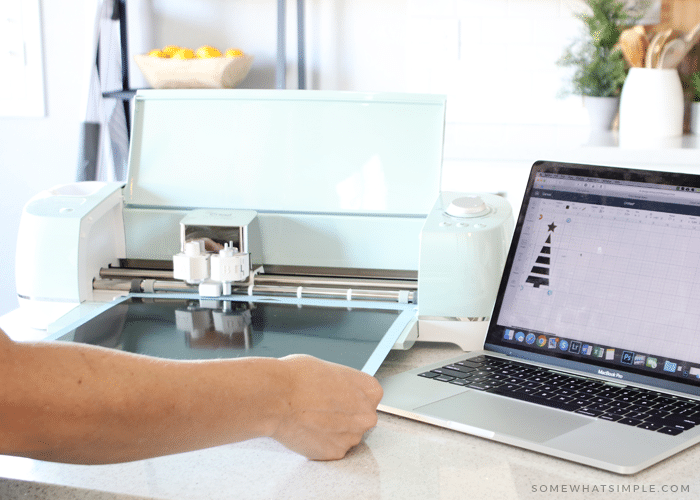
I’m quite new to the world of Cricut creating, but I’m no stranger to the fun things you can make with a desktop cutter! I’ve previously owned 2 other cutting machines, but the Cricut Explore Air 2 is my VERY FAVORITE! Here is what I love most about it –
#1 – It is EASY to Set Up
I’ll admit it – I was intimidated to start the set up process when I first got my machine. It sat in the box for two weeks before I got the courage to try it out! But Cricut makes the set up process SO EASY! It literally takes just a few minutes… I promise! Get it out of the box, plug the power cord into the wall and connect your computer. Open Design Space and start creating – that’s basically it! Cricut even includes a test project + all the supplies. you’ll need, and they walk you through every step so you get the hang of how it works right away!

#2 – It is FAST!
The Cricut Explore Air 2 can cut and write up to 2X faster than previous Cricut Explore models. When you’re making 10 party invitations with multiple layers on each invite, speed matters!
#3 – It Cuts a BUNCH of Materials!
The Cricut Explore Air 2 cuts on more than 100 materials — everything from cardstock, vinyl and iron-on to specialty materials like glitter paper, cork, and bonded fabric. From cards to custom T-shirts to home decor, Explore Air 2 makes it easy to realize your creative vision. For these sleep mask party invitations, we cut out printer paper, cardstock and vinyl. One blade does all of that!
#4 – It’s Easy to Create + Design
Design on the go on your laptop, iPad or iPhone. Browse and play with thousands of images, fonts, and ready-to-make projects, or create your own design from scratch!
#5 – It’s PRETTY!
Not only is it sleek and beautiful, but have you seen all the color options??? Finally, a useful machine that I don’t mind leaving out in my office! (I wish my printer was as pretty as my Cricut!)
So, what do you think?! Are you ready to put a Cricut Explorer Air 2 on your Christmas List???


im trying to open this project up with my cricut but its not working. any ideas?
Good idea. 🙂
Stephanie,
Invitation is so pretty. Now I want a Cricut!
Hi Sarah, you should put in on your Christmas list!
Stephanie,
These are adorable! Thanks for sharing.
Hi Arie-
Thanks for the compliment! I love how they turned out!