
Making a Wax Paper Stencil is a simple method that will change the way you add fonts and images to your crafts and decor!
Here are a few more stencil projects you might enjoy: Freezer Paper Stencils, Stenciling a Jersey Shelf, and Wood Stenciled Monogram.
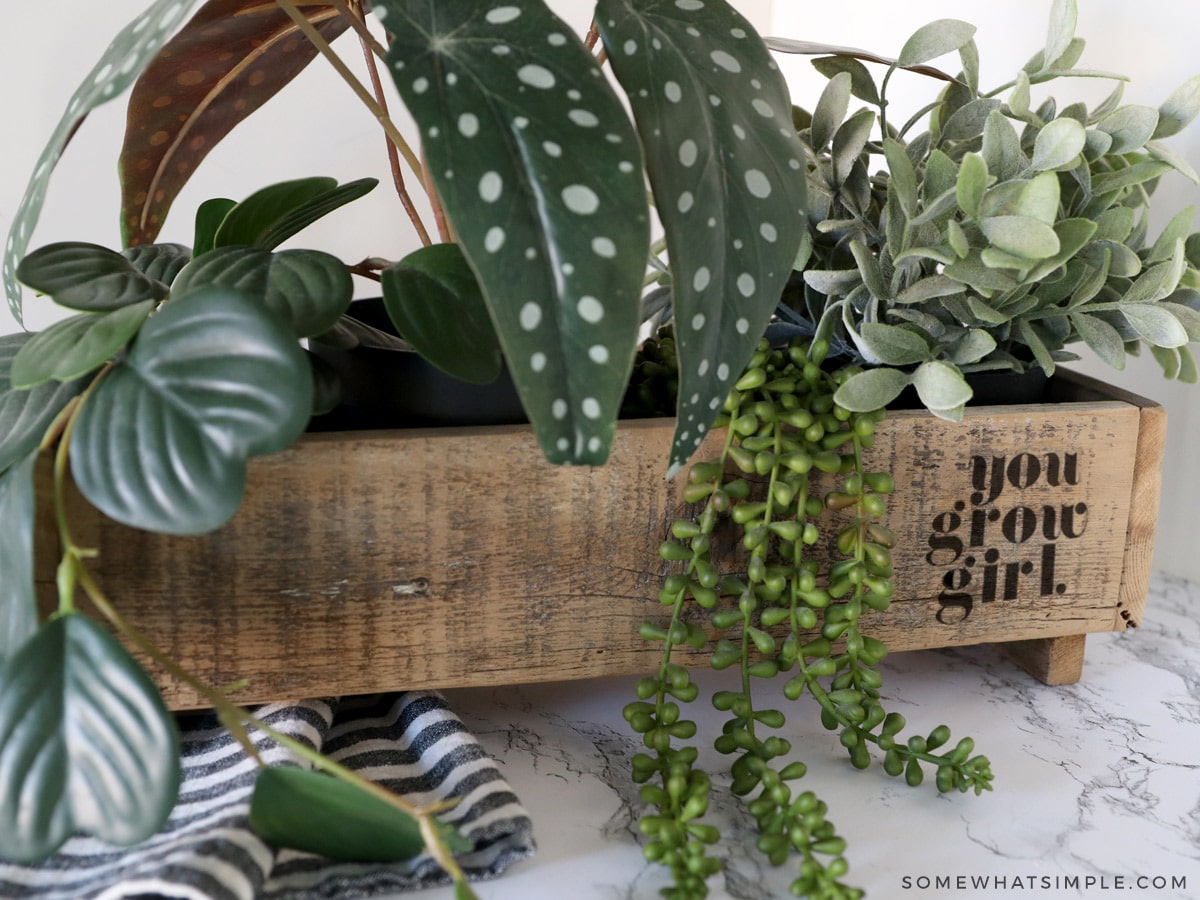
If you’re not great at hand-lettering and you don’t have a Cricut or craft cutter to make your own stencil, you can still get a nice, hand-painted look on that project you’re planning! All you have to do is use this simple wax paper transfer method.
Here is how to make a stencil without any cutting machines or special stencil paper:
How to Use Wax Paper as a Stencil
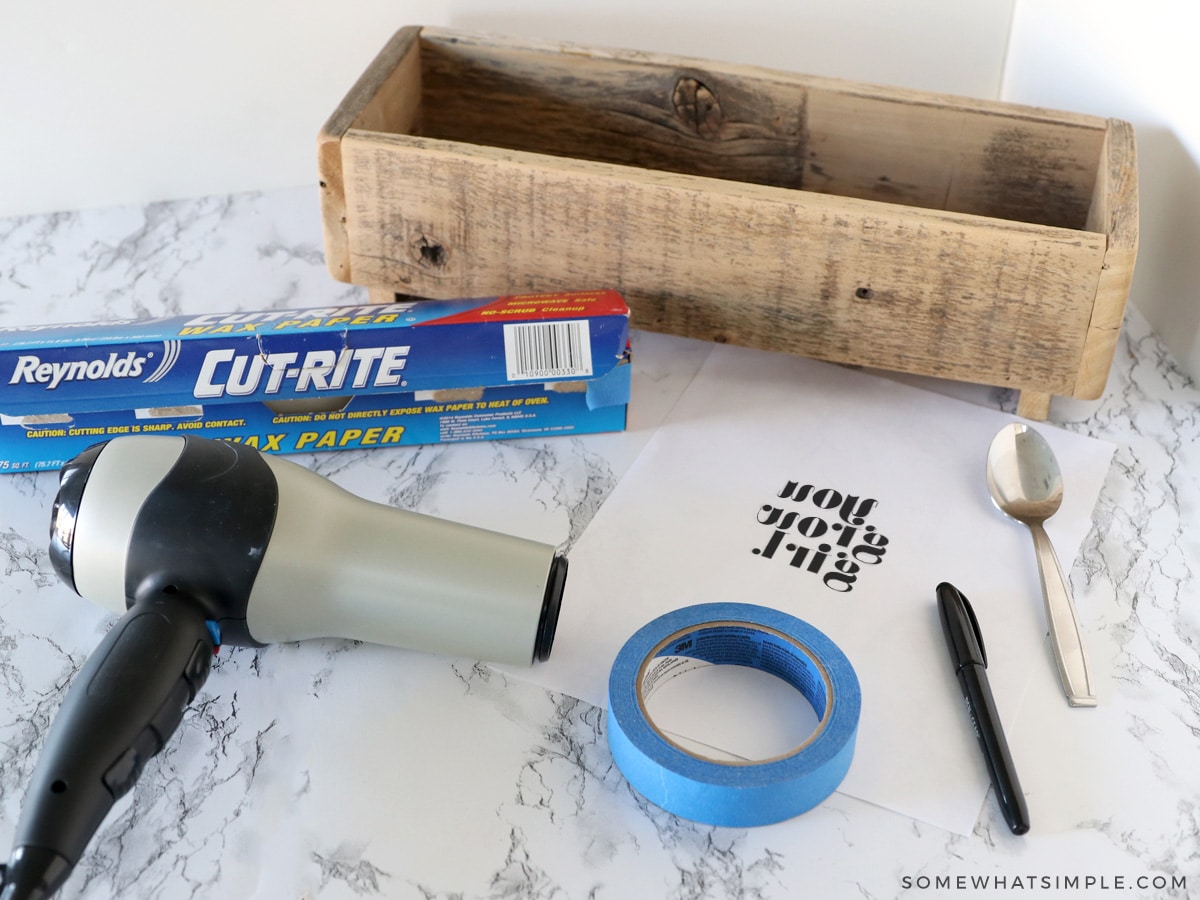
MATERIALS –
- wax paper roll
- scissors
- tape
- permanent marker – your choice of color(s)
- spoon
- blow dryer
- printed words or graphics – you can use Canva to design your own, or you can use our free printable (download below). If you make your own, I recommend using simple, large graphics.
- project surface – you can use this method on a T-shirt or a wood surface. The smoother, the better! The wood I first used for this project wasn’t very smooth and it made the design hard to see.
NOTES –
- If you are using this method to make a t-shirt, you will want a piece of cardboard to stick inside your shirt so the design doesn’t bleed through. You can also use fabric paint, fabric markers, or your favorite fabric medium and fill in your design with a fine brush.
- You can follow this tutorial using a sheet of freezer paper instead of wax paper if you have that on hand.)

INSTRUCTIONS –
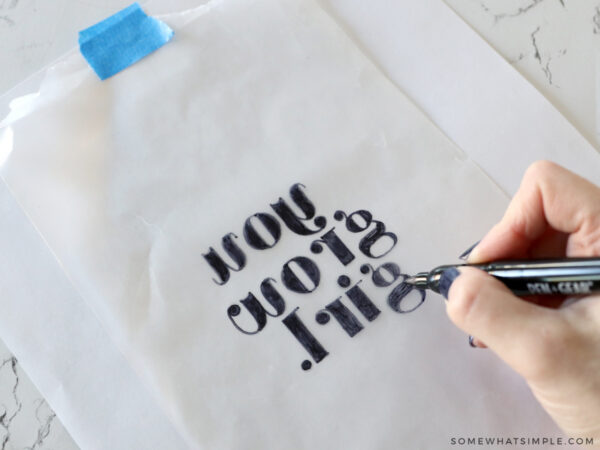
PRINT. Print a mirror image of your desired stencil design to fit your project. (Our printable is already backward and ready to go!)
PREP. Cut a piece of wax paper to fit over the design. Leave a minimum of a 1-inch border so you can add tape to secure it.)
TAPE. Place the wax paper (shiny side up) over the design and put a small piece of tape over the top and bottom edges to secure it.
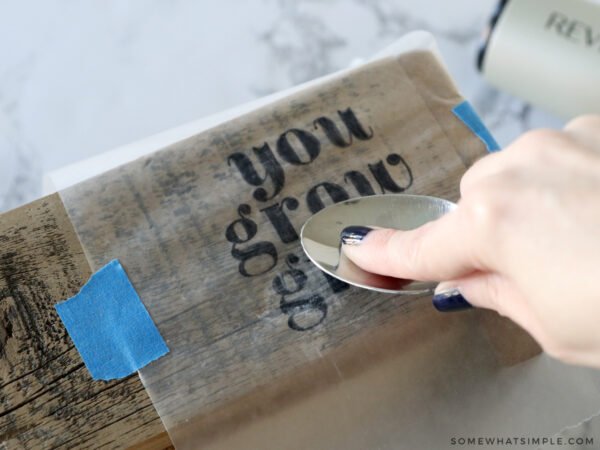
TRACE. Trace your words/image by drawing on the surface of the wax paper with your permanent marker.
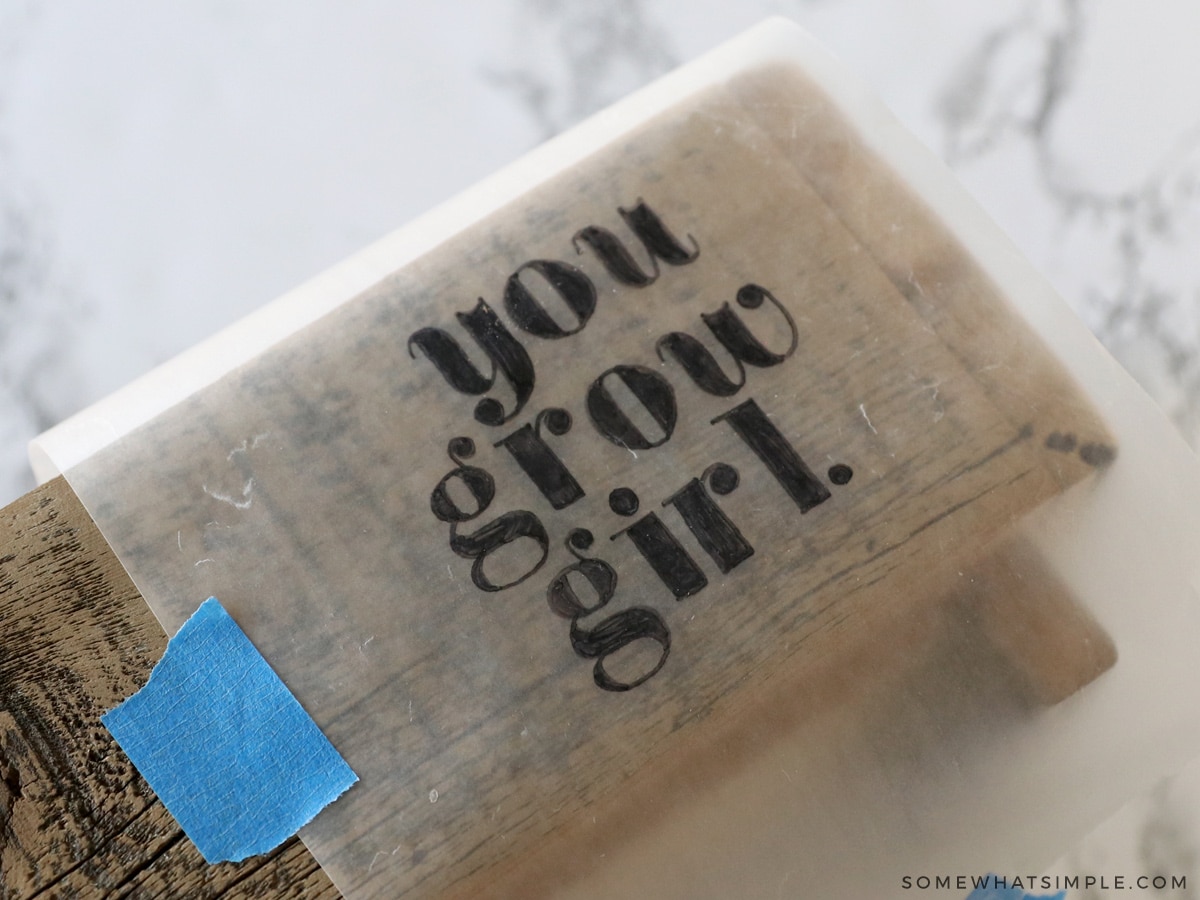
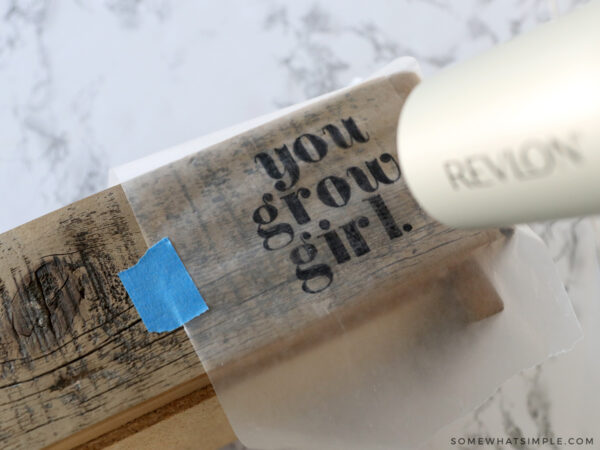
TRANSFER. Carefully remove the wax paper from the page, and move the pieces of tape to the opposite side of the wax paper. Place the wax paper over your project, shiny/marker side down, and press the tape down to hold it in place.

BLOW. Use the hairdryer to help reactivate/ wet the ink, then rub the wax paper over the design with a spoon or your finger, to transfer the marker to the wood.
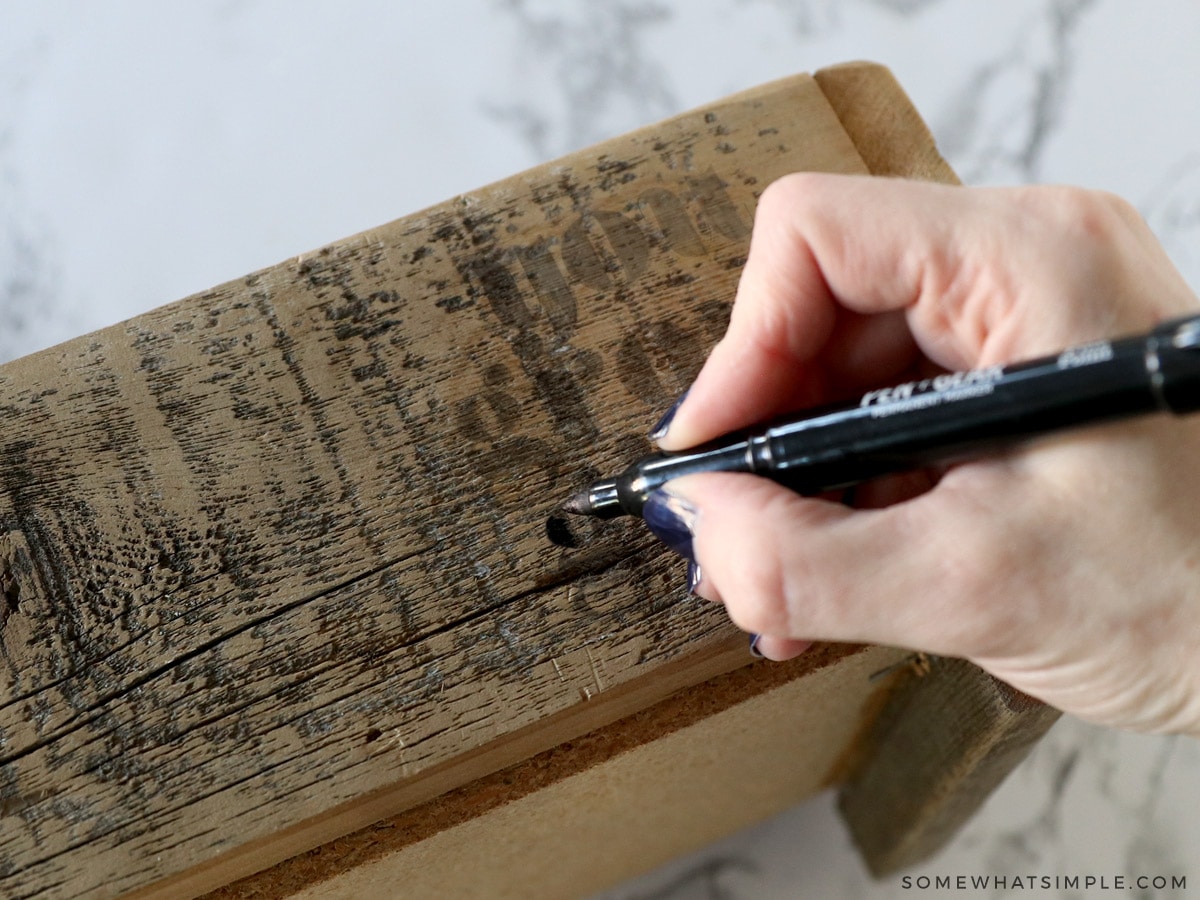
TRACE. Remove the wax paper. Trace over the design on the wood with your permanent marker to fill it in as much as you’d like. (Our design was super light on this rough wood, so we had to trace and fill quite a bit.)
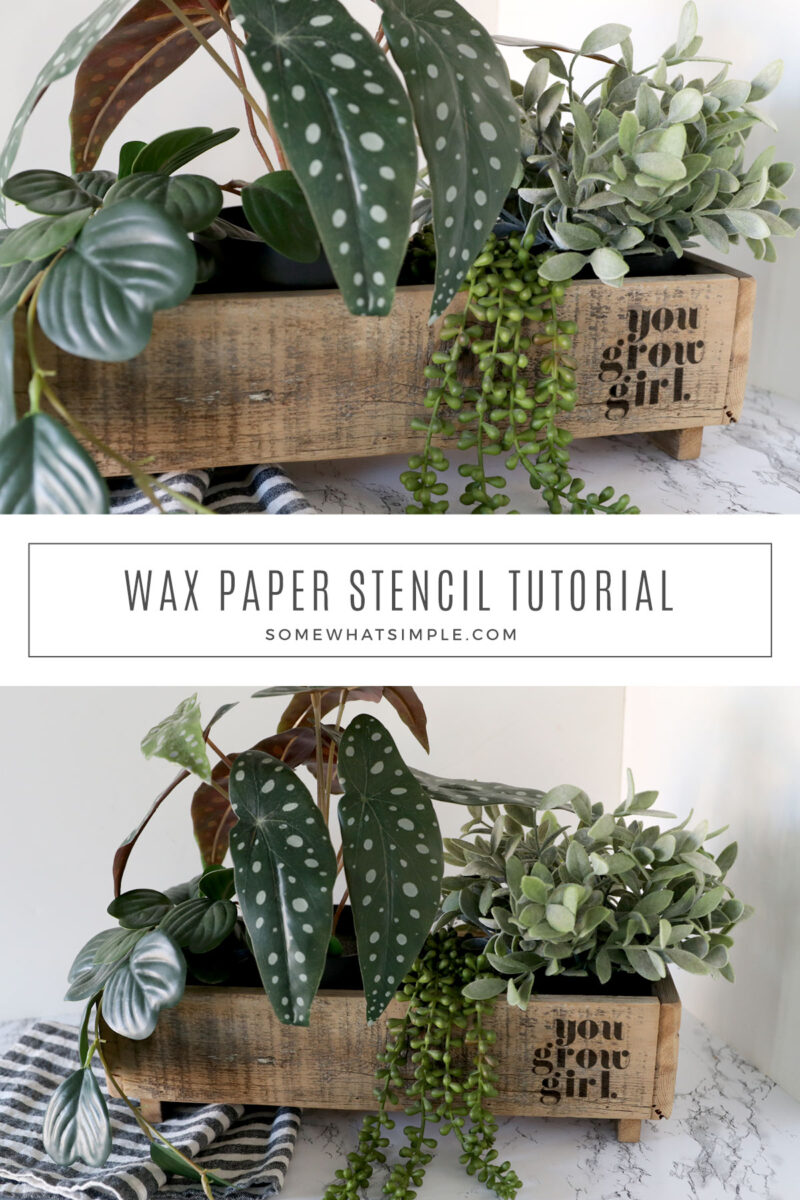
… and you’re done! Super simple, and it looks fantastic!
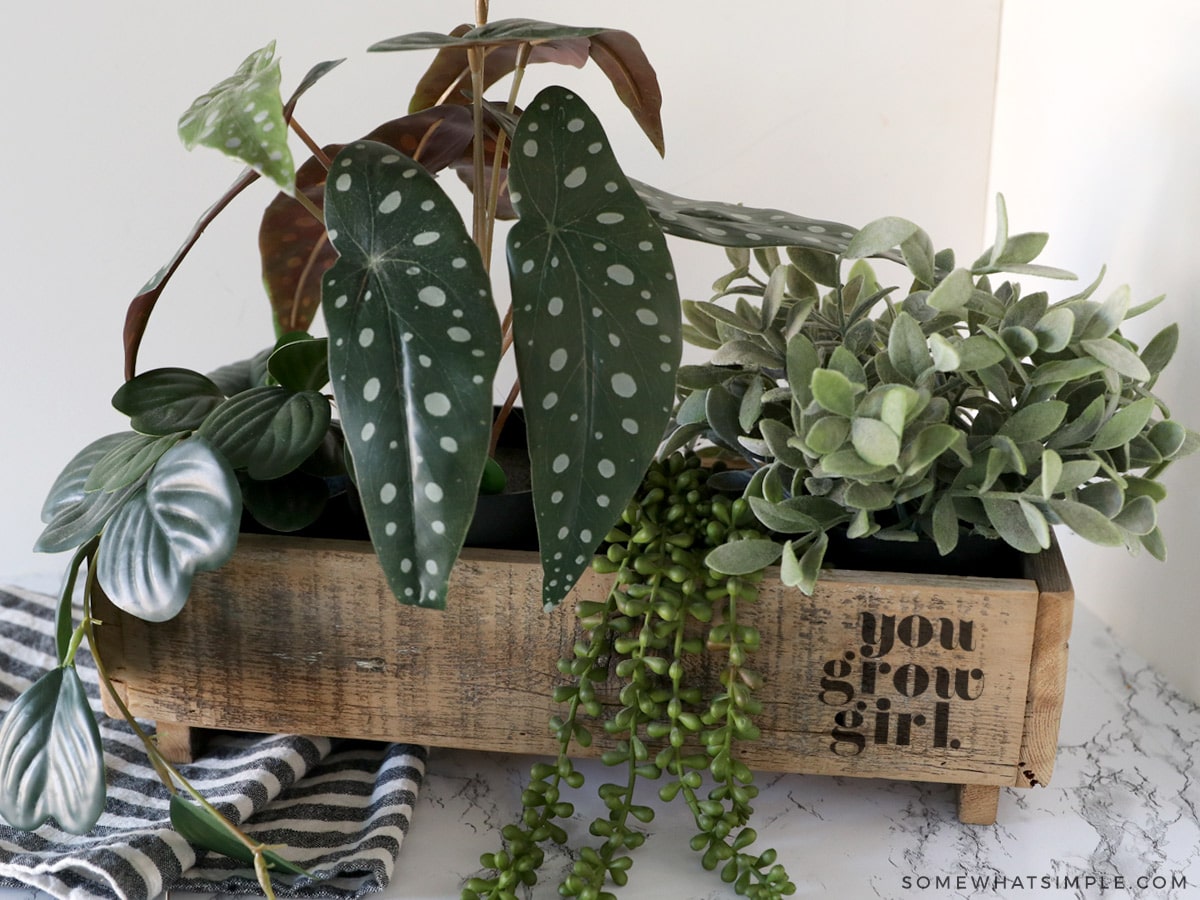
You Grow Girl Printable
We are happy to offer free printables to our newsletter subscribers. To use our design, enter your name and email address in the form below.
HERE’S A PRINTABLE TUTORIAL CARD IF YOU’D LIKE TO PRINT THESE DIRECTIONS –
Wax Paper Stencil
Ingredients
- wax paper
- scissors
- tape
- permanent marker – your choice of colors
- spoon
- blow dryer
- printed words or graphics
Instructions
- Print a mirror image of your words or graphic to fit your project. Cut a piece of wax paper to fit over the design. Place the wax paper (shiny side up) over the design and put a small piece of tape over the top and bottom edges to secure it. Trace your words/image by drawing on the wax paper with your permanent marker.

- Carefully remove the wax paper from the page, and move the pieces of tape to the opposite side of the wax paper. Place the wax paper over your project, shiny/marker side down, and press the tape down to hold it in place.
- Use the hairdryer to help reactivate the marker, then rub the wax paper over the design with a spoon or your finger, to transfer the marker to the wood.
- Remove the wax paper. Trace over the design on the wood with your permanent marker to fill it in as much as you’d like.


Thank you for your help with this! I was about to give up on trying to get my projects done. I tried paint and it just smeared my walls. Your a life saver! Would you be able to help me figure out how to transfer to tin? I’m trying to do flower pots and windchims from recycled materials.
I wonder if you could use craft paint instead of markers? I may try it.
Let us know if it works! 🙂
Love this!
Thank you so much! I can not afford a vinyl machine and so wanted to do some of the things I have seen.
Happy Holidays for all coming up.
Hi Jody, I’m so glad this can help you with your projects! Thanks for commenting, and Happy Holidays to you too!
This is a great tip and tutorial for a quick one 🙂 I was wondering if we could print the design directly on the wax paper or not. What do you think? Have you tried it yet?
Thanks in advanced!
Hi Helen, yes I’ve tried printing on wax paper but it didn’t work, the printer crumpled it up. If you could attach the wax paper to a thicker paper and remove it after printing, that might work. Thanks for asking and good luck with it!
Wow What an Awesome idea for those of us who aren’t really talented with writing and don’t have a vinyl machine. Thanks so much I can hardly wait to try it out!
Thanks Li! Have fun with your project!!