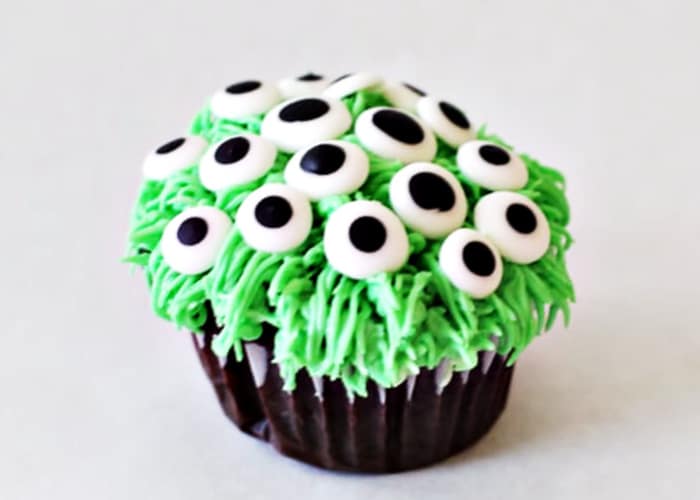
These edible candy eyeballs made from royal icing are an easy way to add monster faces on cupcakes, cookies, and frosted treats.
Looking for more ways to decorate those delicious baked goods? Be sure to check out a few of our favorite tutorials – Cupcake Frosting Tips, Fancy Fillings and Frostings, and Marshmallow Fondant Recipe + Tips.
A Fun Halloween Dessert Decoration
Halloween season is upon us, which means it’s time to stock up on candy eyeballs! Yes, this is totally necessary for all of your monster needs this season! Today I am going to show you how fast and fun it is to mass produce these little candy eyeballs made from royal icing.
These eyeballs are easy to make so your Halloween treats will be both delicious and fun to eat! Before we get started, if you need a little refresher on using royal icing, be sure to read these icing tips.
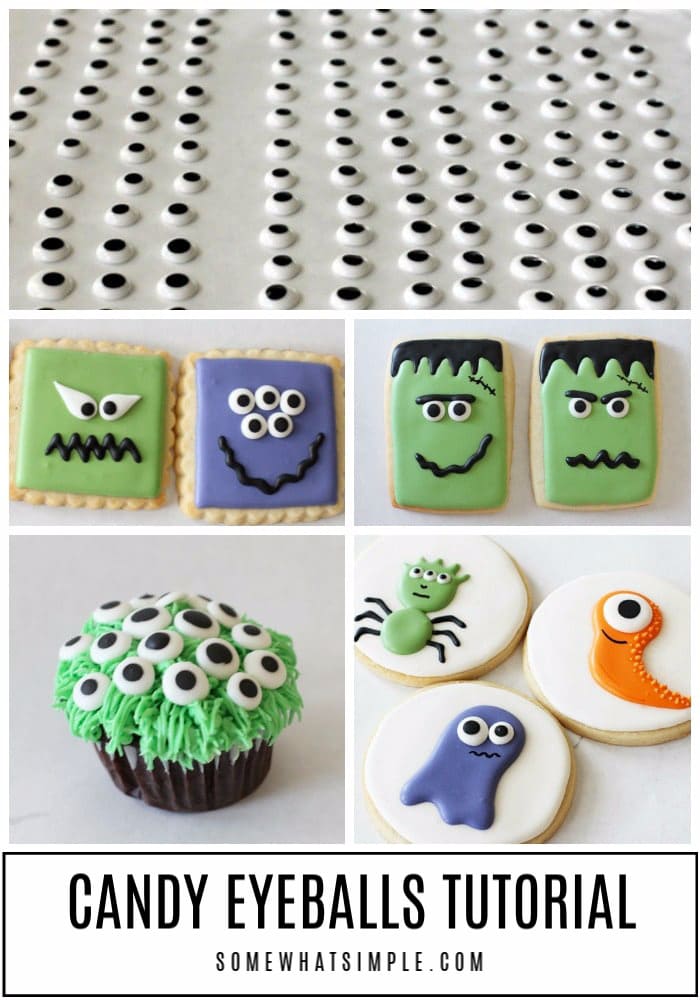
How To Make Monster Candy Eyeballs
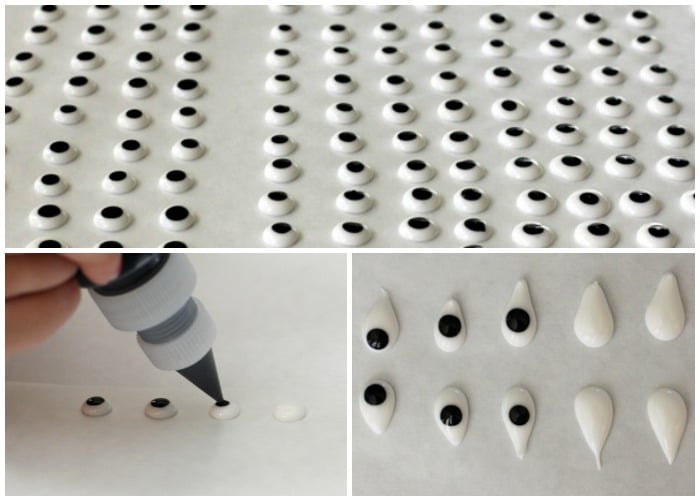
Prep – Lay out a sheet of parchment paper on a hard surface. You’ll also want to pour your royal icing into writer bottles so it’s easier to use. I used black and white royal icing for this tutorial but it’s fun to mix up the colors during Halloween.
Wet On Wet – In order for the eyes to lay flat when we’re done, we’ll need to use the “wet on wet” technique. This means you’ll first put a dot or two of white icing onto the parchment paper until you get the desired size of the eyeball. Before it dries, add the drop of black icing on top of the white.
Style Them – If you want to alter the shape of the eyeballs to make them even more spooky, use a toothpick to drag the icing to get the desired shape and look.
Let Them Dry – These candy monster eyeballs will need to dry for a full 24 hours before they’ll be ready to use.
Storage – If you’re not ready to use them right away, place them in a Ziploc bag to store them until you’re ready to decorate your delicious desserts.
Ideas For Using Your Candy Eyeballs
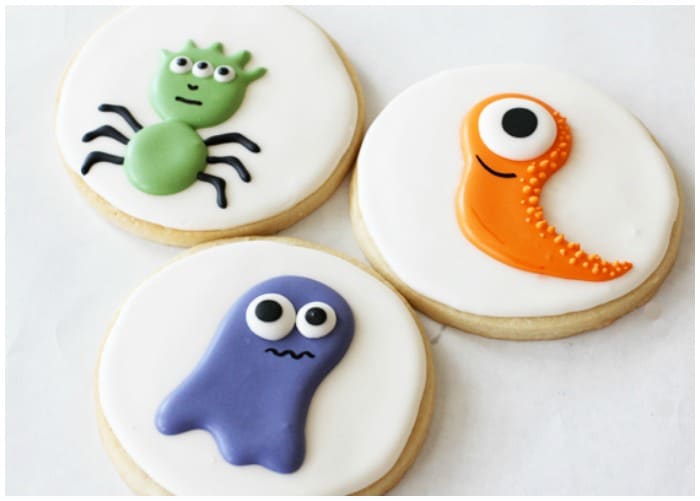
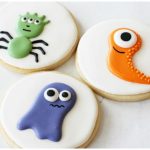
Blob Monsters – I made some random blob-ish monsters that were so easy! Just do some blobs of icing, and place some eyes on. For all you room moms out there, even a simple square can be a monster by placing eyes and a mouth on them. You can come to class with the base layer frosted, then let the kids put the eyes and mouth on. Then they can eat up!
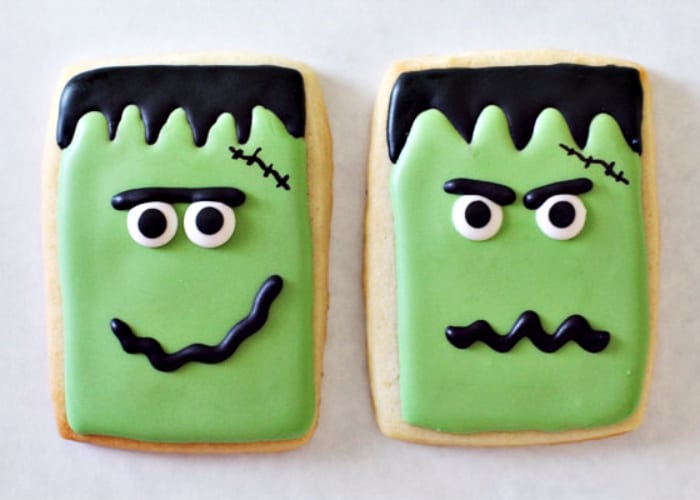
Frankenstein – These Frankenstein cookies are extra easy when your eyes are already made. Cut rectangles out of your dough with a knife, then frost the face and hair. After I frosted the green face, I just dropped two eyes in the wet frosting. If you want to wait until it dries, you can adhere your dry eyes with a dot of fresh icing.
I just couldn’t decide if I wanted a nice or mean monster. I think I prefer the friendly uni-brow, smiley one, but you can decide how you like your Halloween monsters!
Recipes That Use Candy Eyeballs
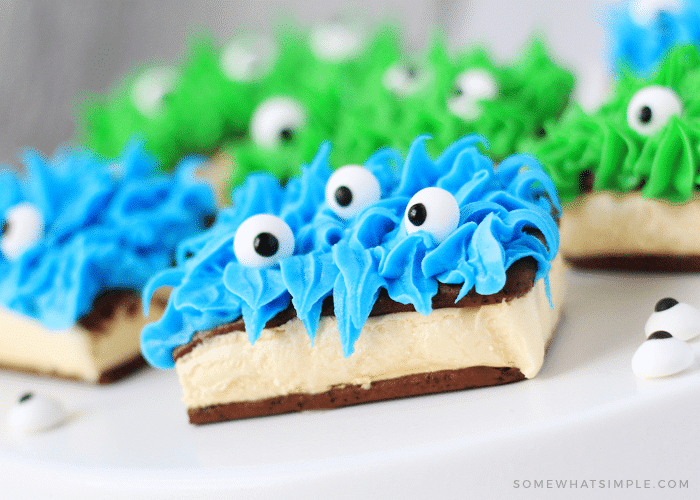
Your eyeballs will come in handy when doing tons of Halloween/monster treats. Decorate a brownie, or cupcake with these little eyes and your kids will have a blast!
- Monster Ice Cream Sandwiches
- Frankenstein Rice Krispies
- Mummy Cookies
- Zombie Bait
- Nutter Butter Turkey Cookies
- Turkey Oreo Pops
- Turkey Sugar Cookies
- Reindeer Marshmallow Pops
Leave us a comment below and let us know how they turned out or tag a picture of your spooky treats and tag us on social media.
Candy Eyeball Recipe
Ingredients
- 2 colors of royal icing
- parchment paper
- toothpick
Instructions
- In order for the eyes to end up flat, we are going to do the “wet on wet” technique. This means that as soon as you put a dot of white (or a couple), you put a dot of black right on top, before it dries at all. The key is to have the right consistency of icing. I used about a 7 second icing for these. (For clarification on that, see post mentioned above.) If you wait for the white to dry, you will have more 3D looking eyes.
- You can make different style eyes by taking a toothpick and dragging the icing out a little, then put the black dot on.
- All of your eyes will need to dry a full 24 hours before they pop right off your parchment paper. Then you can just stash them in a zip-loc bag until you need them.
Notes
For an awesome Royal Icing Recipe and other tips, see this post on the basics of royal icing.
Nutrition
Other Notes
ABOUT THE AUTHOR: Ashleigh is the creative mom of three and cookie EXPERT from Bee in Our Bonnet. Ashleigh spent a few years blogging on Somewhat Simple as our Baking Contributor.


These are fantastic! We make a few dozen in white, green and yellow, and they make our Halloween cupcakes look amazing! My kids (and I) have so much fun making them. I’ll never buy eyeballs again! Thank you for such a great recipe.
I’m so glad you enjoy them! Thanks for the kind comment Donna!
Can’t believe these are homamde!! So much fun and easy to make!
Thanks Eden!
We had so much fun making these for some monster cookies we were making! Great instructions!
Thanks Katie!
These turned out perfectly! I’m going to be using these for all of the Halloween cookies I make next month.
Let me know when they’re ready and I’ll be over.:)
I definitely have to make some of these this year for our cookies! This will be so much fun with my son!
What a fun tutorial! And such cute monster cookies!! Can’t wait for Halloween!
These monster eyse are just terribly fantastic! You are brilliant, Ashleigh! So much fun, and so many possibilitites.
I love this idea.
I make this cookies in Peru with mi parents, my brother and my sister
These are SO fun! My kids would adore the monster cookies.
I love this! Put eyes on anything and it makes it spooky 🙂
Love them, specially the square monsters.
Soooo Cute!!!
Love this idea! Decorating cookies with a classroom would be such a fun activity. Unfortunately my son’s school doesn’t celebrate Halloween, the class party just before Halloween is a “fall” party – no monsters allowed. Don’t even get me started about the “winter” party just before Christmas vacation. Still this looks like a fun thing to do with the kids & their friends. Thanks for sharing.
So fun! Thanks for sharing that great technique!
I must give these a try! They will be perfect for our bento school lunches. I have not been able to find the store bought ones nearby. This will save me a ton! Thanks for sharing.
These are fantastic!
Love them all! Great decorating ideas…thanks for sharing.
Cute and fun! SO jealous you can take homemade items into school. We’re in an area where everything has to be store-bought with an ingredient label on it.